What Is a Tea Latte and How Do You Make One at Home?

What Is a Tea Latte and How Do You Make One at Home?

A tea latte combines the flavour of tea with the creamy texture of milk. It can be warming and spiced, fresh and grassy, or mellow and roasted, depending on the tea you choose. Served hot with a little foam or cold over ice, it is an easy way to bring your favourite café drink into your own kitchen.

The basic method is simple: prepare a concentrated tea base, add milk, and adjust the sweetness to taste. You can start with tea bags, loose-leaf tea, pure matcha or a ready-made latte blend. The quantities and preparation change slightly with each one.

In this guide, you will learn how to make a tea latte at home, which milk to use and how to choose between different flavours. Explore our Tea Lattes collection as you find the style you would most like to try.

What is a tea latte?

A tea latte is a drink made with a concentrated tea infusion or powdered tea and a generous amount of milk. Hot versions often have a layer of frothed milk, while iced tea lattes combine the tea base with cold milk and ice.

Unlike a coffee latte, a standard tea latte does not contain espresso. Its main flavour comes from tea, such as black tea, matcha or roasted hojicha. A chai latte also includes spices, while an Earl Grey latte brings the citrus aroma of bergamot.

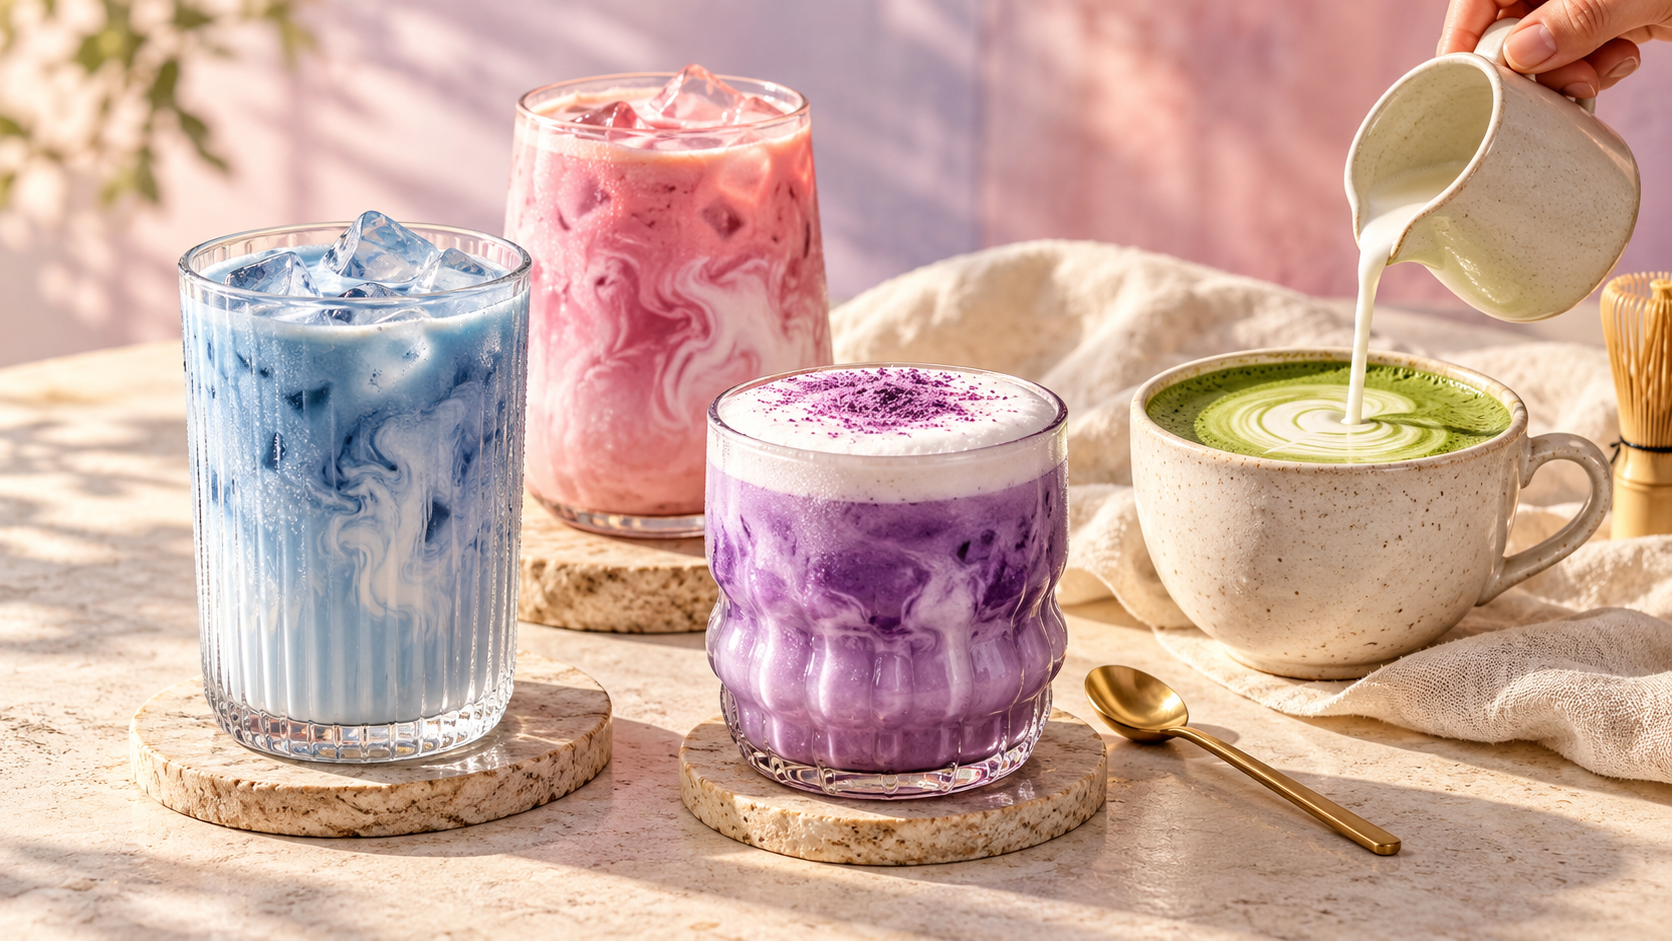
The word latte is also used for creamy drinks made from ingredients such as turmeric, ube or blue spirulina. These are often sold alongside tea lattes, even when they contain no tea leaves. For that reason, the colour or name of a latte does not tell you whether it contains caffeine. The ingredients do.

Tea latte versus tea with milk

The main difference is the balance of ingredients. A traditional cup of tea with milk usually contains mostly brewed tea and a small splash of milk. A tea latte typically uses a stronger tea base and considerably more milk, creating a fuller texture.

There is no single compulsory ratio. For a latte made with brewed black tea, a useful starting point is one part concentrated tea to two parts milk. If you prefer a stronger tea flavour, reduce the milk or use a little more tea in the initial brew.

Powdered blends work differently. Some already contain sugar, spices or coconut ingredients, so follow the serving guidance for your chosen product rather than applying the same spoonful to every powder.

How to make a tea latte with tea bags or loose leaf tea

This easy tea latte recipe is a starting point for black tea, including English Breakfast and Earl Grey. It makes one generous mug and takes approximately 5–10 minutes.

Ingredients for one serving

  • 2 black tea bags, or approximately 4 g of loose-leaf black tea
  • 100 ml freshly boiled water
  • 200 ml dairy milk or your preferred plant-based drink
  • 1–2 teaspoons of honey, sugar or maple syrup, optional
  • A little vanilla or cinnamon, optional

Brew a concentrated tea base

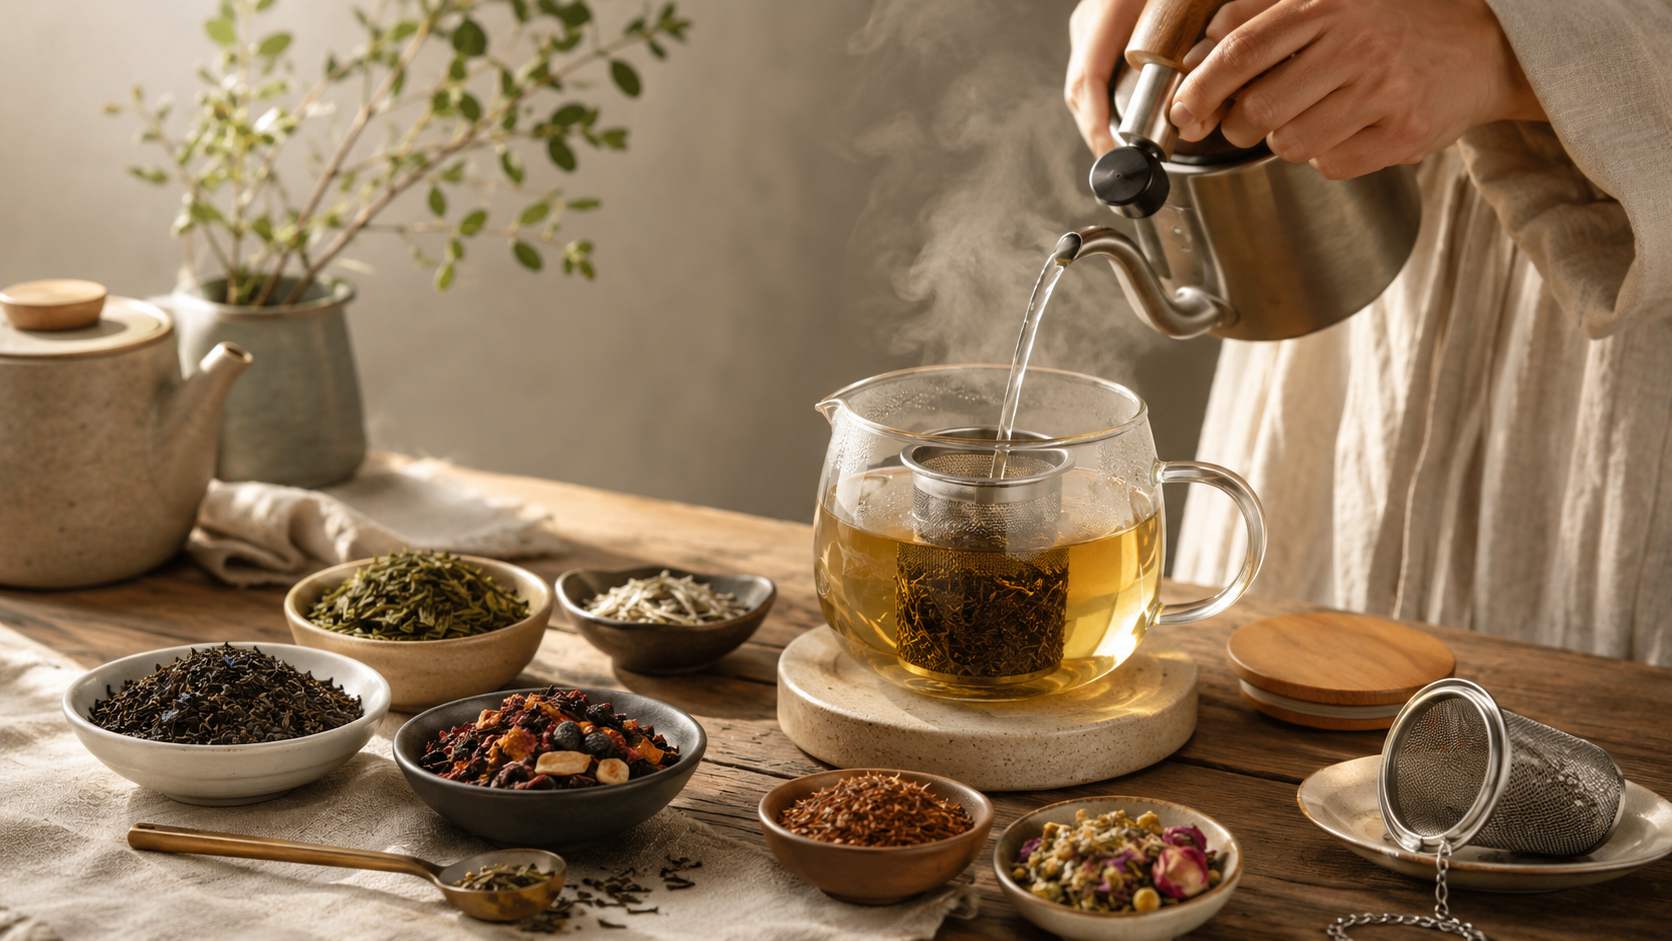
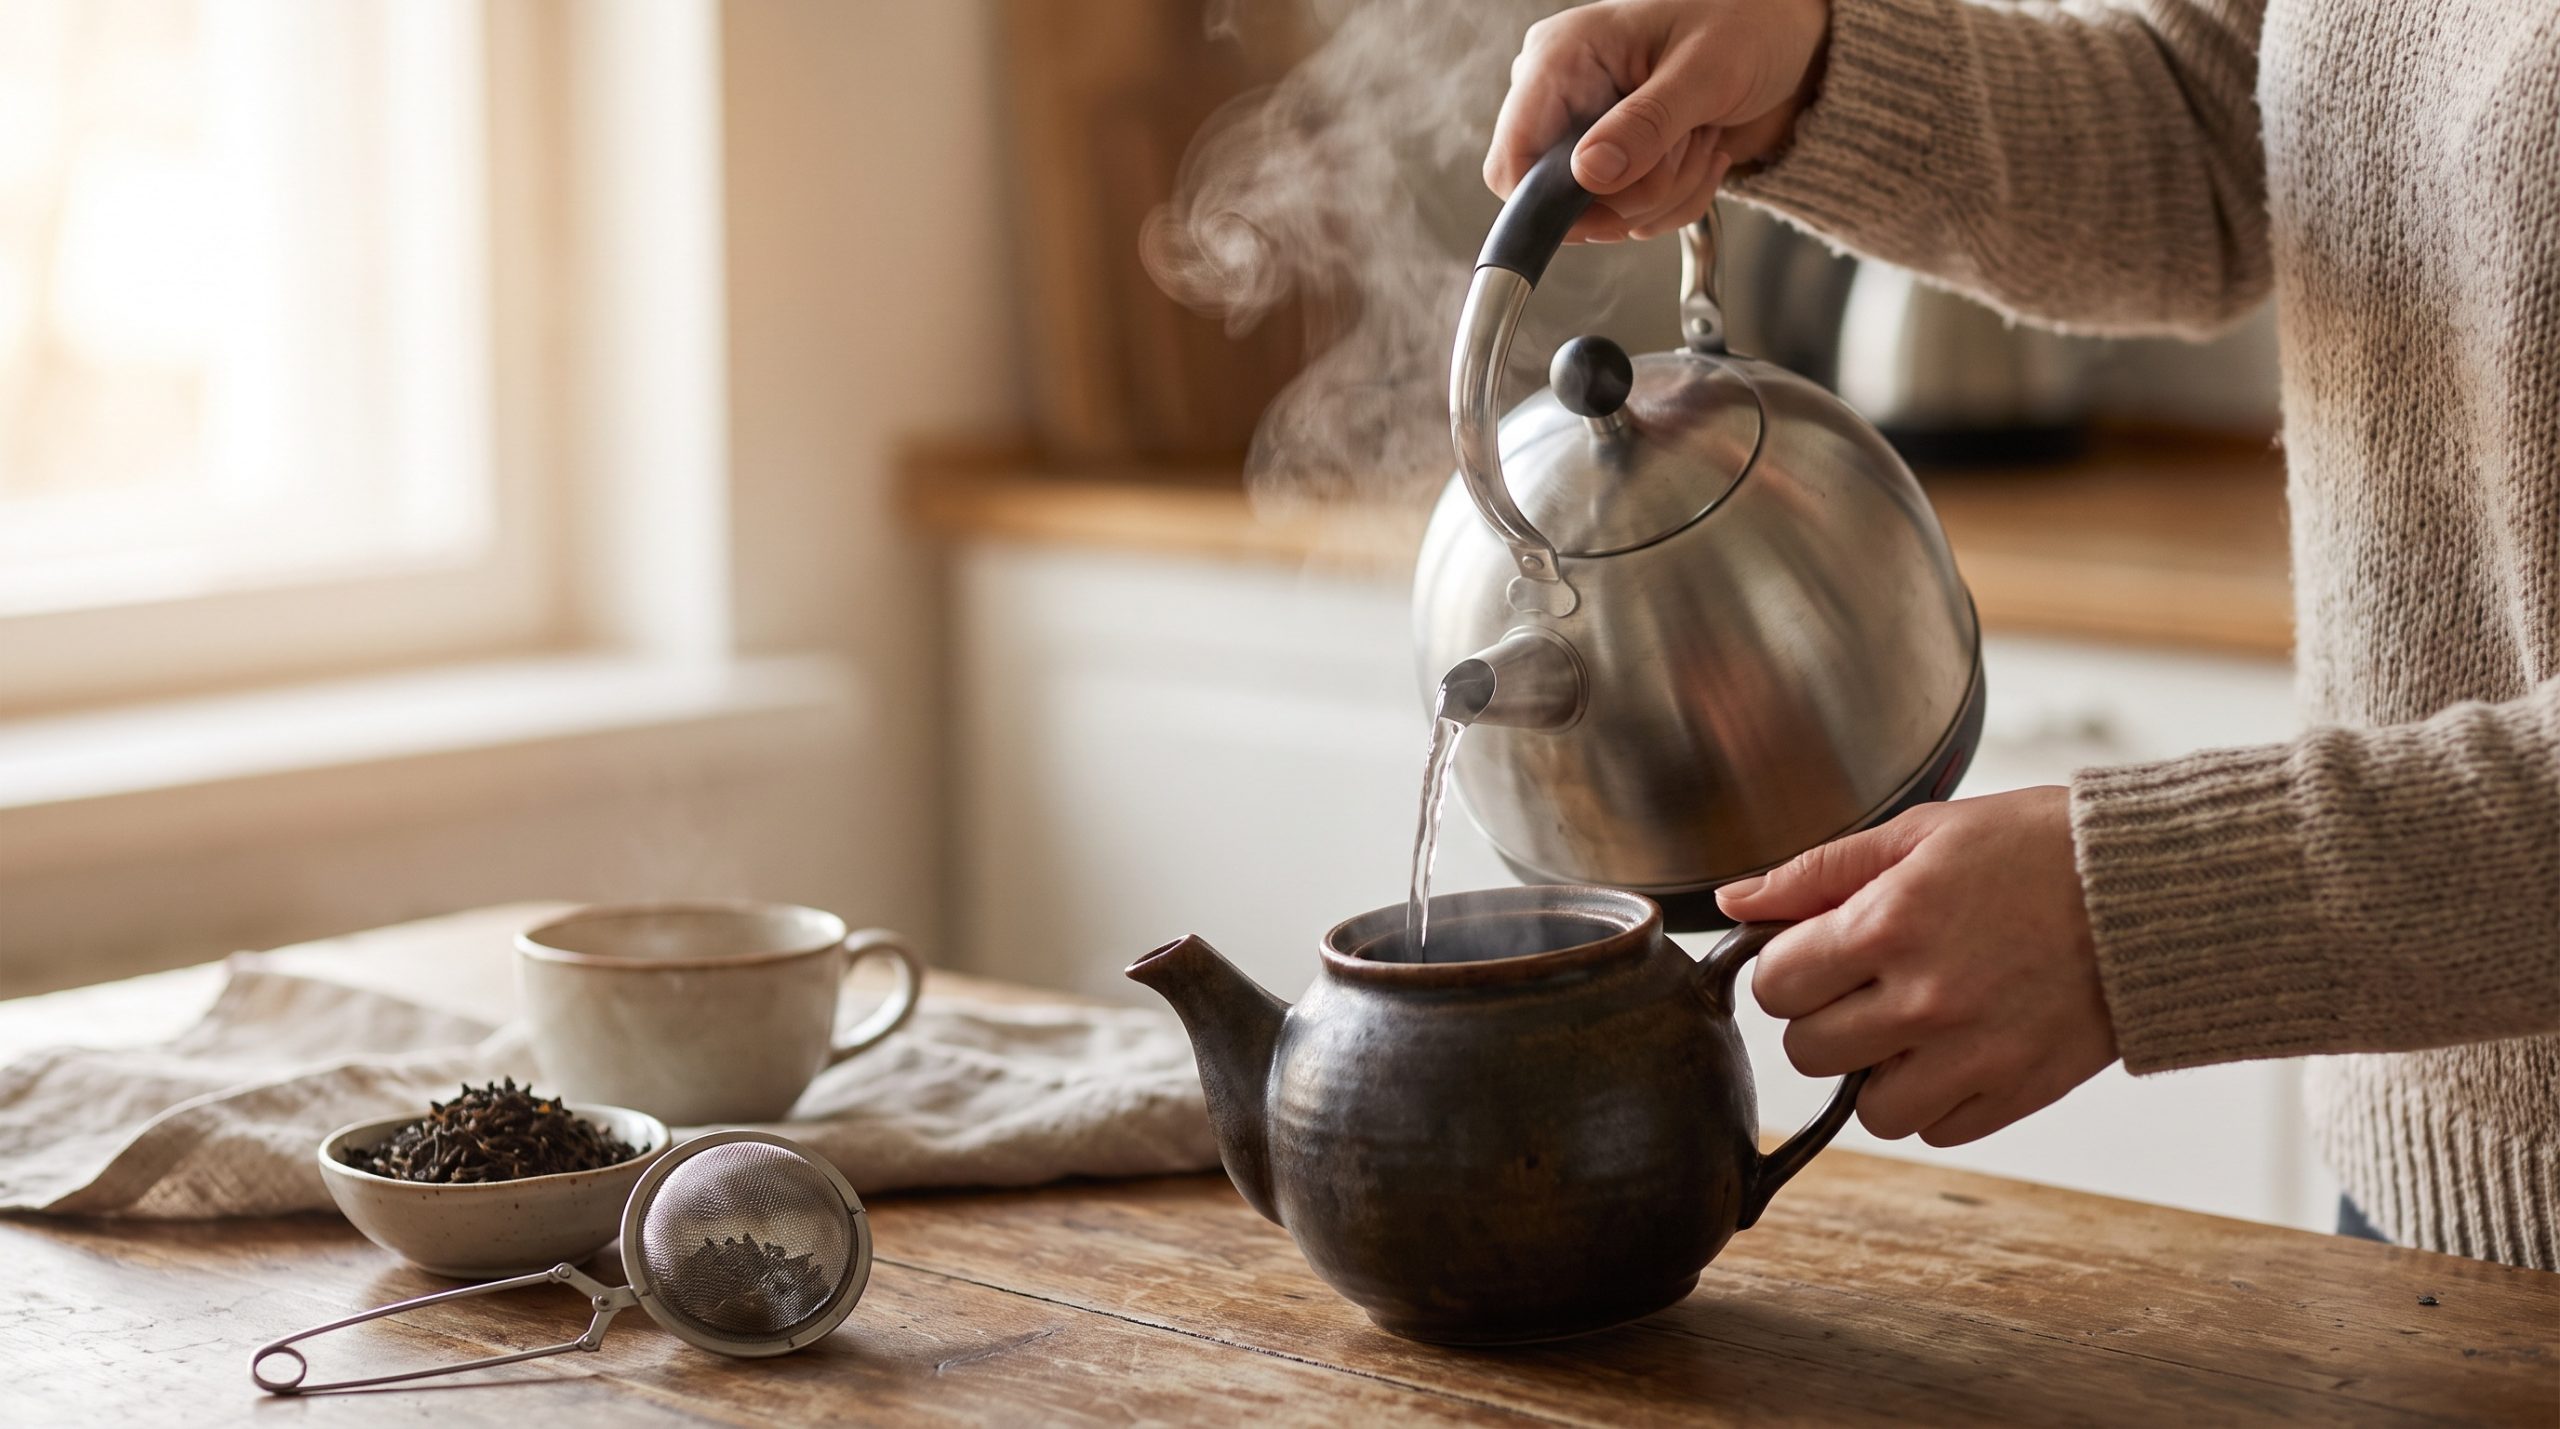
Place the tea in a heatproof mug or small teapot and add the water. For many black teas, a 3–5 minute infusion is a useful starting point, but follow the tea’s own brewing instructions. Remove the bags or strain the leaves when the infusion is ready.

You need a stronger brew than you would normally drink on its own because the milk will soften the flavour. If your latte tastes weak, increase the quantity of tea next time. Leaving the same leaves in for much longer can make the drink more bitter without giving the balance you want.

Warm and froth the milk

Heat the milk gently in a saucepan or suitable microwave-safe container until hot but not boiling. Froth it with a handheld milk frother or a whisk. A small amount of fine foam is enough; you do not need a large, stiff mound.

No frother? Simply whisk the milk by hand and pour it into the tea. The drink will still have a creamy texture even with very little foam.

Combine and adjust

Stir your chosen sweetener into the hot tea, then slowly pour in the milk. Spoon any remaining foam over the top and taste before adding more sweetness.

For an Earl Grey variation, add a few drops of vanilla extract. This combination of Earl Grey, vanilla and milk is commonly called a London Fog. Start with a small amount of vanilla so that the bergamot remains noticeable.

How to make a tea latte with powder

Latte powders are convenient when you want a quick drink without steeping or straining. The most useful habit is to mix the powder with a small amount of liquid first, then gradually add the rest.

  1. Measure the powder. Use the quantity recommended for that specific blend. A kitchen scale is helpful because a teaspoon of one powder can weigh differently from another.
  2. Make a smooth base. Add a splash of warm water or milk, according to the product instructions. Whisk until the visible lumps disappear.
  3. Add the remaining milk. Pour slowly while stirring, then froth if you would like a foam topping.
  4. Taste before sweetening. Many blends already contain cane sugar or coconut blossom sugar.

Pure matcha and a sweetened matcha latte mix are different ingredients. They should not be substituted spoon for spoon: a latte mix may contain a much smaller proportion of tea.

Which tea latte should you try?
Matcha latte for a fresh green tea flavour

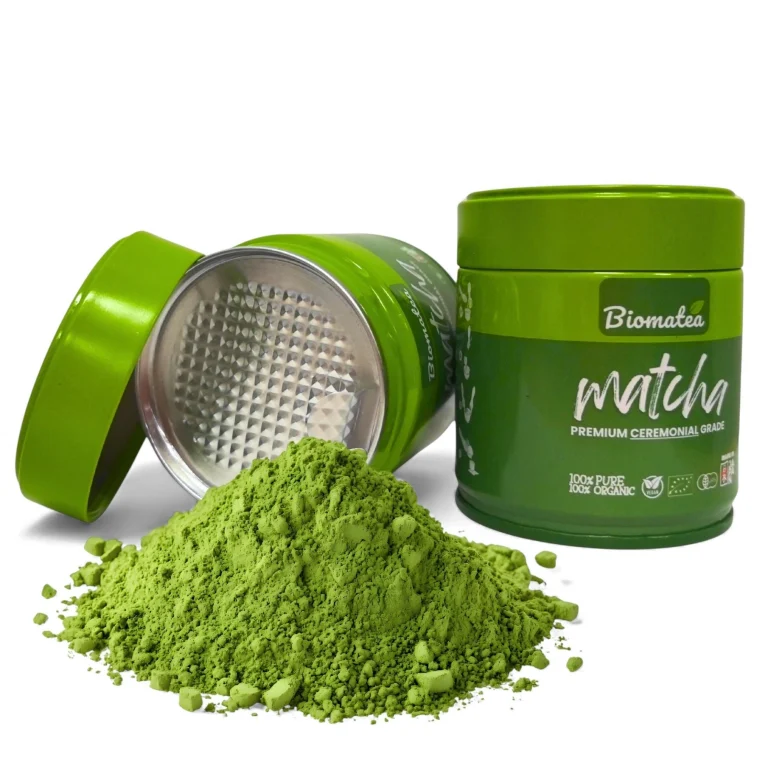
Matcha is powdered green tea with a distinctive vegetal flavour. Milk softens its intensity, making a matcha latte an approachable way to enjoy it.

For a homemade version using pure matcha, start with 2 g of Biomatea Organic Ceremonial Matcha from Kagoshima, 50 ml water at approximately 80°C and 150–200 ml milk. Sift the powder, whisk it into the water, then add the milk. Adjust these suggested proportions to suit your taste.

For a sweetened option, Biomatea Matcha Latte Love Edition contains 20% Japanese matcha with coconut sugar. Its preparation guidance is 10 g of mix with 200 ml milk or a plant-based drink. Both versions contain caffeine.
Chai latte for warming spices

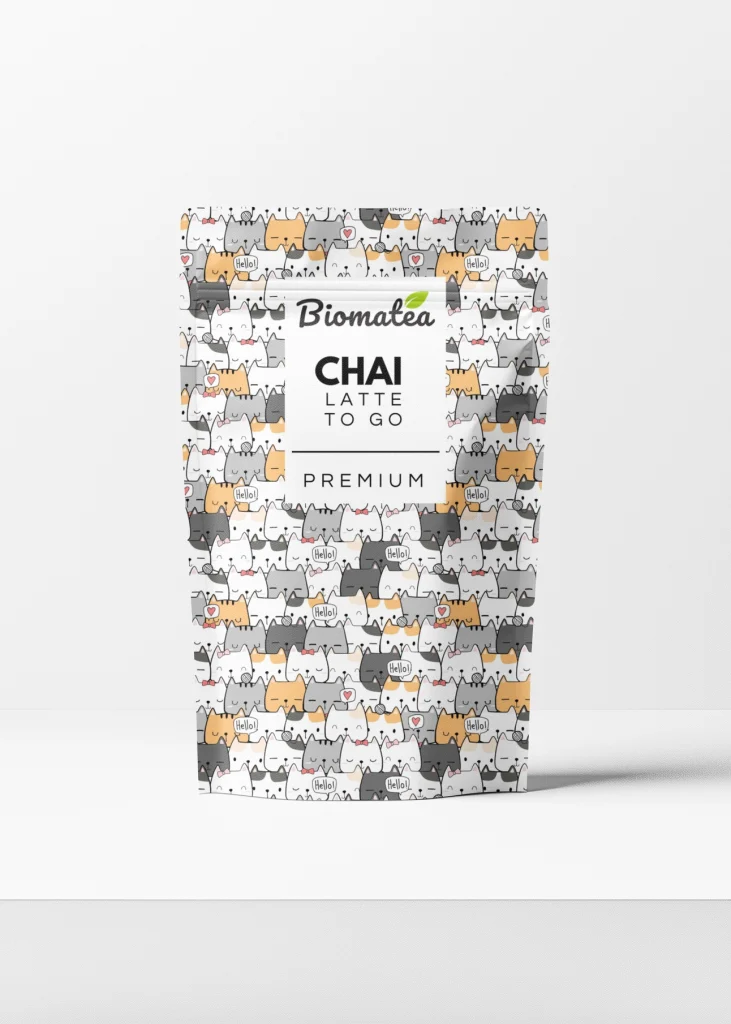
A chai latte combines tea with spices and milk. Depending on the blend, the flavour can be gently aromatic or more intensely spiced.

Biomatea Organic Chai Latte Powder combines black tea, cinnamon, cardamom and cloves. It is already sweetened with cane sugar and contains caffeine from the tea.

Use approximately 10 g per serving. Mix it with a little warm milk, then add more to your preferred strength. For a first cup, try around 200 ml milk in total and adjust from there. A light dusting of cinnamon makes a simple finishing touch.

Hojicha latte for a mellow roasted taste

Hojicha is roasted Japanese green tea. Its toasted character offers a different direction from the fresh, green flavour of matcha.

Biomatea Organic Hojicha Latte Mix pairs powdered hojicha with coconut blossom sugar. Prepare 7 g with 200 ml hot or cold milk, then stir or froth thoroughly.

Try it if roasted and gently caramel-like flavours appeal to you. Hojicha is still tea, so do not assume that a roasted flavour means it is caffeine-free.
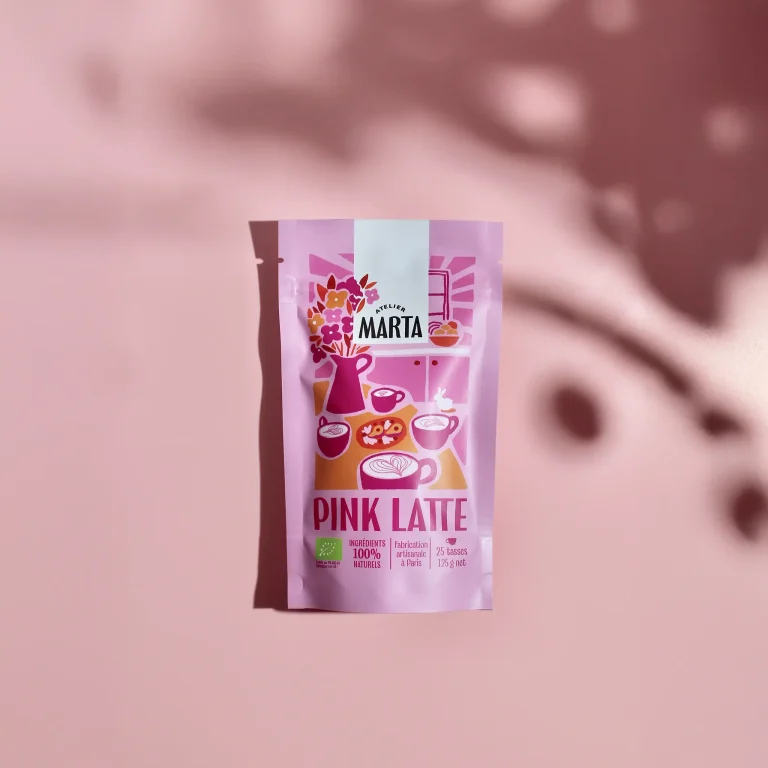
Pink latte for beetroot and gentle spice

Atelier Marta Organic Pink Latte combines beetroot with black tea, cinnamon, ginger and coconut blossom sugar. The result is a colourful drink with earthy, gently sweet and lightly spiced notes.

Start with approximately 5 g of powder, mix it with a little warm milk, then add more milk to taste. For an iced version, smooth out the powder with a splash of warm liquid before adding cold milk and ice.

This particular pink latte contains black tea and therefore caffeine. Beetroot-based drinks can have different recipes, so check the individual blend when choosing one.
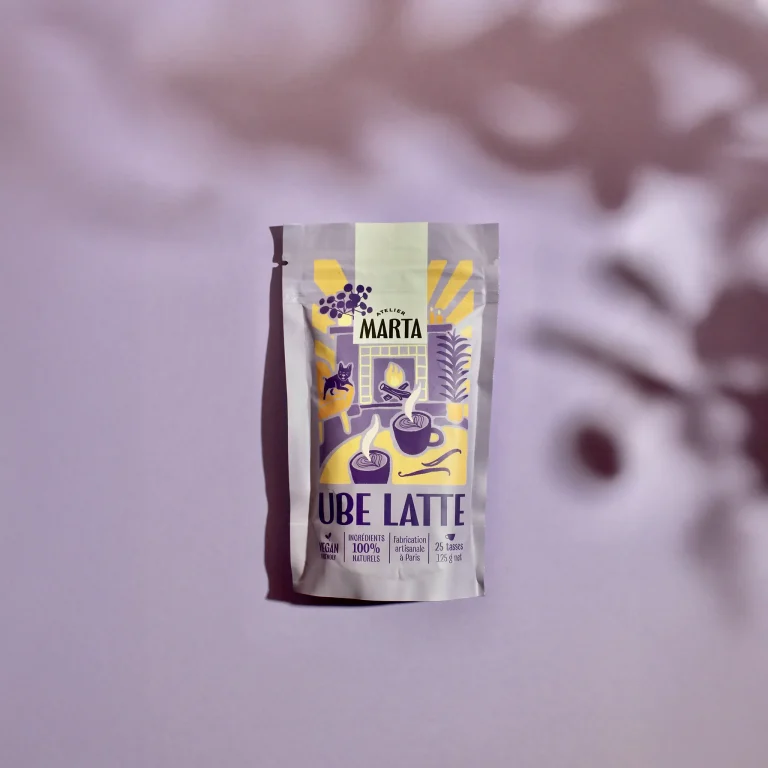
Ube latte for vanilla and a creamy purple drink

Ube is purple yam, and an ube latte offers a mild, gently sweet alternative to stronger tea flavours.

Atelier Marta Ube Latte with Madagascar Vanilla combines ube, purple carrot, sweet potato, vanilla and coconut blossom sugar. This blend is naturally caffeine-free and contains no tea.

Mix approximately 5 g with a small splash of warm water, then add around 200 ml warm milk. To serve it cold, use the same smooth base with cold milk and ice. Oat drink is a good starting point if you enjoy a creamy finish.
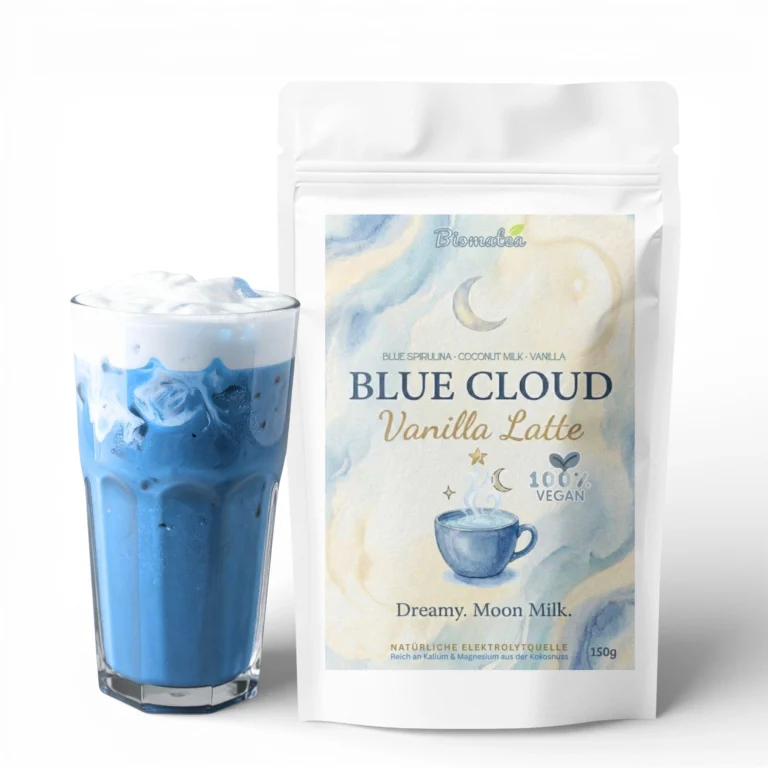
Blue latte for coconut and vanilla

For a different colour and flavour, try Biomatea Blue Cloud Latte, a blend featuring blue spirulina, coconut and vanilla.

Follow the preparation instructions on the pack and whisk the powder thoroughly for an even texture. Serve it in a clear glass if you want the blue colour to be part of the experience. It is a fun option for a homemade latte afternoon with friends, alongside pink and purple drinks.
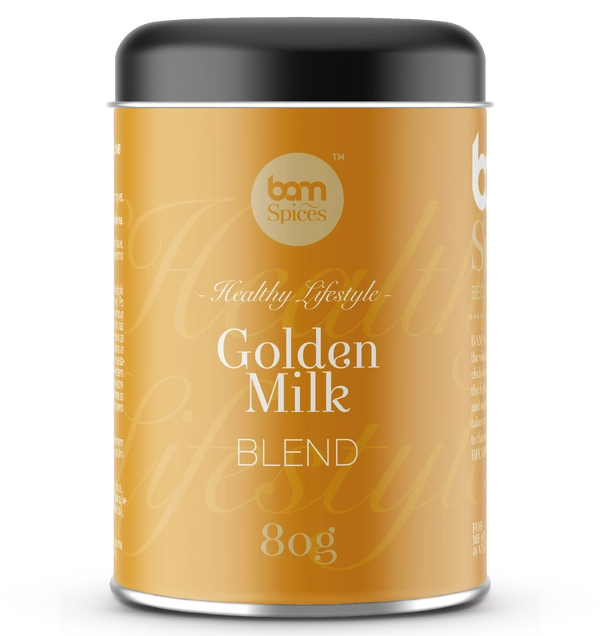
Golden latte for turmeric and spice

A golden latte, often called golden milk, is built around turmeric and other spices. It belongs to the wider family of milk-based lattes and does not necessarily contain tea.

BAM Golden Milk Turmeric Latte Spice Blend combines turmeric, cinnamon, ginger and black pepper. Use one teaspoon with approximately 200 ml warm milk, then sweeten to taste.

This four-spice blend offers an earthy, warming flavour. Stir again as you drink if some of the ground spices settle at the bottom.

How to make an iced tea latte

An iced tea latte uses the same basic ingredients as a hot version, but a little attention to dilution makes a big difference.

For a latte made with brewed tea:

  1. Prepare a concentrated infusion using your chosen tea’s brewing instructions.
  2. Strain it and stir in any sugar while the tea is still warm.
  3. Allow the tea to cool so it does not immediately melt all the ice.
  4. Fill a large glass with ice and add around 150–200 ml cold milk.
  5. Pour in 75–100 ml cooled tea concentrate and stir.

For a powdered latte, prepare a smooth base using the recommended serving of powder and a little warm liquid, unless the packaging specifies a different method. Add cold milk and pour over ice.

The drink should taste slightly stronger before the ice begins to melt. If it becomes watery too quickly, cool the base more thoroughly or reduce the liquid used to make it. For a layered appearance, pour the milk over the ice first, add the coloured base slowly and stir before drinking.

What is the best milk for a tea latte?

The best milk depends on how much creaminess and additional flavour you want. These are useful starting points for experimenting.

Milk choices for your homemade tea latte
Milk or plant drinkWhat to expectFlavours to try it with
Whole dairy milkA rounded, creamy textureBlack tea, chai and hojicha
Oat drinkA mild cereal flavour and a creamy finishChai, ube and pink latte
Soy drinkA fuller texture with a noticeable flavour of its ownMatcha and stronger black tea
Almond drinkA nutty note and often a lighter textureChai, vanilla and golden latte
Coconut drinkA more pronounced coconut flavourBlue latte and golden latte

For a foam topping, a barista-style plant drink is a useful option. Results vary by brand and formulation. If your blend is already sweetened, an unsweetened milk alternative gives you more control over the finished drink.

Common tea latte mistakes and how to fix them

The latte tastes watery. The tea base may be too weak for the amount of milk. Use more tea leaves or less brewing water next time. With powder, check that you measured the recommended serving.

The tea tastes bitter. Check the brewing temperature and steeping time. A stronger tea base does not require a much longer infusion. With pure matcha, try water below boiling and adjust the powder-to-milk ratio.

There are lumps in the drink. Sift pure matcha and make a smooth paste or concentrate before adding a full cup of milk. Stirring dry powder straight into a large glass of cold liquid often makes blending more difficult.

The latte is too sweet. Taste the blend before adding honey or syrup. For your next drink, choose an unsweetened base or an unsweetened plant drink.

Powder settles at the bottom. Some ground tea, vegetable and spice ingredients remain suspended rather than dissolving completely. A little settling can be normal; stir again before the last few sips.

Frequently asked questions about tea lattes

Does a tea latte contain coffee?

A standard tea latte does not contain coffee. A dirty chai is a variation with added espresso, so check the name and ingredients when ordering.

Does a tea latte contain caffeine?

It depends on the base. Matcha, black tea and hojicha contain caffeine. A tea-free blend such as the Atelier Marta Ube Latte above provides a caffeine-free option. There is no single caffeine value for all tea lattes because the ingredients and serving sizes differ.

Can I make a tea latte without a milk frother?

Yes. Warm the milk gently and whisk it by hand, or simply stir it into your prepared tea. Foam changes the presentation and texture, but it is not essential for a good homemade latte.

Can I make a vegan tea latte?

Yes. Choose a suitable tea or latte powder and prepare it with a plant-based drink. Check the blend itself as well as the milk: some latte products include milk ingredients or animal-derived additions such as collagen. Use sugar or maple syrup if you also want a vegan sweetener.

Can I use ordinary tea bags?

Yes. Black tea bags are a straightforward starting point. Brew a concentrated infusion so that the flavour remains noticeable after adding milk. Earl Grey and English Breakfast are two familiar options.

Is every matcha latte powder pure matcha?

No. Pure matcha contains only powdered green tea. A matcha latte mix can also contain sugar and other ingredients. Check the ingredient list and serving guidance, especially when switching between products.

Find your favourite tea latte

Start with the flavour you already enjoy: chai for fragrant spice, matcha for green tea character, hojicha for roasted notes or ube for a gentle vanilla drink. Make one cup using the suggested quantities, then adjust the milk and sweetness until it suits you.

Explore our tea lattes

Continue reading

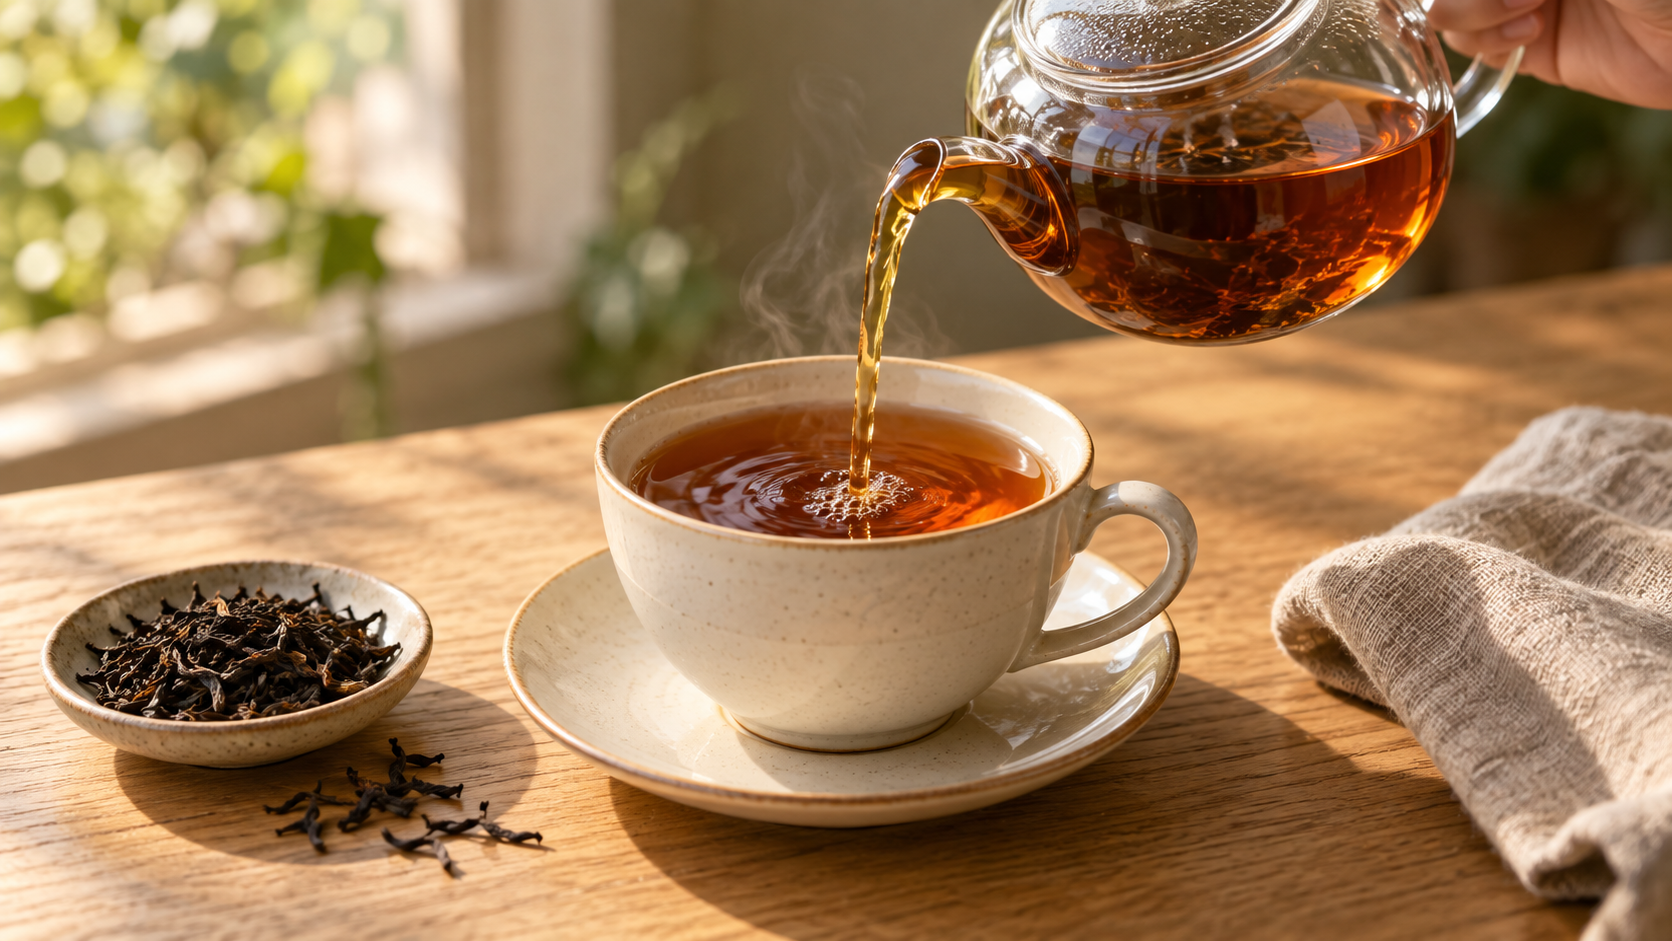
Amber black tea pouring from a glass teapot into a cream ceramic cup, with loose tea leaves beside it.

Black Tea Guide: Types, Caffeine and How to Brew It

Amber black tea pouring from a glass teapot into a cream ceramic cup, with loose tea leaves beside it.

Black Tea Guide: Types, Caffeine and How to Brew It

A good cup of black tea can be brisk and malty, light and fragrant, or full of citrus and spice. It might be the familiar mug you reach for at breakfast, a delicate afternoon brew or the base of a refreshing homemade iced tea. The pleasure is in finding the style that suits you, then giving it the right amount of leaf, water and time.

This black tea guide explains the main varieties, how much caffeine to expect, how to brew a balanced cup and which blends to try. Along the way, you will find selected teas from the Leaf & Spice black tea collection, with practical reasons to choose each one.

Black tea at a glance: Black tea comes from Camellia sinensis, the same plant used for green tea. Its leaves undergo oxidation during processing, developing their characteristic colour and flavour. For many everyday black teas, around 2–3 g of loose leaf per 250 ml, water at 90–100°C and a 3–5-minute infusion make a useful starting point. Always follow your tea’s own preparation instructions first.

What is black tea?

Black tea is made by processing tea leaves so that they oxidise before the final drying stage. Producers wither the leaves, roll or break them, allow oxidation to develop and then dry them. This changes the leaves’ colour and helps create the range of aromas associated with black tea. The UK Tea & Infusions Association’s processing guide explains these stages in more detail.

The word “black” describes the tea category, rather than a requirement to drink it without milk. English Breakfast with a splash of milk is still black tea. In the cup, the colour can range from golden amber to deep copper or reddish brown.

Nor does black tea have to taste intensely strong. A rich Assam-based breakfast blend and a light Darjeeling offer different experiences, even though both sit within the same broad family. Origin, harvest, leaf size, blending and preparation all help shape the result.

What does black tea taste like?

Useful flavour words include malty, brisk, floral, fruity and earthy. “Malty” suggests a rounded cereal-like richness; “brisk” describes a lively, refreshing character. An Earl Grey adds the fragrant citrus note of bergamot, while a vanilla blend brings a different aromatic direction.

When trying a tea, let the first sip cool enough to taste comfortably. Notice the aroma, how full or light the tea feels and what remains after swallowing. These simple observations are more useful for choosing your next tea than deciding whether a cup is merely “strong” or “weak”.

The main types of black tea

Tea names describe different things. Assam, Darjeeling and Ceylon identify origins; English Breakfast describes a blend style; and Earl Grey describes a tea flavoured with bergamot. Understanding that distinction makes a shelf of unfamiliar names much easier to navigate.

English Breakfast: a familiar, full-flavoured cup

English Breakfast is a useful place to start if you enjoy a substantial cup with breakfast or want tea that works with milk. Recipes differ between producers, so two breakfast blends need not taste identical.

The English Tea Shop blend featured below combines Ceylon and Assam black teas. Try it plain first, then add milk gradually until the balance suits you. Breakfast tea also makes sense for a shared office cupboard or a teapot served to guests who prefer a straightforward, unflavoured brew.

Earl Grey: black tea with fragrant bergamot

Earl Grey pairs a tea base with bergamot, a citrus fruit whose aroma gives the blend its distinctive character. It is a good direction to explore when you like black tea but want a more perfumed cup.

The tea underneath the bergamot matters too. A fuller base can suit milk, while drinking it plain makes it easier to notice the interplay between tea and citrus. If you are comparing Earl Grey blends, consider both the tea base and any additional flavours rather than choosing by the name alone.

Assam: depth and malty character

Assam black tea comes from north-east India and is associated with a robust, malty profile. You will find it sold on its own and used in blends that need body. If you regularly add milk and find lighter teas disappear beneath it, an Assam-based blend is a sensible starting point.

Darjeeling: a lighter style to explore

Darjeeling comes from the Himalayan foothills in India. Its black teas can be delicate and aromatic, with character that varies between harvests. Some show the grape-like quality described as “muscatel”. Try your first cup without milk so you can decide how you enjoy it. The UK Tea & Infusions Association’s varieties guide covers Assam, Darjeeling and other tea styles.

Ceylon: a broad range from Sri Lanka

Ceylon is the traditional name still used for tea from Sri Lanka. Growing region and elevation create considerable variety, so it is helpful to read the description of the individual tea. Expect the category to include both fuller and lighter styles, often described as bright or brisk. Read more about these regional differences in the UK Tea & Infusions Association’s guide to tea origins.

Flavoured black tea: fruit, vanilla and spice

Flavoured blends offer a straightforward way to explore tea through tastes you already enjoy. Vanilla might appeal if you like softly aromatic drinks; peach and ginger give you fruit notes with a warming edge.

Read the ingredients as well as the flavour name. Fruit pieces, fruit concentrates, spices and flavourings play different roles in a blend. A tea described as fruity is not necessarily sweetened, and the name alone does not tell you its sugar content. Likewise, adding fruit or spice to a black tea base does not make it caffeine-free.

Which black tea should you try?

Start with the way you want to drink your tea. A dependable breakfast mug, a fragrant afternoon cup and a fruity iced drink each suggest a different choice. These five options offer clear starting points.

Choose a black tea to suit your preferences
If you enjoy…A tea to tryWhy choose it?
A classic cup, plain or with milkEnglish Tea Shop Organic Fairtrade English Breakfast — 20 Tea BagsA Ceylon and Assam blend in a convenient format for everyday brewing.
Citrus fragrance and loose leaf brewingPremium Earl Grey Black Tea with Natural Bergamot — 150 gAssam and South Indian black teas with natural bergamot flavouring.
Vanilla and a cosy afternoon cupTatasse Vahiné Organic Vanilla Black Tea — Bourbon Vanilla & Date, 100 gA loose leaf blend combining Chinese and Assam black teas with vanilla, date and calendula.
Fruit notes, gentle spice or iced teaEnglish Tea Shop Organic Ginger & Peach Black Tea — 20 Tea BagsBlack tea with ginger, natural peach flavour and peach concentrate; suitable for brewing hot or serving over ice.
Black tea with less caffeineEnglish Tea Shop Organic Decaffeinated Black Tea — 20 Tea BagsA CO₂-decaffeinated Assam and Kenyan blend. Decaffeinated tea can still contain residual caffeine.

For a first order, choosing one familiar tea and one different flavour can be more useful than buying several similar blends. For example, pair English Breakfast with Earl Grey to compare plain and citrus-flavoured styles. If you already know you enjoy bergamot, a vanilla or peach blend gives you a different direction to explore.

How to brew black tea well

The most useful habit is to make the first cup according to the pack instructions and change one thing at a time afterwards. If you adjust the amount of leaf, temperature and steeping time together, it becomes difficult to tell which change helped.

1. Measure for the cup you actually use

For many loose leaf black teas, 2–3 g per 250 ml is a practical starting point. A large breakfast mug may hold much more than a small teacup, so “one spoon per cup” can be misleading. Weighing the leaves once helps you learn what the right portion looks like.

Use the individual tea’s recommended dose when it differs. Premium Earl Grey, for example, specifies 12 g per litre, equivalent to 3 g per 250 ml. Tatasse Vahiné specifies approximately 2.5 g per 200 ml.

2. Use the recommended water temperature

Black tea commonly uses water around 90–100°C, but the ideal temperature depends on the tea. Several of the featured blends specify freshly boiled water at 100°C. Follow that guidance, especially when a blend contains additional ingredients. A delicate tea with different instructions should receive its own treatment.

Fill the kettle with the water you need. If tap water has a pronounced taste, compare one brew made with filtered water and see which you prefer.

3. Give loose leaves room to infuse

A roomy basket infuser makes it easy to measure the tea, immerse it fully and lift it out when the timer finishes. Avoid packing leaves tightly into a small tea ball. If you brew directly in a teapot, strain the tea into cups or another pot once it is ready.

4. Time the infusion and remove the tea

Many black teas use a 3–5-minute infusion, but their specific instructions matter. Start at the shorter end of the stated range when trying a blend for the first time. Remove the leaves or bag when brewing is complete; leaving them in the mug means the tea continues to extract as you drink.

For more help with equipment and measurements, read our guide to brewing loose leaf tea. The UK Tea & Infusions Association’s brewing advice also emphasises following the instructions on the pack.

Preparation guide for the featured teas

Preparation instructions from the linked product listings
TeaAmountWater and time
English Tea Shop English Breakfast1 tea bag per cup100°C; 4–5 minutes
Premium Earl Grey12 g per litre; equivalent to 3 g per 250 ml100°C; 3–5 minutes
Tatasse VahinéApproximately 2.5 g per 200 ml100°C; 3–5 minutes
English Tea Shop Ginger & Peach1 tea bag per cupFreshly boiled water; 3–4 minutes
English Tea Shop Decaffeinated Black Tea1 tea bag per cup100°C; 4–5 minutes

These instructions apply to a conventional cup or teapot infusion. If the current packaging gives different directions, use those.

How to fix bitter, weak or unbalanced tea

If it tastes too bitter: Check that the tea was removed on time. For your next cup, use the shorter end of the recommended infusion range. If you were generous with the leaves, return to the stated dose before changing the temperature.

If it tastes weak: Check the water volume. A single bag in an oversized mug may not give the strength you want. With loose leaf tea, try a little more leaf on the next brew while keeping the steeping time within the recommended range.

If it tastes good until you add milk: Use a smaller splash first. You may prefer a fuller tea base or a slightly larger leaf dose for future cups. Aim to keep enough tea flavour in the finished drink.

How much caffeine is in black tea?

Black tea naturally contains caffeine. The European Food Safety Authority gives approximately 50 mg in a 220 ml cup as a useful reference figure. It is an estimate for a typical serving, rather than a measured value for every tea in this guide.

Approximate caffeine amounts in example servings
DrinkExample servingApproximate caffeine
Black tea220 ml50 mg
Filter coffee200 ml90 mg
Espresso60 ml80 mg

These are EFSA’s illustrative serving sizes, so the table compares example drinks, not equal volumes. Actual quantities vary. See EFSA’s caffeine information for the source figures.

When choosing tea, keep the size of your usual mug in mind. The amount of tea and the way you prepare it affect what ends up in your cup. A light colour or a mild taste is not a reliable caffeine measurement.

Does decaffeinated black tea contain caffeine?

Decaffeination reduces caffeine but does not necessarily remove all of it. The FDA’s caffeine guide distinguishes decaffeinated drinks from caffeine-free drinks.

If you want the familiar taste of black tea with less caffeine, the English Tea Shop decaffeinated blend in the selection above is worth considering. Its Assam and Kenyan teas are decaffeinated using a CO₂ process. If you want to avoid caffeine altogether, look for a clearly labelled caffeine-free infusion and check the full blend.

Choose your drinking time with your own caffeine sensitivity in mind. An evening cup may affect your sleep even if drinking the same tea earlier in the day feels fine.

Black tea vs green tea: which should you choose?

Both come from the tea plant; processing creates their different styles. Black tea undergoes oxidation, while green tea is heated early in processing to limit it.

For shopping purposes, start with flavour and how you like to serve a cup. If you want a breakfast blend that takes milk well, explore black tea. If fresh, grassy or gently vegetal notes sound appealing, browse the green tea collection.

There is plenty of variety within both categories. A light black tea may suit you more than a strongly brewed green tea, and a fruity green blend may appeal even if plain green tea has not been your favourite. Compare individual descriptions rather than treating either category as a single flavour.

Loose leaf black tea or tea bags?

Loose leaf tea gives you flexibility. You can measure a dose for your favourite mug, adjust it for a teapot and see the dry ingredients before brewing. It suits people who enjoy a little experimentation and already have a strainer or infuser.

Tea bags make preparation convenient. They are easy to portion, useful at work and straightforward to offer to guests. If you are new to a flavour, a box of individually portioned bags can also be a simple introduction.

Format alone does not settle which tea you will enjoy more. Consider the blend, the freshness, how you prepare it and the time you want to spend making a cup. A practical cupboard might contain loose leaf Earl Grey for unhurried afternoons and English Breakfast bags for busy mornings.

Ways to enjoy black tea

With milk

Brew the tea in water first, remove the bag or leaves and then add milk gradually. This makes it easier to judge the strength and stop at the balance you like. English Breakfast is a straightforward starting point; vanilla black tea is another option if you enjoy a softly aromatic cup.

Try your preferred dairy milk or plant-based drink in a small quantity first. Their flavours differ, so a milk you love in coffee may give a different result in tea. Keep lemon for a separate cup, as its acidity can curdle dairy milk.

Plain, with lemon or alongside food

Before adding anything, taste a new tea plain. You may find it already has the balance you want. For a citrus variation, add a small slice of lemon and taste again before adding more.

For an easy afternoon pairing, try Earl Grey with plain shortbread, vanilla black tea with an oat biscuit, or breakfast tea alongside buttered toast. These are starting ideas: keep the food simple when you want to notice the tea itself.

A simple peach and ginger iced black tea

This serving suggestion uses English Tea Shop Organic Ginger & Peach Black Tea. Its product instructions recommend a stronger infusion for serving over ice.

For one large glass: Use two tea bags, 200 ml freshly boiled water, plenty of ice and, if you like, a few peach slices or a little lemon.

  1. Steep both tea bags in the hot water for 3–4 minutes.
  2. Remove the bags. If you want to sweeten the tea, stir in a small amount of sweetener while it is still warm.
  3. Pour carefully over plenty of ice in a vessel suitable for both boiling water and sudden temperature changes. Alternatively, cool the tea first, then add it to an ordinary glass of ice.
  4. Add your chosen fruit, taste and adjust with a little cold water if needed. Serve straight away.

The extra tea gives you room for dilution as the ice melts. For more flavours and methods, see our guide to making iced tea at home.

Try an Earl Grey milk drink

For a simple variation, make a smaller, concentrated cup of Earl Grey using the normal steeping time, then add warm, frothed milk. Start with roughly equal volumes of brewed tea and milk, adjusting to taste. A little vanilla can complement the bergamot if you enjoy that combination. Increase the amount of leaf for a stronger tea base instead of leaving it to infuse indefinitely.

How to store black tea

Keep dry tea in a well-sealed container in a cool, dry cupboard, away from sunlight and strongly scented foods. A shelf beside open spice jars is less suitable than a separate, odour-free space. Reseal the original pack properly or use a clean, dry tea tin.

Avoid opening the pack directly above a steaming kettle. Use a dry spoon, close the container after measuring and follow the storage guidance and best-before date on the packaging.

When comparing pack sizes, think about how often you will drink that flavour. A larger pack can be practical for an everyday favourite, while a smaller quantity makes sense when you are trying something unfamiliar. The right purchase is the tea you will enjoy using.

Frequently asked questions about black tea

Is English Breakfast black tea?

Yes. English Breakfast is a black tea blend style. Its exact recipe depends on the producer. The English Tea Shop version featured here combines Ceylon and Assam teas.

What is the difference between English Breakfast and Earl Grey?

English Breakfast is generally a blend of unflavoured black teas. Earl Grey adds the distinctive citrus aroma of bergamot. Choose breakfast tea for a straightforward classic cup or Earl Grey when you want that fragrant citrus character.

Is black tea better with or without milk?

That depends on your taste and the tea. Try a new blend plain first. Full-flavoured breakfast blends often suit milk, while you may prefer to enjoy the subtleties of a lighter tea without it.

How long should black tea steep?

Many black teas use 3–5 minutes for an ordinary cup or teapot infusion. Follow the pack instructions: the Ginger & Peach blend in this guide specifies 3–4 minutes, while the featured English Breakfast uses 4–5 minutes.

Why does my black tea taste bitter?

Check the steeping time and the amount of tea first. Use a timer, remove the leaves when brewing finishes and try the shorter end of the recommended time range. A tea that still feels too intense may simply be a stronger style than you prefer.

Does adding milk remove caffeine?

No. Milk does not remove the caffeine already in the brewed tea. Adding it to a cup changes the drink’s volume and flavour, but the caffeine from that infusion remains.

Which black tea is a good choice for beginners?

English Breakfast is a sensible starting point if you want a familiar cup with the option of milk. Earl Grey suits people who enjoy citrus aromas, while a vanilla or peach blend offers an introduction through flavours you may already like.

Find a black tea you will look forward to brewing

Choose the flavour direction that appeals to you, make the first cup according to its instructions and adjust from there. A small change in dose or timing can help you get much more enjoyment from the same tea.

Whether your preference is a classic breakfast mug, fragrant Earl Grey or a fruit-flavoured afternoon cup, explore the black tea collection at Leaf & Spice and choose the blend you would most like to try next.

Continue reading

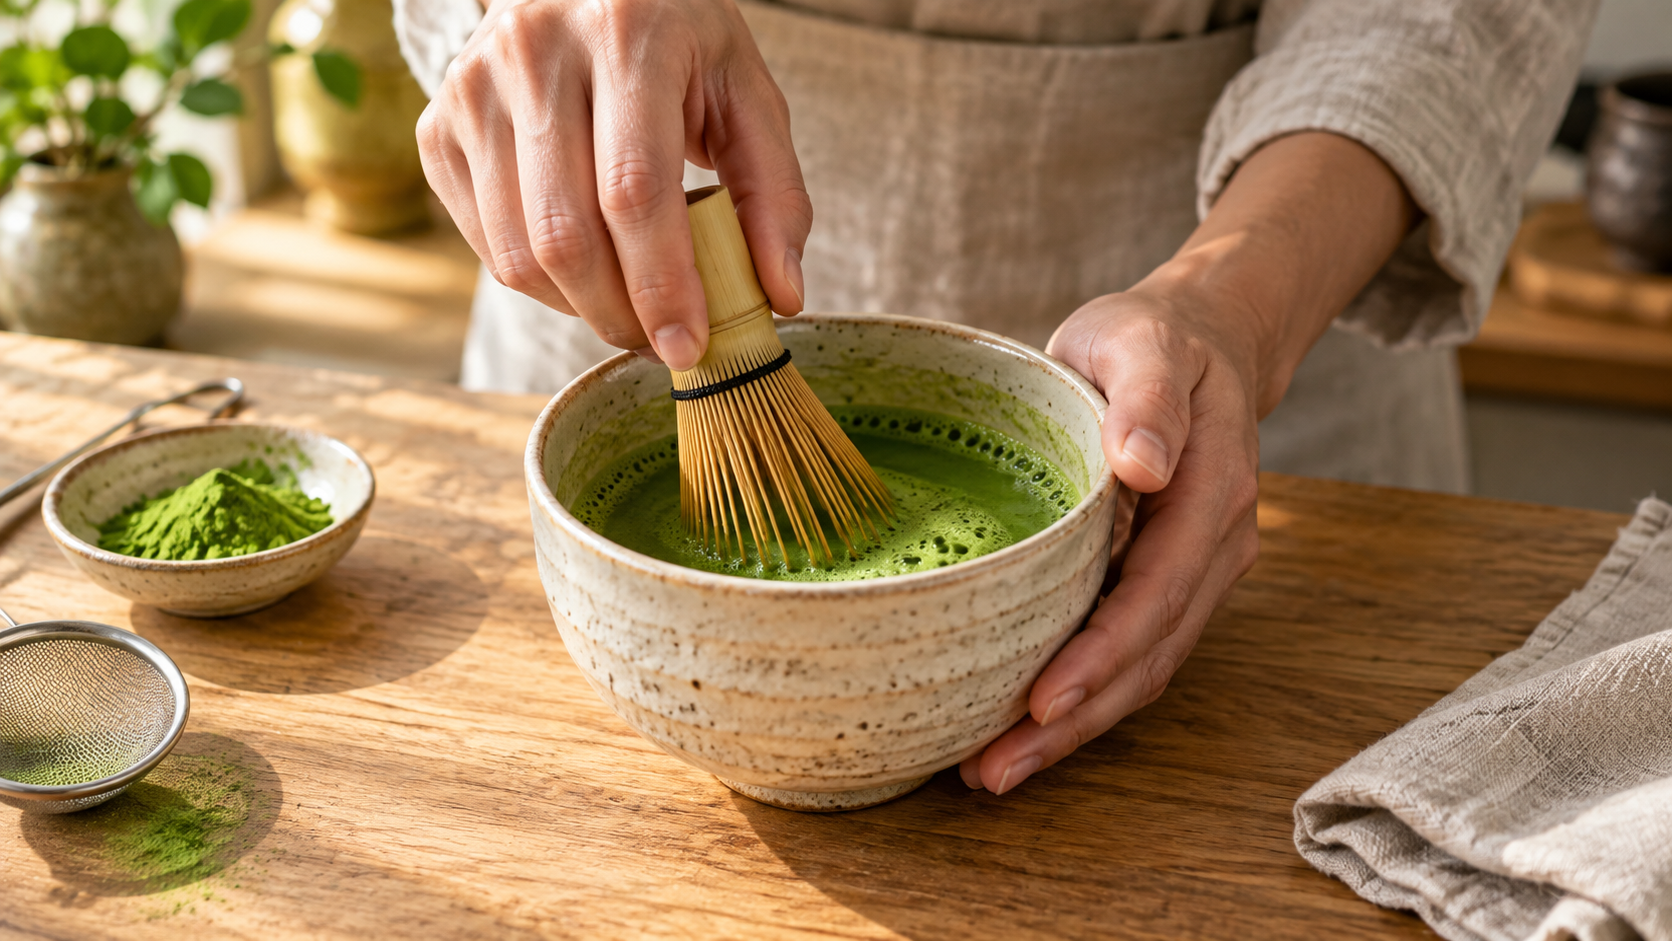
Hands whisking green matcha with a bamboo whisk in a ceramic bowl on a sunlit wooden counter.

How to Prepare Matcha: A Step-by-Step Guide for Beginners

Hands whisking green matcha with a bamboo whisk in a ceramic bowl on a sunlit wooden counter.

How to Prepare Matcha: A Step-by-Step Guide for Beginners

A good bowl of matcha should make you want another sip: fresh, pleasantly rich and smooth enough to enjoy slowly. If your homemade version turns out bitter, watery or full of little green lumps, a few small changes can make a big difference.

Learning how to prepare matcha comes down to three things: measuring the powder, controlling the water temperature and mixing it properly. Once you understand those basics, you can make everything from a simple bowl of green tea to a creamy iced matcha latte.

In our guide to what matcha tea is, we explore its origins, flavour and different uses. This practical follow-up focuses on what happens in your kitchen: which tools you need, how much water to add and how to get a drink you actually enjoy.

How to prepare matcha: the quick answer

For one small bowl, sift 1.5–2 g of pure matcha into a bowl, add 70 ml of water at around 75°C and whisk briskly with a bamboo whisk until evenly mixed and lightly foamy. Sip straight away. If it tastes too concentrated, add a little more water.

For a latte, whisk 2 g of matcha with 50 ml of warm water, then add 150–200 ml of milk. Use warm milk for a hot latte or cold milk and ice for an iced version. These are starting ratios: the instructions on your matcha packaging and your own taste can guide small adjustments.

Start with the right matcha powder

Before measuring anything, check the ingredients. Pure matcha and a ready-made matcha latte blend need different quantities. A recipe calling for 2 g of pure matcha will not work the same way with 2 g of a blend containing sugar, milk powder or other ingredients.

For matcha prepared with water

Choose pure matcha intended for drinking on its own. With no milk or sweetener to soften the flavour, the tea itself takes centre stage. Look for a product with clear information about its ingredients, origin and intended use.

Biomatea Organic Ceremonial Matcha from Kagoshima, 30 g is a 100% organic Japanese matcha option for this method. The smaller tin is also convenient when you are discovering how often you like to drink matcha.

For matcha lattes and kitchen recipes

For a latte, choose a matcha whose flavour you enjoy with milk. You can use the same pure matcha you drink with water; you do not need a separate tin just because you are making a latte. If you also want to bake or blend it into smoothies, explore Matcha & CO Organic Culinary Matcha Powder from Uji, 100 g.

Rather than choosing by the grade name alone, read the product description and try a small amount first. Your favourite matcha for a plain bowl may be different from the one you prefer in a large oat latte.

For a convenient sweetened latte

A premixed latte powder is another option, but follow its own recipe. For example, Biomatea Organic Japanese Matcha Latte with Coconut Sugar contains 20% matcha. Its preparation instructions call for 10 g of blend with 200 ml of milk. That is different from using 10 g of pure matcha, which would make a much stronger drink.

Explore the Leaf & Spice matcha collection →

What do you need to make matcha at home?

You can start with a few everyday kitchen items, then add specialist tools if you enjoy the ritual.

  • Matcha powder: use pure matcha for the recipes below unless a blend is specifically mentioned.
  • A wide bowl: you need enough room to move your whisk without splashing over the sides.
  • A bamboo whisk, or chasen: its many fine tines help distribute the powder and create a delicate foam.
  • A fine sieve: useful for breaking up dry clumps before water touches them.
  • A small digital scale: ideally one that measures in 0.1 g increments.
  • A measuring jug and temperature-controlled kettle or thermometer: helpful for repeating a recipe you like.

The Traditional Bamboo Matcha Whisk with 80 Bristles is a useful addition if you want to prepare matcha regularly. If you are putting together your first kit, the Matcha & CO Advanced Matcha Set brings together organic matcha, a spoon and a bamboo whisk; check the product details for the exact contents.

A narrow mug is fine for drinking from, but less comfortable for whisking. Prepare the matcha in a wider bowl, then pour it into your favourite cup.

Matcha water temperature and ratios

Start with water between 70°C and 80°C; 75°C is a useful middle point. A temperature-controlled kettle makes this easy. With a regular kettle, allow the boiled water to cool and check it with a thermometer. A fixed waiting time is only a rough guide because the amount of water and the vessel affect how quickly it cools.

Think of the following quantities as a starting point for home preparation. Make one small change at a time so you can tell what improves the flavour.

Matcha preparation ratios for one serving
DrinkPure matchaWaterMilk or finishing liquid
Small whisked matcha1.5–2 g70 ml at about 75°CNone; dilute to taste
Milder matcha1 g70 ml at about 75°COptional extra warm water
Hot matcha latte2 g50 ml at about 75°C150–200 ml warm milk
Iced matcha latte2 g50 ml at about 75°C150–200 ml cold milk, plus ice
Iced matcha with water2 g50 ml at about 75°C100–150 ml cold water, plus ice

Why use grams? A teaspoon is a volume measurement. The weight changes depending on how generously you fill it and how tightly the powder is packed. A level teaspoon may hold roughly 2 g, but it is an approximation. A small scale makes it easier to repeat your favourite cup.

For a comparison with a Japanese tea producer’s approach, Marukyu Koyamaen’s preparation guide uses approximately 1.5 g of matcha with 70 ml of water and recommends adjusting preparation to taste.

How to prepare matcha step by step

Makes: one small bowl. Preparation time: around 5 minutes, including heating and cooling the water.

1. Prepare your bowl and whisk

Pour a little warm water into the bowl and briefly wet the bamboo whisk’s tines. Empty the bowl and dry its inside before adding powder. This gives you a warm bowl without leaving damp patches for the matcha to stick to.

Set out everything before opening the tin. Having the sieve, scale and water ready lets you measure the matcha and reseal it promptly.

2. Measure and sift the matcha

Measure 1.5–2 g of matcha and pass it through a fine sieve into the bowl. Use the back of a clean, dry spoon to gently push small clumps through.

Dry clumps are much easier to break up at this stage than after they have become wet on the outside. If you have been getting tiny pockets of powder in your drink, this is the first habit to change.

3. Add the water

Add 70 ml of water at approximately 75°C. For your first attempts, measure the water rather than estimating by eye: a large bowl can make a small serving look deceptively small.

If you prefer to smooth the powder with a small splash first, take that splash from the measured 70 ml, then add the rest. The total amount matters more than whether you pour it in one go or two.

4. Whisk with quick back-and-forth movements

Hold the bowl steady and move the whisk briskly back and forth, in a compact M or W pattern. Keep the movement light and avoid pressing the tines hard against the bottom. Think of moving through the liquid rather than scrubbing the bowl.

Begin by distributing the powder evenly, then keep whisking until the surface looks lightly foamy. Around 15–30 seconds is a useful starting point, but judge the texture instead of chasing a precise number.

5. Finish gently and taste

Slow down near the surface to tidy up larger bubbles, then lift out the whisk. Take a small sip before changing anything.

If it feels too concentrated, add 10–20 ml of warm water. If it is smooth but weaker than you would like, use slightly less water next time. If it is harsh, try a cooler preparation or a smaller powder dose on your next bowl.

6. Drink it freshly prepared

Matcha is a suspension of fine tea particles, so some settling is normal. It does not behave like sugar that disappears into water. Enjoy it soon after whisking, and gently swirl the bowl if necessary.

Do not judge success only by the amount of foam. A smooth, balanced drink matters more than a thick cap of bubbles.

How to make a hot matcha latte

A homemade matcha latte lets you control the balance between tea, creaminess and sweetness. Begin with a modest amount of milk so you can still taste the matcha, then adjust.

Ingredients for one latte

  • 2 g pure matcha powder
  • 50 ml water at around 75°C
  • 150–200 ml milk or plant-based drink
  • Optional: a little maple syrup, honey or sugar, to taste

Method

  1. Sift the matcha into a bowl or suitable cup.
  2. Add the water and whisk until evenly mixed.
  3. If using a sweetener, stir it into the warm matcha.
  4. Warm the milk gently until pleasantly hot, without bringing it to a boil. Froth it if you like.
  5. Pour the milk over the matcha and stir lightly. Start with 150 ml and add more if you prefer a softer flavour.

Mixing the powder with water first makes it easier to spot and remove clumps before adding milk. Pouring a full mug of milk onto dry matcha usually makes that job harder.

Which milk should you use?

Dairy milk gives a familiar, creamy result. Oat drink adds a cereal note, soy drink can give a fuller texture, and almond drink brings a nutty flavour. The result varies between brands, so use a milk you already enjoy and taste before adding sweetener.

If you want more tea flavour, reduce the milk before automatically adding more matcha. That keeps the serving size consistent while making the tea more noticeable.

How to make an iced matcha latte

The easiest way to get a smooth iced latte is to prepare the matcha separately before combining it with cold milk and ice.

Ingredients for one iced latte

  • 2 g pure matcha powder
  • 50 ml water at around 75°C
  • 150–200 ml cold milk or plant-based drink
  • A handful of ice cubes
  • Optional sweetener, to taste

Method

  1. Sift the matcha, add the warm water and whisk until smooth.
  2. Mix in any sweetener while the matcha is warm.
  3. Put ice into a glass and add the cold milk, leaving space for the matcha.
  4. Pour the prepared matcha over the milk.
  5. Stir before drinking so the flavour is evenly distributed.

The green-and-white layers look beautiful, but the drink tastes more balanced once mixed. For a stronger-tasting iced latte, begin with 150 ml of milk and avoid adding extra water beyond the recipe: melting ice will already dilute it.

Prefer iced matcha without milk?

Prepare the same 2 g matcha and 50 ml water mixture, then add 100–150 ml of cold water and ice. Taste as you go. This makes a longer, lighter drink than a small bowl of warm matcha.

Can you make matcha without a bamboo whisk?

Yes. A bamboo whisk is enjoyable to use and gives you good control, but you can make a satisfying drink with other equipment.

With a handheld milk frother

Sift the powder into a tall, heat-safe vessel, add your measured water and mix in short bursts with the frother head submerged. Leave enough space to prevent splashing. This is particularly convenient for a latte, where the matcha will be mixed with milk anyway.

With a shaker for cold matcha

For a cold drink, put sifted matcha and cool water into a clean, securely closed shaker. Shake vigorously, then pour into your glass and add milk or more water to taste. Use cold or room-temperature liquid; do not shake hot water in a sealed container.

With a spoon

A spoon is a workable fallback, although it is less effective at producing foam. Sift the powder, add a little water and work it into a smooth mixture with the back of the spoon. Gradually stir in the remaining liquid. Pay attention to the corners and bottom of the cup, where dry powder can hide.

Why does my matcha taste bitter, clumpy or weak?

Before replacing your tea or buying more equipment, check the basics. Changing one variable per cup is more useful than changing the powder, temperature and milk quantity all at once.

Common matcha problems and practical fixes
ProblemWhat to checkTry next
Harsh or bitter flavourWater temperature, powder dose and freshnessUse 70–75°C water and a measured smaller serving; compare with a matcha intended for drinking plain
Little dry lumpsUnsifted powder or a damp bowlSift into a dry bowl and mix thoroughly before adding milk
Weak latteToo much milk, water or melting iceKeep the 2 g powder serving and reduce milk to 150 ml
Little or no foamWhisking motion, vessel shape and concentrationUse a wider bowl and quick back-and-forth movements; prioritise smoothness
Large bubblesOver-aeration or vigorous mixing at the surfaceFinish with gentler, shallower whisk movements
Powder settling at the bottomHow long the drink has stoodSwirl or stir and drink freshly prepared; some settling is normal
Flat or stale flavourStorage conditions and how long the tin has been openCompare with a freshly opened pack and keep it tightly sealed

A useful first experiment: measure the same serving twice and prepare it at two different temperatures, such as 70°C and 80°C. Keep the water quantity identical. Taste the difference and choose the version you prefer.

How to care for your matcha whisk

Rinse a bamboo whisk promptly with clean water so tea does not dry between its fine tines. Let it air-dry fully in a ventilated place before storing it. Avoid leaving it standing in water or putting it away damp.

Follow the care instructions for your particular whisk. For the 80-bristle bamboo chasen, the instructions advise against soap, boiling water and dishwasher cleaning. Gentle handling also helps preserve the tines: heavy pressure while whisking does not improve the drink.

Store your matcha so the next cup tastes good

Close the tin or pouch immediately after measuring your serving. Keep it away from moisture, direct light, heat and strong kitchen smells, following the storage directions on the pack.

A dry spoon matters as much as an airtight lid. Avoid measuring over a steaming kettle or returning a damp scoop to the container. If you prepare matcha only occasionally, a smaller pack may suit you better than a large bag that stays open for months.

For perspective, a 30 g tin provides about 15 servings at 2 g each, or 20 servings at 1.5 g. Use your usual portion and frequency to choose a pack size that fits your routine.

Frequently asked questions about preparing matcha

How much matcha should I use for one cup?

Start with 1.5–2 g for a small bowl prepared with 70 ml of water, or 2 g for a latte. For a gentler first taste, try 1 g. Follow the package instructions for blends, since their matcha content varies.

Does matcha need to steep?

No. You whisk the powder into the liquid and drink it without removing the leaves. There is no tea bag to take out and no steeping timer to follow.

Should I use boiling water for matcha?

For these recipes, let the water cool to 70–80°C before adding it. Start around 75°C and adjust according to your tea’s instructions and the flavour you enjoy.

Do I need to sift matcha every time?

Sifting is a useful routine, especially if the powder has visible clumps. It only takes a moment and makes even mixing easier. If you skip it, you may need to spend longer working out lumps.

Can I mix matcha directly into cold milk?

You can, particularly with a frother or blender, but dry clumps may be harder to remove. Whisking pure matcha with a small measured amount of water first gives you more control. Some instant latte blends are designed for direct mixing; follow their instructions.

Is a matcha latte supposed to contain coffee?

No. The recipes here contain matcha, water and milk. You can add espresso as a separate variation, but it is not needed for a matcha latte.

Why is there green powder at the bottom of my glass?

The fine tea particles can settle as the drink stands. Stir or swirl it before the next sip. Large dry lumps, however, usually mean the powder needed more sifting or mixing at the start.

Can I prepare several servings at once?

You can scale the quantities, but leave enough room in your bowl or jug to mix thoroughly. For the best texture, prepare what you plan to serve now. Keep milk cold until needed for iced drinks, and mix each finished serving before drinking.

Make your next cup of matcha your favourite

Start with one repeatable recipe: 1.5–2 g of pure matcha, 70 ml of water and a temperature around 75°C. Sift, whisk and taste. Once that feels familiar, experiment with extra water, warm milk or an iced version.

For a simple home setup, pair Biomatea Organic Ceremonial Matcha with a bamboo matcha whisk, or browse the full matcha collection to find a tea that suits the way you like to drink it.

Want to explore the tea behind your new ritual? Read What Is Matcha Tea? for more on its origins, flavour and different styles.

Continue reading

Coffee alternatives including matcha, yerba mate, rooibos, golden milk and cacao chai

12 Best Coffee Alternatives: Caffeinated and Caffeine-Free Options

Coffee alternatives including matcha, yerba mate, rooibos, golden milk and cacao chai

For many people, coffee is more than a drink. It is the aroma that begins the morning, the warm cup held between both hands and the familiar pause before the day gathers speed. Wanting an alternative does not necessarily mean that coffee is “bad” or that you must give it up completely. You might simply want less caffeine, a drink you can enjoy later in the day, a new flavour or a different kind of daily ritual.

The good news is that there is no shortage of choice. Matcha and yerba mate provide caffeine in very different flavour profiles. Black tea and masala chai feel familiar and comforting with milk. Hojicha and chicory offer roasted notes, while rooibos, herbal tea and golden milk create a satisfying cup without caffeine.

This guide compares 12 of the best coffee alternatives by caffeine level, flavour, preparation and ideal use. Whether you want an energising morning drink or a completely caffeine-free evening cup, you can use it to find an option that genuinely suits your routine.

What Is the Best Coffee Alternative?

The best coffee alternative depends on what you want to keep from your usual cup. Choose matcha or yerba mate if caffeine still matters; black tea or chai if you want a bold drink that works with milk; hojicha or chicory if you enjoy roasted flavours; and rooibos, herbal tea or golden milk if you want to avoid caffeine.

There is no universal winner because coffee drinkers are not all looking for the same thing. Someone replacing a double espresso before work has different priorities from someone searching for a cosy caffeine-free drink after dinner. Start by deciding whether flavour, stimulation, creaminess or the ritual itself matters most to you.

Coffee Alternatives at a Glance

DrinkTypical caffeine levelFlavourBest for
Filter coffee, for comparisonAbout 90 mg per 200 mlRoasted, bitter, aromaticA familiar reference point
MatchaModerate to high; approximately 38–89 mg per 2 g of powderVegetal, creamy, umamiA caffeinated morning ritual
Yerba mateModerate to high; approximately 80 mg per 150 ml in one scientific reviewEarthy, herbal, pleasantly bitterA robust tea-based alternative
Black teaModerate; about 50 mg per 220 mlMalty, brisk, sometimes smokyPeople who like a strong cup with milk
Masala chaiLow to moderate when made with black teaWarm, spiced, creamyLatte and cappuccino lovers
Green teaLow to moderateFresh, grassy or lightly sweetA lighter everyday drink
HojichaUsually low, but not caffeine-freeRoasted, nutty, gently smokyA mellow roasted flavour
RooibosNoneSmooth, rounded, gently sweetA naturally caffeine-free tea ritual
Golden milkNone when made only with milk and spicesEarthy, warming, creamyA caffeine-free latte
Cacao drinkLow and variable; not always caffeine-freeChocolatey, rich, slightly bitterChocolate lovers
Herbal teaUsually noneVaries by herb, flower and spiceA refreshing caffeine-free cup
Chicory drinkNoneDark, roasted, nuttyA coffee-like flavour without caffeine
Decaffeinated coffeeVery low; typically 2–15 mg per 237 mlClosest to regular coffeeKeeping the coffee flavour and method

Caffeine figures are approximate. Variety, quantity, serving size and preparation can all change the final amount. The European Food Safety Authority uses approximately 90 mg for a 200 ml filter coffee and 50 mg for a 220 ml black tea as practical reference values. Always check the information supplied with a specific product when caffeine intake matters to you.

Why Look for an Alternative to Coffee?

Coffee can form part of a balanced diet, and many people enjoy it without any difficulty. The search for healthy coffee alternatives should therefore not begin with the assumption that every other drink is automatically healthier. It is more useful to think about your own reason for making a change.

You might be looking for a coffee substitute because you want to:

  • reduce your total caffeine intake without abandoning a warm morning drink;
  • avoid drinking another coffee in the afternoon or evening;
  • discover a gentler, fresher or more varied flavour;
  • make a colourful café-style latte at home;
  • replace a sweet energy drink with an unsweetened infusion;
  • keep the comfort of a daily ritual while changing what is in the cup.

Caffeine sensitivity varies considerably. According to the European Food Safety Authority, intakes of up to 400 mg across the day do not generally raise safety concerns for healthy adults, excluding pregnant women. EFSA also notes that even a 100 mg dose may affect sleep in some adults when consumed close to bedtime. Your own tolerance, medication, pregnancy and health conditions may change what is appropriate, so seek personalised advice from a healthcare professional when needed.

12 Best Coffee Alternatives to Try

1. Matcha: The Best All-Round Alternative for a Caffeinated Ritual

Matcha is finely ground Japanese green tea. Instead of steeping leaves and removing them, you whisk the powder into water and consume the suspended tea itself. This gives matcha its concentrated flavour, brilliant green colour and unmistakable preparation ritual.

Its taste can range from fresh and grassy to creamy, sweet and deeply savoury. High-quality ceremonial matcha is especially pleasant with water, while culinary and latte-oriented matcha works well with milk, fruit and other ingredients.

Matcha is not caffeine-free. A scientific review of matcha composition reported 18.9–44.4 mg of caffeine per gram. A two-gram serving could therefore provide approximately 38–89 mg, although the actual amount depends on the matcha and how much you use. Matcha also naturally contains L-theanine, an amino acid found in tea. Research discussed in the same review suggests that caffeine and L-theanine together may support attention, but they do not guarantee a particular feeling or eliminate caffeine-related effects for everyone.

How to prepare it: Sift 1–2 g of matcha into a bowl, add approximately 60–80 ml of water at around 70–80°C and whisk until smooth and lightly frothy. Drink it as it is, or add warm or cold milk for a matcha latte. Avoid boiling water if you prefer a smoother, less bitter cup.

Best for: People who want a distinctive morning ritual, flexible preparation and a meaningful amount of caffeine without drinking coffee.

Explore: Browse the complete Leaf & Spice matcha tea collection, or begin with Biomatea Organic Ceremonial Matcha from Kagoshima.

2. Yerba Mate: A Bold, Naturally Caffeinated Alternative

Yerba mate is made from the leaves of Ilex paraguariensis, a plant native to South America. It is traditionally prepared in a gourd, topped up repeatedly with water and sipped through a filtered metal straw called a bombilla. It can also be brewed much like loose-leaf tea, which makes it easy to add to an everyday routine.

The flavour is usually earthy, herbal and pleasantly bitter. Pure yerba mate will appeal to drinkers who enjoy a robust cup, while blends with lemon, ginger, mint or berries make the transition from flavoured coffee or tea easier.

Yerba mate contains caffeine. A review of yerba mate cites approximately 80 mg in a 150 ml cup, broadly comparable with coffee. However, preparation makes a major difference. A lightly brewed mug and a traditional gourd refilled several times should not be treated as the same serving.

How to prepare it: For a tea-style cup, follow the instructions on the pack and use hot water below boiling. For traditional preparation, partially fill a mate gourd, tilt the leaves, add warm water and insert a bombilla before adding hotter water. Beginners may prefer a flavoured blend served hot or over ice.

Best for: Coffee drinkers who still want a substantial caffeine contribution and do not mind an earthy, bitter edge.

Explore: Discover the full yerba mate tea collection. For an approachable first cup, try Original Mate Organic Lemon & Ginger Yerba Mate; for a traditional base, choose Organic Yerba Mate Loose Leaf Tea.

3. Black Tea: The Familiar, Full-Flavoured Choice

If matcha feels too vegetal and mate too unfamiliar, black tea may be the easiest step away from coffee. It has enough body to work with milk, a broad range of flavour profiles and a familiar brewing method. Assam can be rich and malty, Ceylon bright and brisk, Earl Grey citrusy, and smoked black teas intensely aromatic.

Black tea contains caffeine, but a typical cup generally provides less than filter coffee. EFSA uses approximately 50 mg for 220 ml of black tea, compared with around 90 mg for 200 ml of filter coffee. Brewing time, leaf quantity and tea variety all affect the result.

How to prepare it: Use freshly boiled water for most black teas and steep according to the pack instructions, commonly three to five minutes. Add milk if desired. If bitterness becomes excessive, shorten the steep rather than diluting an over-brewed cup.

Best for: Anyone who likes a strong, uncomplicated drink and wants an easy coffee alternative with moderate caffeine.

Explore: Find classic breakfast teas, aromatic blends and distinctive loose leaves in the Leaf & Spice black tea collection.

4. Masala Chai: The Best Alternative for Latte Lovers

Masala chai combines tea with warming spices such as cinnamon, cardamom, ginger, cloves and black pepper. Recipes vary across households and regions, which is part of its appeal. Some cups are intensely spiced, some are tea-forward, and others are creamy and gently sweet.

Traditional chai commonly uses black tea, so it usually contains caffeine. The amount depends on the proportion of tea, the strength of the concentrate and the final serving size. A café chai made mostly with sweetened milk may taste indulgent but provide relatively little tea, while a strongly infused homemade chai may contain considerably more caffeine.

How to prepare it: Simmer or steep the chai according to the product instructions, add warm milk or a plant-based drink and sweeten only if needed. For an iced chai, prepare a more concentrated base, cool it and pour it over ice and milk.

Best for: Cappuccino and flavoured-latte drinkers who value creaminess, aroma and warming spice as much as caffeine.

Explore: Browse tea lattes for café-style drinks at home, including Biomatea Organic Chai Latte Powder with Black Tea & Spices.

5. Green Tea: A Lighter Everyday Swap

Green tea is a versatile alternative when you want to keep some caffeine but prefer a lighter cup. Depending on its origin and processing, it may taste grassy, marine, floral, nutty or gently sweet. Sencha, jasmine green tea, gunpowder and flavoured green blends can feel like entirely different drinks.

Green tea generally contains less caffeine than coffee, although there is no single amount for every cup. Leaf type, water temperature, infusion time and the quantity used all matter. Tea made with more leaves or brewed for longer is not necessarily “low caffeine” simply because it is green.

How to prepare it: Many green teas taste best with water below boiling, commonly around 70–85°C. Start with the time and temperature printed on the pack. If the result is harsh or bitter, lower the temperature or shorten the infusion.

Best for: People seeking a fresh, lower-intensity morning or early-afternoon drink.

Explore: Compare delicate, classic and flavoured options in the green tea collection.

6. Hojicha: Roasted Flavour with Less Intensity

Hojicha is Japanese green tea that has been roasted. That process transforms the familiar fresh-green profile into something warmer: toasted nuts, caramel, wood and a gentle smokiness. These roasted notes make hojicha particularly interesting for people who miss the aroma and depth of coffee but do not need the same level of stimulation.

Hojicha is often lower in caffeine than matcha or many other green teas, but it is not caffeine-free. Exact values vary with the leaves, stems, serving size and preparation, so anyone who is highly caffeine-sensitive should still treat it as a caffeinated tea.

Loose-leaf hojicha can be steeped in hot water. Powdered hojicha is whisked in a similar way to matcha and works particularly well as a creamy latte.

Best for: Anyone seeking a mellow drink with roasted character, especially as an afternoon alternative to another coffee.

Explore: Try Biomatea Organic Hojicha Roasted Japanese Green Tea Powder, or choose the convenient Biomatea Organic Hojicha Latte Mix.

7. Rooibos: The Best Naturally Caffeine-Free Tea Alternative

Rooibos comes from the South African plant Aspalathus linearis, not from the caffeine-containing tea plant Camellia sinensis. It is naturally caffeine-free rather than decaffeinated. Its smooth body, rounded aroma and gentle sweetness make it one of the easiest caffeine-free alternatives to serve with milk.

Pure rooibos has warm woody and honeyed notes. It also pairs beautifully with vanilla, cinnamon, orange, cocoa, caramel, fruit and flowers. That range makes it useful for both simple everyday infusions and dessert-like evening lattes.

How to prepare it: Use freshly boiled water and steep for approximately five to seven minutes, or follow the product instructions. Rooibos does not usually become as astringent as black tea during a longer infusion, so you can brew it strongly before adding milk.

Best for: Anyone who wants a satisfying tea ritual without caffeine, including later in the day.

Explore: Browse the rooibos tea collection. Start simply with Mabura Organic Pure Loose Leaf Rooibos, or try Biohême Organic Choco Jungle Rooibos & Cacao Infusion for a richer flavour.

8. Golden Milk: A Warm, Caffeine-Free Latte

Golden milk, also known as a turmeric latte, is a warm drink made with turmeric, milk or a plant-based drink and complementary spices. Ginger, cinnamon and black pepper are common additions. It offers the colour, warmth and frothy texture of a café latte without requiring coffee or tea.

A traditional spice-only golden milk is naturally caffeine-free. Nevertheless, always check a premixed product: some modern “golden” blends include matcha, black tea, cacao or other caffeine-containing ingredients.

How to prepare it: Whisk the spice blend into a small amount of warm milk until smooth, then add the remaining milk and heat gently. A milk frother produces a more café-like texture. Sweeten to taste rather than assuming a latte needs a large amount of sugar.

Best for: People who want a colourful, creamy and warming coffee alternative without caffeine.

Try it: Biomatea Organic Golden Milk Turmeric Latte Blend combines turmeric, Ceylon cinnamon, ginger and black pepper without added sugar or caffeine-containing ingredients.

9. Cacao and Cacao Chai: A Rich Chocolate Alternative

A cacao drink will not taste like coffee, but it can replace the rich, comforting experience of a mocha. Unsweetened cacao brings bitterness and depth, while milk creates body and spices such as cinnamon, cardamom or chilli add complexity.

Cacao should not automatically be described as caffeine-free. Cocoa naturally contains small and variable amounts of caffeine as well as theobromine, another naturally occurring methylxanthine. The final level depends on the quantity and type of cacao, and a cacao chai may contain additional caffeine if it includes black tea.

How to prepare it: Mix the powder with a small amount of hot liquid first to create a smooth paste. Add warm milk gradually and froth. Check whether the blend is already sweetened before adding sugar or syrup.

Best for: Mocha drinkers and anyone who prioritises a dark, chocolatey flavour over a coffee-like caffeine level.

Explore: Try Matcha & CO Organic Cacao Chai Tea Powder, and explore more colourful and spiced options in the tea latte collection.

10. Peppermint, Ginger and Other Herbal Teas

Herbal tea is a broad category covering infusions made from leaves, roots, flowers, fruit and spices. Peppermint tastes cool and vivid, ginger is warming and spicy, chamomile is gentle and floral, and lemon verbena has a bright citrus character.

Most pure herbal infusions are naturally caffeine-free, but “herbal blend” does not always guarantee zero caffeine. A blend may also contain green tea, black tea, yerba mate, guarana or cacao, so read the ingredient list when avoiding caffeine completely.

Herbal tea does not reproduce caffeine’s stimulant effect. Its appeal lies elsewhere: hydration, aroma, flavour and the act of pausing for a freshly prepared drink. A vivid peppermint or ginger infusion can still feel refreshing even though it does not chemically replace caffeine.

How to prepare it: Brewing varies by ingredient. Many herbal teas can take freshly boiled water and a five-to-ten-minute infusion, while roots and dense spices may benefit from a longer steep. Follow the instructions for the particular blend.

Best for: A caffeine-free morning, an after-meal cup or an aromatic drink at any time of day.

Explore: Discover peppermint, ginger, floral and spiced blends in the Leaf & Spice herbal tea collection.

11. Chicory: The Closest Caffeine-Free Roasted Substitute

Roasted chicory root is one of the most familiar caffeine-free coffee substitutes. When brewed, it creates a dark cup with roasted, earthy, nutty and gently bitter notes. It can be enjoyed on its own or combined with other roasted roots and grains.

Chicory does not taste exactly like coffee. It lacks coffee’s aroma and natural caffeine, but its colour and roast character make it a convincing option for people who care more about flavour and ritual than stimulation.

Chicory root contains inulin, a type of fermentable fibre. Some people tolerate it well, while larger amounts may cause gas or digestive discomfort, particularly for those sensitive to fermentable carbohydrates. Begin with a modest serving if it is new to you.
How to prepare it: Preparation depends on the form. Some ground chicory products brew in a filter or French press, while instant versions dissolve directly in hot water. Add milk for a softer, more coffee-like cup.

Best for: People who want a dark, roasted and caffeine-free drink rather than a conventional tea.

12. Decaffeinated Coffee: The Most Familiar Compromise

Sometimes the best alternative to regular coffee is still coffee. Decaf preserves more of the familiar taste, aroma and brewing ritual than matcha, mate or herbal tea. It is particularly practical if you enjoy espresso equipment or simply do not want to learn a new preparation method.

Decaffeinated does not mean completely caffeine-free. The US Food and Drug Administration states that decaf coffee typically contains around 2–15 mg of caffeine per 237 ml cup. That is much less than regular coffee, but it may still matter to someone who reacts strongly to small quantities.

Best for: Coffee lovers who want to reduce caffeine while changing as little as possible about the flavour and ritual.

Which Coffee Alternative Should You Choose?

Rather than looking for the single healthiest or strongest option, match the drink to the part of coffee you value most:

  • If you still want meaningful caffeine: begin with matcha or yerba mate.
  • If you want less caffeine and a familiar cup: try black tea, chai or green tea.
  • If you enjoy roasted flavours: choose hojicha or chicory.
  • If you love cappuccinos and flavoured lattes: try masala chai, matcha latte, golden milk or cacao chai.
  • If you want to avoid caffeine: choose pure rooibos, a caffeine-free herbal infusion, spice-only golden milk or chicory.
  • If nothing but coffee tastes right: switch to decaf or combine regular and decaf beans while reducing your intake.

Flavour is just as important as the caffeine figure. A theoretically perfect substitute will not last in your routine if you do not enjoy drinking it. Small discovery sizes and varied blends can help you find your preference before committing to a large pack.

Are Coffee Alternatives Healthier Than Coffee?

Not automatically. “Coffee alternative” describes what a drink replaces, not its nutritional quality.

An unsweetened tea or herbal infusion can be a simple, low-calorie drink. A café-style powder may contain substantial sugar, even if its main ingredient sounds wholesome. A large matcha or mate serving may contain more caffeine than expected. Golden milk can be unsweetened and spice-forward, or it can become a dessert-like drink depending on the recipe.

Coffee itself also contains numerous naturally occurring compounds and can fit into a balanced diet. A better comparison considers the complete drink:

  • How much caffeine does the actual serving contain?
  • Is sugar already included in the blend?
  • How much sweetener do you add?
  • What type and quantity of milk do you use?
  • Does the drink suit your digestion, medication and caffeine sensitivity?
  • Do you genuinely enjoy it enough to make the change sustainable?

The most useful coffee alternative is therefore not a miracle drink. It is a cup that fits your taste, schedule and desired caffeine intake.

How to Replace Coffee Without Losing the Ritual

Decide whether you want less caffeine or no caffeine

This choice immediately narrows the field. Matcha, mate, black tea, green tea and hojicha all contain caffeine. Pure rooibos, most herbal infusions, spice-only golden milk and chicory do not.

Change one cup at a time

If you drink several coffees a day, replacing the afternoon cup may be easier than abandoning the first morning coffee. The FDA advises reducing regular caffeine intake gradually because withdrawal can be unpleasant. A staged approach also helps you notice which alternative works at each time of day.

Keep the sensory details you enjoy

If coffee means warmth and creaminess, prepare a chai, matcha or rooibos latte rather than a thin infusion. If you enjoy bitterness, try mate or strong black tea. If aroma matters most, explore roasted hojicha, chai spices or chicory. Use the same favourite mug, take the same short break and preserve the satisfying part of the habit.

Watch the complete serving

Measure powders at first, particularly matcha, and remember that repeated refills of a mate gourd add to total caffeine intake. Check premixed latte blends for tea, cacao, sweeteners and serving instructions. “Natural” does not tell you how stimulating or sweet the final cup will be.

Give your palate time

A first sip of unsweetened matcha will not taste like an espresso, and it should not. Instead of judging every option by how accurately it copies coffee, explore what makes each drink appealing in its own right. A new favourite often appears when you stop expecting an exact imitation.

Three Easy Coffee-Alternative Drinks to Make at Home

Simple Matcha Latte

  1. Sift 1–2 g of matcha into a bowl or wide cup.
  2. Add 60 ml of water at approximately 70–80°C.
  3. Whisk until smooth and lightly frothy.
  4. Add 150–200 ml of warm or cold milk.
  5. Sweeten lightly if desired.

Strong Rooibos Latte

  1. Use roughly twice the rooibos you would prepare for a normal cup.
  2. Add freshly boiled water and steep for five to seven minutes.
  3. Strain, then add warm frothed milk.
  4. Finish with cinnamon or vanilla if desired.

Quick Golden Milk

  1. Add one teaspoon of golden-milk spice blend to a cup.
  2. Mix it with a small amount of warm milk to form a smooth paste.
  3. Add approximately 200 ml of milk or plant-based drink.
  4. Heat gently, stir or froth, and sweeten to taste.

Frequently Asked Questions About Coffee Alternatives

What is the best substitute for coffee?

Matcha is a versatile choice if you still want caffeine and enjoy a creamy or vegetal flavour. Yerba mate suits people seeking a bolder herbal drink. Black tea and chai are familiar with milk, while chicory is one of the closest caffeine-free choices in terms of dark colour and roasted taste.

What can I drink in the morning instead of coffee?

Good morning drinks instead of coffee include matcha, yerba mate, black tea, green tea, masala chai, hojicha, rooibos and golden milk. Choose according to your preferred caffeine level. A caffeine-free drink can replace the ritual and flavour experience, but it will not reproduce caffeine’s stimulant effect.

Which coffee alternatives still contain caffeine?

Matcha, yerba mate, black tea, green tea, tea-based chai and hojicha all naturally contain caffeine. Cacao contains a smaller, variable amount, and decaf coffee retains traces. Rooibos, most pure herbal teas, chicory and spice-only golden milk are naturally caffeine-free.

Does matcha have less caffeine than coffee?

Often, but not always. EFSA uses around 90 mg as a reference for 200 ml of filter coffee. Research reports 18.9–44.4 mg of caffeine per gram of matcha, so a two-gram serving may contain approximately 38–89 mg. A strong matcha made with more powder can therefore approach or exceed some coffees.

Is yerba mate stronger than coffee?

A cup of yerba mate can contain a similar amount of caffeine to a cup of coffee, but there is considerable variation. Leaf quantity, steeping and repeated additions of water all affect total intake. A traditional mate session with several refills can provide much more caffeine than a single lightly brewed cup.

What is the best caffeine-free coffee alternative?

Choose chicory if you want the closest roasted character, rooibos if you want a full-bodied tea, and golden milk if you prefer a creamy latte. Peppermint, ginger and other herbal infusions are good choices when freshness and aroma matter more than similarity to coffee.

Can rooibos be prepared with milk?

Yes. Rooibos is naturally smooth and works well with dairy or plant-based milk. Brew it more strongly than usual before adding milk so that its flavour remains present. Vanilla, cinnamon, caramel, orange and cacao are especially complementary flavours.

A Better Morning Drink Is the One You Look Forward To

Replacing coffee does not have to mean settling for a less satisfying morning. It can be an opportunity to choose the experience you actually want: the bright ritual of whisked matcha, the earthy character of yerba mate, the warmth of chai, the roasted aroma of hojicha or the caffeine-free comfort of rooibos and golden milk.

Start with your desired caffeine level, then let flavour guide you. You may find one direct replacement, or build a more flexible routine—matcha in the morning, black tea after lunch and rooibos in the evening.

Ready to discover your new cup? Explore matcha, yerba mate, tea lattes, rooibos and the complete Leaf & Spice tea collection.


Sources and note: General caffeine guidance and reference values were checked against the European Food Safety Authority and the US Food and Drug Administration. Matcha composition is discussed in a peer-reviewed scientific review, and yerba mate composition and traditional use in a separate peer-reviewed review. This article provides general information about foods and beverages and is not medical advice.

Continue reading

Best Tea for Digestion & Bloating: 7 Teas After Meals

Best Tea for Digestion and Bloating

Best Tea for Digestion and Bloating: 7 Teas to Drink After Meals

Feeling overly full after dinner or simply looking for a comforting drink to finish a meal? A warm cup of herbal tea is one of the simplest after-meal rituals you can add to your day.

Some herbs have a particularly long tradition of being enjoyed after food. Peppermint, ginger, fennel, lemon balm, lemon verbena, chamomile and anise are among the most popular choices, and several are traditionally used in herbal preparations for mild digestive discomfort, including feelings of fullness, gas and bloating.

So, what is the best tea for digestion and bloating?

There is no single tea that is best for everyone, but if you want a simple place to start, peppermint, fennel and ginger teas are excellent after-meal choices. For a gentler evening infusion, lemon balm, lemon verbena or chamomile can be especially pleasant.

If you prefer a ready-made blend rather than choosing individual herbs, our PROVENCE D’ANTAN Organic Lemon Digestion Herbal Tea combines lemon balm and lemon verbena in a refreshing caffeine-free infusion specifically created for the after-meal tea ritual.

Quick answer: The best teas to try after meals include peppermint, ginger, fennel, lemon balm, lemon verbena, chamomile and anise. Most herbal versions are naturally caffeine-free, making them particularly convenient after dinner.

The 7 Best Teas for Digestion and Bloating

TeaFlavourBest time to drink
Peppermint teaFresh and cooling

After lunch or dinner

Ginger teaWarm and spicyAfter a rich meal
Fennel teaSweet and anise-likeAfter lunch or dinner
Lemon balm teaSoft, fresh and herbalAfternoon or evening
Lemon verbena teaBright and lemonyAfter dinner
Chamomile teaMild and floralEvening
Anise teaSweet and aromaticAfter meals

Let’s look more closely at each one.

What does peppermint tea taste like

Peppermint Tea

Peppermint tea is probably the first drink many people think of when looking for a tea for digestion after eating.

Its clean, cooling flavour makes it especially refreshing after rich, spicy or heavy food. Unlike black tea or green tea, pure peppermint tea is naturally caffeine-free, so it can also be enjoyed after an evening meal.

Peppermint also has a long history of traditional use for digestive complaints. Modern research has investigated peppermint extensively, although much of the clinical research relates to peppermint oil rather than ordinary peppermint tea. NCCIH notes evidence that enteric-coated peppermint oil may help some IBS symptoms in the short term, while evidence for herbal products more generally remains limited.

That distinction is important: a cup of peppermint tea should be enjoyed as a beverage and traditional herbal infusion, not treated as a medicine.

What does peppermint tea taste like?

Peppermint has:

  • a cooling sensation
  • a naturally fresh aroma
  • a clean herbal flavour
  • very little natural sweetness
  • no caffeine when made purely from peppermint leaves

That refreshing character makes it a particularly good choice after a substantial lunch or dinner.

Try this peppermint tea

Our Organic Peppermint Tea – Refreshing Herbal Infusion contains organic peppermint in convenient tea bags and is naturally caffeine-free.

It is an easy choice when you want a simple cup of mint tea after eating without preparing a loose-leaf blend.

Best for: A fresh, cooling tea after a rich meal.

Why drink ginger tea after meals

Ginger Tea

If peppermint is cooling, ginger tea is its warming counterpart.

Ginger has been used in food and traditional herbal preparations for centuries. Its distinctive spicy flavour works particularly well after heavier meals and makes a satisfying alternative to coffee or sweet desserts.

Ginger has also been widely studied, especially in relation to nausea. NCCIH notes that ginger has traditionally been used for indigestion and gastrointestinal discomfort, although research varies depending on the preparation and condition being studied.

Recent European Medicines Agency assessment material also documents traditional medicinal use of ginger preparations for mild spasmodic gastrointestinal complaints including bloating and flatulence. This refers to specific herbal medicinal preparations and doses rather than proving that any cup of ginger tea will have the same effect.

Why drink ginger tea after meals?

Quite simply, it tastes good after food.

The natural warmth of ginger pairs particularly well with:

  • curries
  • grilled food
  • roasted vegetables
  • rich sauces
  • winter meals
  • spicy dishes
  • large weekend lunches

Ginger tea is generally caffeine-free when made only with ginger and other caffeine-free herbs.

Try this ginger tea

For a simple ingredient-focused infusion, try our Organic Ginger Root Infusion 50g.

It has a naturally spicy, warming character and can be enjoyed on its own or combined with lemon, mint or a little honey.

For something more complex, the Provence d’Antan Organic Apple, Ginger & Fennel Infusion combines ginger with two other ingredients that work beautifully in an after-meal tea: sweet apple and aromatic fennel.

Best for: People who prefer warm, spicy herbal tea rather than mint.

What does fennel tea taste like

Fennel Tea

Fennel is one of the most interesting ingredients to explore if you are looking for herbal tea for bloating or an after-dinner tea.

Fennel seeds have a naturally sweet, aromatic flavour reminiscent of anise or liquorice. Because the flavour has a slight sweetness of its own, fennel tea can also be satisfying when you want something after dinner without reaching for a sugary drink.

Fennel has a particularly long history in European herbal traditions. The European Medicines Agency recognizes the traditional use of sweet fennel fruit herbal medicines for mild spasmodic gastrointestinal complaints including bloating and flatulence.

Again, this traditional medicinal recognition relates to defined herbal preparations rather than meaning that ordinary fennel tea should be considered a treatment.

What does fennel tea taste like?

Expect a flavour that is:

  • gently sweet
  • warming
  • aromatic
  • slightly liquorice-like
  • softer than strong peppermint or ginger

Fennel is also excellent in blends because it combines well with mint, apple, ginger, lemon balm, cinnamon and anise.

Try a fennel tea blend

Our Stay Strong Organic Herbal Tea – Anise, Fennel, Apple & Mint combines several classic after-meal flavours in a single loose-leaf infusion.

You can also try the Organic Apple, Ginger & Fennel Infusion if you prefer the warmth of ginger alongside fennel.

Best for: A naturally sweet, caffeine-free tea after lunch or dinner.

Lemon balm and the evening tea ritual

Lemon Balm Tea

Lemon balm may sound strongly citrusy, but its flavour is generally much softer than lemon juice or lemon peel.

The herb has a light lemon-like aroma accompanied by a rounded herbal character. It works particularly well in blends designed for evening drinking.

Lemon balm also has a long history of traditional European herbal use. EMA documentation recognizes traditional lemon balm preparations for mild digestive disorders including bloating and flatulence.

Because lemon balm is naturally caffeine-free, it is particularly suitable when you’re searching for a tea to drink after dinner without introducing caffeine late in the day.

Lemon balm and the evening tea ritual

One of the advantages of lemon balm is versatility.

Peppermint can taste intensely fresh. Ginger can be fiery. Fennel has a distinctive anise flavour.

Lemon balm is softer.

That makes it a good choice if you want a gentle tea to slowly sip after dinner while reading, watching a film or winding down for the evening.

Our recommended lemon balm blend

Try the PROVENCE D’ANTAN Organic Lemon Digestion Herbal Tea.

The blend combines organic lemon balm and lemon verbena with additional botanical ingredients to create a light, refreshing herbal infusion.

For readers arriving at this guide specifically looking for an easy after-meal herbal tea, this would be our first recommendation.

Best for: A gentle, refreshing caffeine-free tea after dinner.

Lemon verbena vs lemon balm

Lemon Verbena Tea

Lemon verbena is another excellent option for anyone who likes refreshing citrus flavours.

Unlike a fruit tea made with actual lemon, lemon verbena is a herb. Its leaves produce a fragrant cup with a clean lemon aroma and a lighter, more botanical character.

Lemon verbena also has a history of traditional use for digestive complaints. EMA’s herbal assessment recognizes traditional preparations of lemon verbena leaf for mild gastrointestinal complaints including bloating and flatulence.

Lemon verbena vs lemon balm

The names sound similar, but they are different plants.

Lemon balm tends to be softer, greener and more herbal.

Lemon verbena usually has a brighter, clearer lemon aroma.

They also work extremely well together, which is why you will often find both in herbal blends.

Try them together

The PROVENCE D’ANTAN Organic Lemon Digestion Herbal Tea brings lemon balm and lemon verbena together in one convenient infusion.

If you want to explore lemon verbena on its own, you can also try our Organic Lemon Verbena Herbal Infusion 50g.

Best for: Anyone who enjoys fresh lemon flavours but wants a caffeine-free herbal infusion.

Why chamomile works well after dinner

Chamomile Tea

Chamomile is best known as an evening and relaxation tea, but it also has a long association with traditional herbal use after food.

Its soft floral flavour makes it very different from peppermint, ginger or fennel. If you dislike intense mint or spicy tea, chamomile can provide a much gentler alternative.

European herbal assessment material records traditional oral use of chamomile preparations for mild gastrointestinal complaints associated with minor spasms, bloating and flatulence.

Chamomile remains best thought of as a pleasant herbal drink rather than a treatment for persistent digestive symptoms.

Why chamomile works well after dinner

Chamomile is:

  • naturally caffeine-free
  • mild in flavour
  • floral rather than spicy
  • easy to combine with lemon verbena and other herbs
  • particularly suited to the evening

If your ideal after-dinner tea is something gentle that transitions naturally into your evening routine, chamomile is difficult to beat.

Try this chamomile blend

Our Provence d’Antan Organic Serenity Herbal Tea – Chamomile & Verbena combines organic chamomile with lemon verbena, elderflower, lavender and rose.

For a different format, you can also discover our Chamomile Tea-Pop Instant Herbal Tea.

Best for: A gentle evening tea after dinner.

Anise and fennel make a natural combination

Anise Tea

Anise is another traditional after-meal herb worth knowing.

It has a sweet, highly aromatic flavour that resembles liquorice. If you enjoy fennel, there is a good chance you will enjoy anise too.

Aniseed preparations have also been recognized by the European Medicines Agency for traditional use in mild indigestion complaints including bloating and flatulence.

Anise and fennel make a natural combination

Because their flavours are related but not identical, anise and fennel are often combined.

Add mint and you get an especially refreshing herbal profile after food.

That is exactly the combination found in our Stay Strong Organic Herbal Tea – Anise, Fennel, Apple & Mint.

Apple brings gentle fruitiness, while mint makes the finish fresher.

Best for: Fans of fennel, liquorice-like flavours and aromatic herbal blends.

Which Tea Is Best for Digestion After a Meal?

If you are struggling to choose, use flavour as your starting point.

Best Overall After-Meal Tea Blend

You don’t necessarily need to choose a tea containing only one herb.

In fact, some of the most enjoyable after-meal teas combine complementary ingredients such as fennel, mint, ginger, anise, lemon balm and lemon verbena.

For an easy everyday option, our pick is:

Loose leaf tea

PROVENCE D’ANTAN Organic Lemon Digestion Herbal Tea

This blend is particularly well suited to the intent behind this guide because it combines lemon balm and lemon verbena into a gentle herbal infusion designed around the after-meal ritual.

Shop Organic Lemon Digestion Herbal Tea →

For a warmer and more aromatic alternative, choose:

Shop Organic Apple, Ginger & Fennel Infusion →

Or browse our complete collection of Wellness Teas and Herbal Teas.

Loose leaf tea

When Should You Drink Tea for Digestion?

There is no strict rule saying that herbal tea must be consumed at a particular time.

For an after-meal ritual, a practical approach is simply to prepare a cup after you have finished eating and enjoy it slowly.

The best time can also depend on the tea.

After breakfast

Ginger or peppermint can provide a fresh start without needing another coffee.

After lunch

Peppermint, fennel and ginger are all excellent choices, particularly after a substantial meal.

After dinner

Choose caffeine-free teas such as:

  • peppermint
  • fennel
  • ginger
  • chamomile
  • lemon balm
  • lemon verbena
  • anise
  • rooibos

If you are sensitive to caffeine, herbal tea is generally a better evening choice than black, green, white or yerba mate tea.

Browse our Herbal Tea collection for more naturally caffeine-free options.

Hot or Cold: Which Is Better After Meals

Hot or Cold: Which Is Better After Meals?

Most people associate digestive herbal teas with a warm cup, but there is no reason you cannot enjoy many of these herbs cold.

Peppermint, lemon verbena, lemon balm and ginger can all make refreshing chilled infusions.

In summer, brew the tea normally, allow it to cool and serve it over ice.

Avoid adding large amounts of sugar if your goal is a light drink after a heavy meal. Fresh lemon, orange peel, mint or a small amount of honey can add flavour instead.

If you enjoy cold tea, see our guide to How to Make Perfect Iced Tea at Home.

How to Make the Perfect After-Meal Herbal Tea

How to Make the Perfect After-Meal Herbal Tea

Always follow the preparation instructions for the tea you are using, particularly because ideal steeping times vary between ingredients.

As a general herbal-tea routine:

  1. Bring fresh water to the boil.
  2. Place your loose herbs or tea bag in a cup or teapot.
  3. Pour over the hot water.
  4. Cover the cup or teapot while steeping.
  5. Allow the herbs enough time to release their flavour.
  6. Remove the tea bag or strain the leaves.
  7. Sip slowly while the tea is comfortably warm.

Herbal teas are usually more forgiving than delicate green or white teas, so they can typically handle hotter water and longer steeping.

If you are new to loose-leaf tea, read our complete guide to How to Brew Loose Leaf Tea for more preparation tips.

Can You Combine Peppermint, Ginger and Fennel

Can You Combine Peppermint, Ginger and Fennel?

Yes. From a flavour perspective, these ingredients work particularly well together.

Ginger adds warmth.

Peppermint brings freshness.

Fennel contributes soft natural sweetness.

Anise, lemon balm and lemon verbena can also fit beautifully into an after-meal herbal blend.

If you don’t want to buy several separate herbs, a ready-made blend is the easiest solution.

Two good choices from Leaf & Spice are:

What Tea Is Best After a Heavy Meal

What Tea Is Best After a Heavy Meal?

For a heavy meal, many people prefer stronger, fresher flavours.

That makes peppermint, ginger and fennel particularly appealing.

After rich meat dishes, grilled foods or creamy sauces, peppermint provides a clean finish.

After spicy foods or winter dishes, ginger gives you a warming cup that continues the flavour of the meal.

Fennel sits somewhere between the two: aromatic and warm but also naturally sweet.

Our easiest choices are:

Organic Peppermint Tea →

Organic Ginger Root Infusion →

Apple, Ginger & Fennel Infusion →

What Is the Best Caffeine-Free Tea After Dinner

What Is the Best Caffeine-Free Tea After Dinner?

All seven main teas in this guide can be caffeine-free when made purely from the relevant herbs:

  • peppermint
  • ginger
  • fennel
  • lemon balm
  • lemon verbena
  • chamomile
  • anise

That makes herbal tea particularly useful if you want a warm after-dinner drink but don’t want the caffeine found naturally in traditional tea leaves from Camellia sinensis.

For evening drinking, we particularly like:

For freshness: Peppermint

For warmth: Ginger

For gentle sweetness: Fennel

For a softer evening ritual: Chamomile

For light citrus flavour: Lemon balm and lemon verbena

You can explore more options in our Wellness Tea collection.

Frequently Asked Questions About Tea for Digestion and Bloating

  • What is the best tea for digestion?

    Peppermint, ginger, fennel, lemon balm, lemon verbena, chamomile and anise are all popular herbal teas after meals. Several have a history of traditional use in European herbal preparations for mild gastrointestinal complaints. The best option for everyday drinking ultimately depends on your taste and individual tolerance.

  • What tea is good for bloating?

    Fennel, anise, lemon balm and lemon verbena all have documented traditional herbal use relating to mild digestive complaints including bloating and flatulence. Peppermint is also widely associated with digestive use, although clinical evidence commonly concerns peppermint oil rather than ordinary peppermint tea.

    For an everyday beverage, choose a tea you enjoy and treat it as part of your after-meal routine rather than a medical treatment.

  • Is peppermint tea good after eating?

    Peppermint tea is a popular after-meal drink because it is refreshing, naturally caffeine-free and easy to prepare. Its cooling flavour works particularly well after rich food.

  • Is ginger tea good after dinner?

    Ginger tea can be enjoyed after dinner and is naturally caffeine-free when it contains only ginger and other caffeine-free herbs. Its warming, spicy flavour makes it particularly enjoyable after hearty meals.

  • Is fennel tea good after meals?

    Fennel has a long history of traditional use after food, and EMA recognizes specific fennel herbal medicines for mild spasmodic gastrointestinal complaints including bloating and flatulence.

    Fennel also has a naturally sweet, aromatic taste that makes it pleasant after dinner.

  • Can I drink herbal tea immediately after eating?

    For most people, enjoying an ordinary cup of caffeine-free herbal tea after a meal is simply a matter of preference. If you have a diagnosed digestive condition, take medication, are pregnant, or have been advised to follow particular dietary restrictions, check with an appropriate healthcare professional about herbs that may not be suitable for you.

  • Does digestive tea contain caffeine?

    Many digestive-style herbal teas are naturally caffeine-free because they are made from herbs such as peppermint, ginger, fennel, chamomile, lemon balm or anise rather than traditional tea leaves.

    Always check the ingredients, however. A blend containing green tea, black tea, white tea, matcha or yerba mate will contain caffeine.

  • What is the best tea after dinner before bed?

    Chamomile, lemon balm, lemon verbena, peppermint and fennel are all caffeine-free options. If you primarily want an evening tea, you may also like our guide to the Best Tea for Sleep and Relaxation.

Build Your After-Meal Tea Ritual

The best tea for digestion isn’t necessarily the tea with the longest list of herbs or the strongest flavour.

It is the one you actually enjoy making part of your routine.

Choose peppermint if you like freshness.

Choose ginger if you want warmth.

Choose fennel or anise if you enjoy naturally sweet, aromatic flavours.

Choose lemon balm or lemon verbena for something lighter and citrusy.

Choose chamomile when you want your after-dinner tea to transition into a calm evening.

Or choose a well-balanced blend that combines several complementary herbs.

Our top after-meal picks

Best all-round blend:
PROVENCE D’ANTAN Organic Lemon Digestion Herbal Tea

Best fresh option:
Organic Peppermint Tea

Best warming option:
Organic Ginger Root Infusion

Best aromatic blend:
Provence d’Antan Organic Apple, Ginger & Fennel Infusion

Best loose-leaf herbal blend:
Stay Strong Organic Herbal Tea – Anise, Fennel, Apple & Mint

Explore all Wellness Teas at Leaf & Spice →

A warm cup after a meal takes only a few minutes to prepare, but it can turn the end of lunch or dinner into one of the most enjoyable parts of your daily tea ritual.


This article is intended for general information and enjoyment of tea and is not medical advice. Persistent or severe bloating, abdominal pain, unexplained weight loss, vomiting, blood in the stool or a significant change in digestive symptoms should be discussed with a healthcare professional. Herbal products may also interact with medicines or may not be suitable during pregnancy or for some medical conditions.

Continue reading

Grilled Lemon Garlic Chicken Skewers with Mediterranean Vegetables

Grilled Lemon Garlic Chicken Skewers with Mediterranean Vegetables

Grilled Lemon Garlic Chicken Skewers with Mediterranean Vegetables

Grilled Lemon Garlic Chicken Skewers with Mediterranean Vegetables

Juicy chicken, lightly charred vegetables, fresh citrus and aromatic Mediterranean herbs make these grilled lemon garlic chicken skewers an ideal recipe for summer.

The chicken is marinated with olive oil, lemon juice and BBQ King Citrus Rub, while the vegetables are seasoned separately with BBQ King Mammamia Rub. Once the skewers come off the grill, they are brushed with warm garlic butter for an extra layer of rich, savoury flavour.

The result is a colourful, complete main course that feels special without requiring complicated preparation. Serve the skewers with flatbread, grilled corn, roasted potatoes, a fresh salad or a simple yoghurt dip.

Grilled Chicken Skewers at a Glance

Recipe detailsInformation
Preparation time

20 minutes

Marinating time

30 minutes

Cooking time12–15 minutes
Total timeApproximately 1 hour
Servings4
DifficultyEasy
Best cooking methodOutdoor grill or barbecue
Alternative methodsOven or air fryer

Loose leaf tea

Why These Chicken Skewers Are Perfect for a Summer BBQ

Chicken and vegetable skewers are one of the easiest ways to prepare a complete meal on the grill. They cook relatively quickly, can be prepared in advance and are easy to serve at a barbecue where people may be eating at different times.

This recipe works particularly well because it combines several complementary flavours:

  • Lemon adds brightness and freshness.
  • Garlic gives the chicken a familiar savoury flavour.
  • Rosemary and thyme bring Mediterranean character.
  • Bell peppers and red onion become sweeter as they grill.
  • Zucchini remains light and slightly juicy.
  • Garlic butter adds richness just before serving.

The skewers also look impressive on a serving platter. The combination of golden chicken, red and yellow peppers, green zucchini and purple-red onion makes the recipe naturally colourful without requiring elaborate presentation.

For more ideas on matching seasonings with different types of meat, read our complete guide on how to season meat for BBQ.

Ingredients You Will Need

For the Chicken and Vegetable Skewers

For the Chicken and Vegetable Skewers

  • 600 g boneless, skinless chicken thighs or chicken breast
  • 1 red bell pepper
  • 1 yellow bell pepper
  • 1 medium zucchini
  • 1 large red onion
  • 3 tablespoons olive oil, divided
  • 1–2 tablespoons BBQ King Citrus Rub
  • 2 teaspoons BBQ King Mammamia Rub
  • Juice of half a lemon
  • Freshly grated zest from half a lemon, optional
  • Fresh parsley for serving
  • Wooden or metal skewers

For the Garlic Finishing Butter

For the Garlic Finishing Butter

  • 50 g softened butter
  • 1–2 teaspoons Barbecue Supervisor Garlic Butter Spice Mix
  • A small amount of finely grated lemon zest
  • 1 teaspoon chopped fresh parsley, optional

Loose leaf tea

For the Optional Yoghurt Dip

  • 150 g Greek yoghurt
  • 1 teaspoon Barbecue Supervisor Garlic Butter Spice Mix
  • 1–2 teaspoons lemon juice
  • 1 tablespoon chopped fresh parsley
  • A small drizzle of olive oil, optional

The Spices Used in This Recipe

Loose leaf tea

BBQ King Citrus Rub

Used in the chicken marinade. Lemon peel, orange peel, rosemary, garlic, thyme, black pepper and sea salt create a fresh Mediterranean flavour that works especially well with chicken.

shop now

Loose leaf tea

BBQ King Mammamia Rub

Used to season the bell peppers, zucchini and red onion. Its combination of fennel, sage, thyme, garlic, mustard and bay leaf complements grilled vegetables, chicken and potatoes.

shop now

Loose leaf tea

Barbecue Supervisor Garlic Butter Spice Mix

Used to prepare the finishing butter and optional yoghurt dip. It can also be mixed into sour cream, mayonnaise or olive oil and served with bread, potatoes, corn and grilled vegetables.

shop now

Explore all BBQ and grill spices

Chicken Thighs or Chicken Breast?

Both chicken thighs and chicken breast can be used in this recipe, but they produce slightly different results.

Chicken Thighs

Chicken Thighs

Boneless chicken thighs are the easiest option if your main priority is juicy, tender meat. Their slightly higher fat content makes them more forgiving on the grill, particularly when cooking several skewers for a larger group.

Chicken thighs also remain tender if they cook for a minute or two longer than planned.

Chicken Breast

Chicken Breast

Chicken breast is leaner and has a lighter flavour. It absorbs the lemon and herb marinade very well, but it can dry out more quickly if the cubes are too small or the grill is excessively hot.

When using chicken breast, cut it into generous, evenly sized pieces and begin checking the temperature early.

Why Citrus Rub Works So Well with Chicken

Chicken has a mild flavour, which makes it suitable for fresh herbs, citrus peel, garlic and moderate amounts of pepper.

BBQ King Citrus Rub brings these ingredients together in one blend. The lemon and orange peel add a bright citrus aroma without relying only on lemon juice. Rosemary and thyme provide a Mediterranean herb flavour, while garlic, black pepper and sea salt form the savoury base of the marinade.

Using both citrus peel and fresh lemon juice creates a more complete flavour. The juice brings acidity and freshness, while the dried peel in the seasoning remains aromatic during grilling.

Because the rub already contains sea salt, taste the finished food before adding any additional salt.

How to Prepare the Lemon Garlic Chicken Marinade

How to Prepare the Lemon Garlic Chicken Marinade

Cut the chicken into pieces approximately 3–4 cm wide. Avoid making the cubes too small because small pieces cook quickly and are more likely to become dry.

Place the chicken in a bowl and add:

  • 1½ tablespoons olive oil
  • Juice of half a lemon
  • 1–2 tablespoons BBQ King Citrus Rub
  • A little fresh lemon zest, if desired

Mix until every piece is evenly coated.

Cover the bowl and refrigerate the chicken for approximately 30 minutes. This gives the citrus, herbs and garlic enough time to flavour the surface of the meat without making the preparation unnecessarily long.

You can marinate the chicken for up to two hours if preparing the recipe in advance. Avoid leaving it in a strongly acidic lemon marinade overnight, as the texture of the outer layer may become too soft.

Always keep marinating chicken refrigerated.

Prepare the Mediterranean Vegetables Separately

Prepare the Mediterranean Vegetables Separately

Cut the red pepper, yellow pepper, zucchini and red onion into pieces that are similar in size to the chicken.

Place the vegetables in a separate bowl. Add:

  • 1½ tablespoons olive oil
  • 2 teaspoons BBQ King Mammamia Rub

Toss everything together until the vegetables are lightly coated.

Seasoning the vegetables separately gives you greater control over the flavour. It also prevents the vegetables from coming into contact with raw chicken before the skewers are assembled.

The Mammamia Rub gives the vegetables a Mediterranean profile with fennel, sage, thyme, garlic, mustard and bay leaf. It works particularly well with peppers, zucchini, onions, aubergine and potatoes.

Loose leaf tea

How to Assemble Chicken and Vegetable Skewers

If you are using wooden skewers, soak them in water for approximately 30 minutes before grilling. This helps reduce scorching, although the exposed ends may still darken over direct heat.

Metal skewers do not need soaking and can be reused. Flat metal skewers are especially useful because the chicken and vegetables are less likely to spin when you turn them.

Thread the ingredients onto each skewer, alternating between:

  1. Chicken
  2. Red pepper
  3. Red onion
  4. Chicken
  5. Zucchini
  6. Yellow pepper

Continue until the skewer is nearly full, leaving a small amount of space at both ends.

Do not compress the ingredients tightly against one another. A little space allows heat to circulate and helps the sides of the chicken cook more evenly.

Try to distribute the chicken evenly between the skewers so they finish cooking at approximately the same time.

Loose leaf tea

Should Chicken and Vegetables Go on the Same Skewer?

Chicken and vegetables can be placed on the same skewer when their pieces are cut to suitable sizes.

Bell peppers, zucchini and onion all work well because they can cook in roughly the same amount of time as medium-sized chicken cubes. The vegetables will soften but should still retain some texture.

For complete control, you can prepare separate chicken and vegetable skewers. This allows you to remove each ingredient from the grill at exactly the right moment. However, mixed skewers are more colourful, convenient and attractive for serving.

How to Grill Lemon Garlic Chicken Skewers

How to Grill Lemon Garlic Chicken Skewers

Preheat the grill to medium-high heat. The cooking surface should be hot enough to create light grill marks, but not so hot that the outside of the chicken burns before the centre is cooked.

Clean the grill grates and lightly oil them if necessary.

Place the skewers over direct heat and grill for approximately 12–15 minutes. Turn them every two or three minutes so the chicken browns evenly on several sides.

Exact cooking time will depend on:

  • The size of the chicken pieces
  • Whether you use chicken breast or thighs
  • The temperature of the grill
  • The type of skewers
  • How closely the ingredients are threaded
  • Whether the grill lid is open or closed

The vegetables should become lightly charred and tender, while the chicken should be golden on the outside and fully cooked in the centre.

Chicken should reach a minimum internal temperature of 74°C or 165°F before serving. Measure the thickest piece with a food thermometer rather than judging doneness only by colour.

How to Avoid Dry Chicken Skewers

Chicken skewers are simple to prepare, but the small pieces can become dry if they are cooked too aggressively.

Follow these tips for juicier chicken:

  • Cut the Chicken into Similar-Sized Pieces

    Even pieces cook at approximately the same speed. If one piece is much smaller than the others, it may become dry before the larger pieces are safely cooked.

  • Do Not Make the Cubes Too Small

    Pieces around 3–4 cm wide are easier to keep juicy than very small cubes. They are also less likely to split when pushed onto the skewer.

  • Use Medium-High Heat

    Maximum heat can burn the herbs, citrus peel and garlic on the surface before the chicken is cooked inside. Medium-high heat gives the chicken time to cook while still developing colour.

  • Turn the Skewers Regularly

    Do not leave the chicken on one side for most of the cooking time. Regular turning encourages even browning and reduces the chance of one surface becoming burned.

  • Do Not Press the Chicken Against the Grill

    Pressing meat does not make it cook faster. It can release juices and increase the chance of sticking.

  • Check the Temperature Early

    Begin checking the thickest chicken pieces before you expect the skewers to be finished. This helps you remove them as soon as they reach a safe temperature.

  • Add Garlic Butter Near the End

    Butter and garlic can burn over strong direct heat. Brush the skewers during the final minute or immediately after removing them from the grill.

How to Make Garlic Finishing Butter

How to Make Garlic Finishing Butter

While the chicken is marinating, place 50 g of softened butter in a small bowl.

Add:

  • 1–2 teaspoons Barbecue Supervisor Garlic Butter Spice Mix
  • A little finely grated lemon zest
  • Chopped parsley, if desired

Mix until evenly combined.

Taste a very small amount and adjust the quantity of seasoning if necessary.

You can prepare the garlic butter several hours in advance and keep it refrigerated. Remove it before grilling so it has enough time to soften.

As soon as the skewers come off the grill, brush them lightly with the prepared butter. The heat from the chicken and vegetables will melt the butter and release the garlic aroma.

Do not completely cover the skewers. A light coating adds richness without hiding the citrus and Mediterranean herb flavours.

Any remaining butter can be served with:

  • Grilled corn
  • Warm flatbread
  • Baked potatoes
  • Roasted potatoes
  • Grilled courgettes
  • Steamed vegetables
  • Toasted baguette
  • Grilled steak

Easy Garlic Yoghurt Dip

Easy Garlic Yoghurt Dip

A cool yoghurt dip balances the warmth of the grilled chicken and the richness of the finishing butter.

Combine the Greek yoghurt, Garlic Butter Spice Mix, lemon juice and chopped parsley in a bowl. Mix well and refrigerate until serving.

For a thinner sauce, add a teaspoon of olive oil or a small amount of cold water. For a thicker dip, use strained Greek yoghurt.

Taste before adding salt because the seasoning blend may already provide enough.

The dip can be made several hours in advance. Stir it again just before serving.

What to Serve with Grilled Chicken Skewers

These Mediterranean chicken skewers can be served as a complete meal with one or two simple side dishes.

  • Flatbread

    Flatbread

    Warm flatbread directly on the grill for approximately 30 seconds per side. Brush it with a small amount of garlic butter before serving.

  • Grilled Corn

    Grilled Corn

    Corn becomes naturally sweet on the grill and works well with both the Citrus Rub and Garlic Butter Spice Mix. Serve it whole or cut each cob into smaller sections.

  • Greek-Style Salad

    Greek-Style Salad

    Prepare a fresh salad with tomatoes, cucumber, red onion, olives, feta cheese and olive oil. Its acidity and freshness balance the grilled chicken.

  • Roasted or Grilled Potatoes

    Roasted or Grilled Potatoes

    Season potatoes with BBQ King Mammamia Rub before roasting or grilling. Their mild flavour works well with the fennel, sage, thyme, garlic and bay leaf in the blend.

  • Lemon Rice

    Lemon Rice

    Simple rice with lemon zest, parsley and olive oil turns the skewers into a more substantial dinner.

  • Couscous

    Couscous

    Couscous is a quick option for busy evenings. Add chopped parsley, cucumber, tomatoes, lemon juice and olive oil for a light Mediterranean side dish.

  • Grilled Vegetables

    Grilled Vegetables

    Aubergine, mushrooms, asparagus and cherry tomatoes can be grilled alongside the skewers. Season them lightly with Mammamia Rub and olive oil.

  • Iced Tea

    Iced Tea

    For a refreshing summer drink, serve the skewers with homemade iced tea. Our guide to making perfect iced tea at home includes simple ratios and flavour combinations for summer meals.

Oven Instructions

Oven Instructions

You can prepare these lemon garlic chicken skewers even when outdoor grilling is not possible.

Preheat the oven to 220°C or 425°F.

Line a large baking tray with baking paper or lightly grease a metal roasting tray. Place the skewers in a single layer, leaving space between them.

Bake for approximately 18–22 minutes, turning them halfway through cooking.

For additional colour, place the skewers under the grill or broiler for the final two or three minutes. Watch them closely because the herbs, garlic and vegetables can darken quickly.

Check the thickest chicken piece with a food thermometer before serving. It should reach at least 74°C or 165°F.

Brush the cooked skewers with garlic butter immediately after removing them from the oven.

Air-Fryer Instructions

Air-Fryer Instructions

Preheat the air fryer to 190°C or 375°F.

Use shorter skewers that fit comfortably inside the basket. Avoid overcrowding, as the hot air needs enough space to circulate.

Cook the skewers for approximately 10–14 minutes, turning them halfway through.

Air-fryer models vary considerably, so begin checking the chicken early. Continue cooking until the thickest pieces reach a safe internal temperature of 74°C or 165°F.

Brush with garlic butter after cooking rather than adding it at the beginning.

You may need to cook the skewers in several batches.

Vegetarian Mediterranean Skewers

Vegetarian Mediterranean Skewers

The same seasonings can be used to prepare a vegetarian version.

Replace the chicken with one or more of the following:

  • Halloumi
  • Firm tofu
  • Large mushrooms
  • Aubergine
  • Extra zucchini
  • Small boiled potatoes
  • Cauliflower florets
  • Plant-based chicken pieces

Season the vegetables and protein with olive oil and BBQ King Mammamia Rub. Citrus Rub can also be added if you want a brighter lemon and herb flavour.

Halloumi should be cut into generous cubes so it does not split when threaded. Firm tofu should be pressed first to remove excess water.

Serve the vegetarian skewers with the same yoghurt dip, garlic butter, salad and flatbread.

For more ideas on building a versatile seasoning collection, read our guide to the essential spices every kitchen needs.

Can You Prepare Chicken Skewers in Advance?

Most of the recipe can be prepared before guests arrive.

  • Up to One Day Before

    • Prepare the garlic butter.
    • Prepare the yoghurt dip.
    • Wash and cut the vegetables.
    • Store everything separately in covered containers in the refrigerator.
  • Up to Two Hours Before

    • Cut and marinate the chicken.
    • Season the vegetables.
    • Soak wooden skewers.
  • Shortly Before Grilling

    • Thread the chicken and vegetables onto the skewers.
    • Preheat the grill.
    • Remove the garlic butter from the refrigerator so it can soften.

    Do not leave raw chicken at room temperature while waiting for the grill. Keep it refrigerated until you are ready to cook.

Storing and Reheating Leftovers

Remove leftover chicken and vegetables from the skewers and transfer them to a covered container.

Refrigerate them as soon as practical after the meal. The cooked chicken can then be used in:

  • Salads
  • Wraps
  • Grain bowls
  • Sandwiches
  • Pasta
  • Couscous
  • Rice dishes
  • Baked potatoes

Reheat leftovers until thoroughly hot. Avoid repeatedly reheating the same portion, as this can affect both texture and food safety.

To prevent the chicken from drying out, reheat it gently with a small spoonful of water, stock or yoghurt sauce.

Fresh, aromatic seasonings make a noticeable difference in simple recipes like this one. To check whether older jars in your cupboard are still delivering enough flavour, read our guide: Do Spices Expire?.

Frequently Asked Questions

  • How long should I grill chicken skewers?

    Chicken skewers usually need approximately 12–15 minutes over medium-high heat. Turn them every two or three minutes and use a food thermometer to confirm that the thickest chicken pieces have reached 74°C or 165°F.

    Cooking time can vary depending on the size of the pieces and the temperature of the grill.

  • Can I use chicken breast instead of chicken thighs?

    Yes. Chicken breast works well with the lemon and citrus marinade, but it is leaner and can dry out more quickly. Cut it into evenly sized pieces and remove it from the grill as soon as it is safely cooked.

  • How long should I marinate lemon garlic chicken?

    Thirty minutes is enough for this recipe. You can marinate it for up to two hours for a stronger flavour.

    Avoid leaving the chicken in the lemon marinade overnight because prolonged exposure to acid can affect its texture.

  • Can I make the skewers without lemon juice?

    Yes. The Citrus Rub already contains lemon and orange peel, so the skewers will still have a citrus aroma without fresh juice.

    You can replace the lemon juice with a small amount of olive oil or use only lemon zest if you prefer less acidity.

  • What vegetables are best for chicken skewers?

    Bell peppers, zucchini and red onion are particularly suitable because they cook in approximately the same amount of time as medium-sized chicken pieces.

    Mushrooms, cherry tomatoes and partly cooked potatoes can also be used.

  • Why are my chicken skewers dry?

    Chicken skewers usually become dry because the pieces are too small, the heat is too high or the meat is cooked for too long.

    Use evenly sized pieces, grill over medium-high rather than maximum heat and check the internal temperature early.

  • Should I put oil on chicken before adding a dry rub?

    A small amount of oil helps the seasoning coat the chicken evenly and reduces sticking. You do not need a large quantity. Approximately 1½ tablespoons is enough for 600 g of chicken in this recipe.

  • Can I cook chicken and vegetables on the same skewer?

    Yes, provided the ingredients are cut to suitable sizes. Use medium-sized chicken cubes and vegetables that cook quickly, such as peppers, zucchini and onion.

    Do not press the ingredients tightly together.

  • What can I use instead of garlic butter?

    You can finish the skewers with lemon juice, olive oil, chopped parsley or a spoonful of yoghurt dip.

    For a dairy-free version, mix the Garlic Butter Spice Mix with olive oil or a dairy-free butter alternative.

  • Can I freeze marinated chicken for this recipe?

    Yes. Combine the raw chicken, olive oil and Citrus Rub before freezing. For the freshest flavour, add the lemon juice after defrosting rather than before freezing.

    Defrost the chicken completely in the refrigerator before assembling and cooking the skewers.

Printable Recipe Card

Grilled Lemon Garlic Chicken Skewers with Mediterranean Vegetables

These juicy grilled chicken skewers combine citrus-marinated chicken, colourful Mediterranean vegetables and homemade garlic finishing butter. Serve them with yoghurt dip, salad, grilled corn or warm flatbread.

Preparation time: 20 minutes
Marinating time: 30 minutes
Cooking time: 12–15 minutes
Total time: Approximately 1 hour
Servings: 4
Course: Main course
Cooking method: Grill or barbecue
Cuisine: Mediterranean-inspired

Ingredients

Chicken Skewers

  • 600 g boneless, skinless chicken thighs or chicken breast
  • 1 red bell pepper
  • 1 yellow bell pepper
  • 1 medium zucchini
  • 1 large red onion
  • 3 tablespoons olive oil, divided
  • 1–2 tablespoons BBQ King Citrus Rub
  • 2 teaspoons BBQ King Mammamia Rub
  • Juice of half a lemon
  • Fresh parsley
  • Wooden or metal skewers

Garlic Finishing Butter

  • 50 g softened butter
  • 1–2 teaspoons Barbecue Supervisor Garlic Butter Spice Mix
  • A little grated lemon zest
  • Chopped parsley, optional

Yoghurt Dip

  • 150 g Greek yoghurt
  • 1 teaspoon Barbecue Supervisor Garlic Butter Spice Mix
  • 1–2 teaspoons lemon juice
  • 1 tablespoon chopped parsley

Instructions

  1. If using wooden skewers, soak them in water for approximately 30 minutes.
  2. Cut the chicken into evenly sized pieces approximately 3–4 cm wide.
  3. Place the chicken in a bowl. Add 1½ tablespoons olive oil, lemon juice and BBQ King Citrus Rub. Mix until evenly coated.
  4. Cover and refrigerate the chicken for approximately 30 minutes.
  5. Cut the peppers, zucchini and onion into pieces similar in size to the chicken.
  6. Place the vegetables in a separate bowl. Add the remaining olive oil and BBQ King Mammamia Rub. Toss to coat.
  7. Prepare the garlic butter by combining the softened butter, Garlic Butter Spice Mix, lemon zest and parsley.
  8. Prepare the dip by mixing the Greek yoghurt, Garlic Butter Spice Mix, lemon juice and parsley. Refrigerate until serving.
  9. Preheat the grill to medium-high heat.
  10. Thread the chicken and vegetables alternately onto the skewers. Leave a little space between the ingredients.
  11. Grill for approximately 12–15 minutes, turning every two or three minutes.
  12. Check the thickest chicken pieces with a food thermometer. They should reach at least 74°C or 165°F.
  13. Remove the skewers from the grill and immediately brush them with the prepared garlic butter.
  14. Sprinkle with fresh parsley and serve with the yoghurt dip, flatbread, salad, grilled corn or potatoes.

Recipe Notes

  • Chicken thighs are more forgiving and generally remain juicier on the grill.
  • When using chicken breast, avoid cutting the pieces too small.
  • Do not add the garlic butter early because the butter and garlic may burn.
  • The vegetables can be placed on separate skewers if you prefer greater control over cooking time.
  • Start with a moderate amount of seasoning because the rubs already contain salt.
  • Short air-fryer skewers can be cooked at 190°C or 375°F for approximately 10–14 minutes.
  • Oven-baked skewers can be cooked at 220°C or 425°F for approximately 18–22 minutes.

Bring Mediterranean Flavour to Your Next Barbecue

The right seasoning can turn simple chicken and vegetables into a colourful summer meal with very little additional preparation.

Use Citrus Rub for fresh lemon and herb flavour, Mammamia Rub for aromatic Mediterranean vegetables and Garlic Butter Spice Mix for a rich finishing butter or creamy dip.

Discover the citrus, herb and garlic seasonings used in this recipe.

Continue reading

Do Spices Expire

Do Spices Expire? Shelf Life, Freshness Tests and Storage Tips

Do Spices Expire

Do Spices Expire? Shelf Life, Freshness Tests and Storage Tips

You open a jar of paprika, notice that the best-before date passed several months ago and immediately wonder: do spices expire, or are they still safe to use?

The answer is slightly more complicated than a simple yes or no.

Dried spices and herbs do not normally spoil as quickly as fresh food. When they are kept dry and stored correctly, they usually lose their aroma, colour and flavour gradually rather than becoming unusable on a particular date.

A jar of old cumin may not make a meal unsafe, but it might contribute almost no flavour. A faded oregano may still look recognisable while adding little of the fresh, herbaceous aroma you expect. Moisture, mould, insects or an unusual smell, however, are different matters and mean the product should be discarded.

As a general quality guide, whole spices usually remain aromatic longer than ground spices. Ground spices often retain good quality for around two to three years, while dried herbs and mixed seasonings may begin losing their character sooner. These are general guidelines rather than guaranteed deadlines because storage conditions, packaging and the individual ingredient all make a difference.

This guide explains how long spices last, how to recognise old spices and the best way to store spices so that they stay fragrant for as long as possible.

Do Spices Actually Expire?

Spices expire in the sense that they eventually stop delivering the colour, aroma and flavour they were intended to provide.

However, there is an important difference between:

  • a spice that has lost its flavour;
  • a spice that has passed its best-before date;
  • and a spice that has become contaminated or unsafe.

Most commercially dried spices contain very little moisture. This makes it difficult for the microorganisms associated with rapidly perishable foods to grow under normal storage conditions.

Over time, exposure to oxygen, heat, light and humidity breaks down the volatile oils and aromatic compounds responsible for a spice’s flavour. The spice becomes weaker, flatter and less distinctive.

This means that a spice can be past its best without being visibly spoiled. You may need to add more of it to a recipe, but doing so rarely restores the brighter and more complex flavour of a fresh product.

Best-Before Date Versus Food Safety

Best-Before Date Versus Food Safety

The date printed on most dried spice packaging is generally a best-before date, not a use-by date.

A best-before date primarily concerns quality. After this date, a correctly stored product may still be suitable to use, although its taste, fragrance, colour or texture may have deteriorated. A use-by date, in contrast, is associated with food safety and should be followed more strictly.

When checking an older spice, look at more than the printed date. Consider:

  • Whether the container has remained tightly sealed
  • Whether moisture could have entered
  • Whether the colour still looks natural
  • Whether the spice produces a strong aroma
  • Whether there are insects, webbing or unusual particles
  • Whether the product smells musty, sour or otherwise abnormal
  • Whether the packaging provides special instructions

The best-before date is a useful starting point, but your senses can tell you more about the spice’s present condition.

Spice Shelf Life at a Glance

The following spice shelf-life table provides practical quality guidelines for home kitchens.

Product typeTypical quality periodWhat usually changes first
Whole spicesApproximately 3–4 years

Aroma becomes weaker when crushed

Ground spicesApproximately 2–3 years

Fragrance, colour and intensity fade

Dried herbsApproximately 1–3 yearsLeaves become dull and less aromatic
Spice blends and BBQ rubsApproximately 1–2 yearsOverall flavour becomes flat or unbalanced
Pure saltVery long-lasting when kept dryClumping or quality changes caused by moisture
Seasoned or flavoured saltCheck the individual productAdded herbs, spices or flavourings lose freshness
Seeds used as spicesApproximately 3–4 years when wholeOils gradually oxidise and aroma weakens
Chilli powdersApproximately 1–3 yearsColour, fruitiness and heat become less vivid

These periods should not be treated as strict disposal dates. A frequently opened jar stored beside a cooker may fade considerably faster than a tightly sealed product kept in a dark, cool cupboard. Extension guidance similarly places whole spices at around three to four years, ground spices at roughly two to four years and herbs or many seasoning blends at approximately one to three years.

How Long Do Whole Spices Last

How Long Do Whole Spices Last?

Whole spices usually have the longest flavour life.

Examples include:

  • Whole peppercorns
  • Cinnamon sticks
  • Cloves
  • Cardamom pods
  • Star anise
  • Coriander seeds
  • Cumin seeds
  • Mustard seeds
  • Nutmeg
  • Fennel seeds
  • Allspice berries

A whole spice has less exposed surface area than a ground spice. Its aromatic oils remain protected inside the seed, bark, berry or pod until it is crushed or ground.

Under suitable conditions, whole spices can often retain good quality for approximately three to four years. Some particularly robust spices may remain aromatic for longer, while delicate or oily seeds may lose freshness sooner.

To test a whole spice, break, crush or grate a small amount. A jar of peppercorns may smell weak while closed but release a strong fragrance when one peppercorn is crushed.

Fresh whole spices should produce a clear, recognisable aroma. If crushing them produces almost no scent, they are unlikely to contribute much to your cooking.

Buying whole spices and grinding small amounts as needed can provide better flavour while also extending the useful life of your spice collection.

Loose leaf tea

How Long Do Ground Spices Last?

Ground spices generally maintain their best quality for approximately two to three years, although the exact period depends on the ingredient and storage conditions.

Common ground spices include:

Grinding dramatically increases the amount of the spice exposed to air. This accelerates the loss of volatile oils and other flavour compounds.

Highly aromatic ground spices often reveal their age quickly. Fresh cumin should smell earthy and warm. Fresh paprika should have a noticeable sweet, peppery or smoky aroma. Fresh cinnamon should smell immediately sweet and woody.

If you need several spoonfuls of an old spice to achieve the effect that one teaspoon once provided, replacing it will usually produce better results than continuing to increase the quantity.

Explore Everyday Spices for versatile seasonings used in everyday cooking, or browse the wider spice collection when replacing several older ingredients.

Do Dried Herbs Expire

Do Dried Herbs Expire?

Dried herbs lose their quality in much the same way as spices.

Because dried herbs are usually made from leaves, they are often more delicate than whole seeds, bark or roots. Their colour and volatile aromatic compounds can fade relatively quickly.

Popular dried herbs include:

Dried herbs generally remain useful for around one to three years. However, herbs that are opened frequently or stored in transparent jars near strong light may become dull much sooner.

To test a dried herb, place a small pinch in your palm and gently rub it between your fingers. This releases some of its remaining aromatic oils.

Fresh dried oregano should smell immediately herbaceous and slightly peppery. Rosemary should produce a pine-like, resinous aroma. Thyme should smell earthy, green and gently floral.

A herb that smells mostly like dry grass or paper is unlikely to improve a sauce, soup or marinade.

Browse Leaf & Spice dried herbs when replacing Mediterranean kitchen essentials such as oregano, rosemary and thyme.

How Long Do Spice Blends and BBQ Rubs Last

How Long Do Spice Blends and BBQ Rubs Last?

Spice blends and BBQ rubs generally provide their most expressive flavour for approximately one to two years.

A blend can contain numerous ingredients with different shelf lives, including:

  • Ground spices
  • Dried herbs
  • Salt
  • Sugar
  • Garlic
  • Onion
  • Citrus peel
  • Dried vegetables
  • Mustard
  • Pepper
  • Chilli
  • Smoke flavouring

The finished blend does not necessarily last as long as its most stable ingredient. Its quality depends heavily on the more delicate herbs, aromatic powders and flavouring ingredients.

A pure salt-based seasoning may remain technically usable for a long time, but its garlic, paprika, herbs or citrus could become weak much sooner.

Old blends can also become unbalanced. Pepper, chilli and salt may still be detectable after the fresher herb, citrus or garlic notes have faded. The seasoning then tastes harsher, saltier or flatter than it originally did.

For the most aromatic results, replace BBQ rubs when:

  • The blend no longer smells strongly after shaking the container
  • Paprika-based rubs have lost their vivid colour
  • Herbs have turned dull brown
  • The flavour is dominated only by salt
  • The rub has formed hard, moisture-related lumps
  • You cannot remember when the package was opened

Fresh rubs make a noticeable difference when seasoning meat because they create the aromatic outer layer that meets the heat of the grill. Our guide to how to season meat for BBQ explains which spices and rubs work best with chicken, beef, pork, fish and vegetables.

You can also explore the complete BBQ and Grill Spices collection for smoky, spicy, savoury and herbaceous seasoning options.

Do Spice Blends Expire Faster After Opening

Do Spice Blends Expire Faster After Opening?

Opening a spice blend exposes it to fresh air and, potentially, humidity. How quickly it loses flavour depends on how often it is opened and how carefully it is handled.

A blend used several times each week may remain fresher than a neglected blend even though it is opened more often. Frequent use means it is consumed quickly, while an occasional-use blend may remain in the cupboard for several years.

The greater risk comes from introducing moisture.

Never shake a spice jar directly over:

  • A steaming pan
  • A boiling pot
  • A hot grill
  • A bowl producing heavy steam

Steam can enter the holes or opening and condense inside the container. Instead, shake the spice into your palm, a spoon or a small dry bowl before adding it to the food.

Does Salt Expire

Does Salt Expire?

Pure salt is extremely stable and can last for a very long time when kept dry.

Salt is a mineral rather than a dried plant product. It does not lose volatile aromatic oils because it does not contain them.

However, salt can still experience quality problems. Moisture may cause it to clump, while contamination from dirty or wet utensils can make the product unsuitable to use.

Not every salt product is pure salt. Seasoned salts may contain:

  • Dried herbs
  • Chilli
  • Garlic
  • Citrus
  • Smoke flavouring
  • Dried mushrooms
  • Truffle flavour
  • Other spices

In these products, the salt may remain stable while the added ingredients gradually lose their aroma.

For flavoured salt, follow the storage instructions and best-before date provided on the packaging. Use the smell and appearance tests that you would apply to any other seasoning blend.

Explore Gourmet Salt for finishing salts, smoked salts and distinctive varieties designed to add texture and character at the table.

Three Ways to Tell Whether a Spice Is Still Fresh

You do not need specialist equipment to decide whether an older spice is worth keeping. Three simple tests reveal most freshness problems.

The Aroma Test

1. The Aroma Test

Smell is the most useful freshness test.

Open the container and smell the spice. If the aroma is not obvious, place a small amount in your palm and gently rub it with a finger.

For whole spices, crush one piece before smelling it.

A fresh spice should smell clearly like itself. The fragrance does not need to fill the room, but it should be easily recognisable.

Replace the spice when:

  • There is almost no aroma
  • It smells dusty or stale
  • The normal fragrance has been replaced by a musty smell
  • The aroma appears strange, sour or rancid

The Colour Test

2. The Colour Test

Colour is particularly helpful for spices such as:

Faded colour often indicates that light, heat or oxygen has affected the product.

Old paprika can change from a vivid red to a dull brick or brown colour. Green herbs may become grey-green or brown. Turmeric can lose some of its intense golden appearance.

Colour alone is not always enough to make a final decision. Natural spices can vary between harvests, and some ingredients are naturally muted. Compare the appearance with what you remember and combine the colour test with the aroma test.

The Taste Test

3. The Taste Test

When a spice looks and smells normal but you are still uncertain about its potency, taste a tiny amount.

Do not taste a product showing signs of mould, pest contamination, unusual moisture or a suspicious smell.

The taste should be recognisable and relatively immediate. Pepper should have heat, cinnamon should feel warm and sweet, and oregano should have a herbaceous bitterness.

A flat or dusty taste indicates that the spice is past its flavour peak.

Professional storage guidance also recommends using aroma, potency and vibrant colour as the main indicators of whether dried herbs and spices are still making a meaningful contribution to food.

Signs That Spices Should Be Discarded

Loss of aroma is mainly a quality problem. The following signs are more serious and mean the spice should normally be thrown away.

Visible mould

Visible mould

Mould may appear as fuzzy growth, unusual coloured patches or a coating that was not present when the product was purchased.

Do not remove only the visible part and use the rest. Discard the entire package.

Moisture inside the container

Moisture inside the container

Droplets, damp patches or a wet texture indicate that moisture has entered the packaging. This creates conditions in which deterioration and microbial growth become more likely.

Insects or webbing

Insects or webbing

Pantry pests can enter dried food products. Discard spices containing insects, larvae, eggs, web-like material or unexplained debris.

Check nearby flour, rice, pasta, nuts, tea and other dry ingredients because the problem may have spread.

An unusual or unpleasant odour

An unusual or unpleasant odour

A musty, rancid, sour or otherwise abnormal smell is different from simply having a weak aroma. Do not use the spice.

Damaged packaging

Damaged packaging

Discard a product when the container has cracked, the seal has failed or the contents may have been contaminated.

Contact with dirty or wet utensils

Contact with dirty or wet utensils

Avoid placing a wet spoon into a spice jar. If significant moisture or food residue has entered, it is safer to replace the product.

The Best Way to Store Spices

The best way to store spices is in tightly closed containers in a cool, dark and dry location.

A kitchen cupboard, pantry or drawer away from major appliances is usually ideal.

Good spice storage protects products from four main enemies:

  1. Air
  2. Heat
  3. Light
  4. Moisture

Agricultural extension guidance recommends tightly covered containers, dark storage away from sunlight and locations protected from heat and humidity.

  • Use airtight containers

    Keep the original container closed properly after every use. When transferring spices into decorative jars, choose containers with secure lids.

    A beautiful jar is not useful if it allows air and moisture to enter continuously.

  • Keep spices away from direct sunlight

    A sunny windowsill is one of the worst places for colourful spices and dried herbs.

    Light accelerates fading and can damage the aromatic compounds that give spices their flavour.

    A drawer or closed cupboard provides better protection than an open shelf.

  • Keep them away from heat

    Avoid storing spices:

    • Directly above the cooker
    • Beside the oven
    • Above a microwave
    • Near a heating vent
    • Next to a dishwasher
    • In a cupboard that becomes hot during cooking

    The convenient shelf directly above the hob may be the easiest to reach, but it is rarely the best location for maintaining freshness.

  • Protect them from steam

    Do not shake spices over steaming food. The steam can enter the container and cause clumping or moisture damage.

    Measure the required amount away from the cooking area.

  • Use clean, dry utensils

    Always use a clean, completely dry spoon when measuring spices from a jar.

    Do not use the same spoon after it has touched raw meat, a wet sauce or another ingredient.

Storage Mistakes That Make Spices Lose Flavour

Even high-quality spices can become disappointing when stored incorrectly.

  • Keeping them beside the cooker

    Heat from cooking repeatedly warms the jars, accelerating flavour loss.

  • Displaying clear jars in bright light

    Transparent containers look attractive but expose the contents to light. Store them inside a cupboard or use opaque containers.

  • Leaving lids loose

    An imperfect seal allows aromatic compounds to escape and humidity to enter.

  • Buying containers that are too large

    Bulk purchasing only saves money when the spice will be used before its quality declines.

    Buying a smaller amount more frequently is often better for delicate herbs, speciality blends and spices used only occasionally.

  • Topping up old jars

    Do not pour a new spice on top of the remains of an older batch.

    Empty and clean the container first. Make sure it is completely dry before refilling it, and label it with the new opening date.

  • Keeping duplicates in different cupboards

    Duplicate jars make it difficult to rotate stock. You may continue opening a new jar while an older one remains forgotten at the back of a shelf.

Should Spices Be Kept in the Refrigerator?

Most dried herbs and spices do not need to be refrigerated.

A cool, dry cupboard is generally more practical because repeatedly moving a container between cold refrigeration and a warm kitchen can encourage condensation when the jar is opened.

Moisture is one of the main threats to dry spice quality. For everyday use, refrigeration may therefore create more problems than it solves.

Keep spices in the refrigerator only when:

  • The manufacturer specifically recommends it
  • You live in an extremely hot, humid environment
  • The product contains ingredients that require refrigeration
  • The container is genuinely airtight
  • You can prevent condensation from entering when it is opened

Ordinary ground spices, whole spices and dried herbs are usually better stored in a dark pantry or cupboard. Culinary storage guidance similarly recommends cool, dark and dry storage and generally discourages refrigerators where moisture may become a problem.

How to Organise and Rotate a Spice Collection

A well-organised collection makes it easier to use spices while they are still fresh.

  • Add the opening date

    Write the month and year on the bottom of each jar when you open it.

    The printed best-before date tells you about the unopened product, while your own label helps you remember how long the spice has been exposed to air.

  • Put older spices at the front

    Use the same rotation system followed in professional food storage:

    First in, first out.

    Move older jars to the front and place new purchases behind them.

  • Group spices by how you cook

    There is no single correct organisation method. Useful systems include:

    • Alphabetical order
    • Everyday spices
    • Herbs
    • Baking spices
    • Curry and international blends
    • BBQ and grill seasonings
    • Chilli and hot spices
    • Whole spices
    • Gourmet salts

    Grouping products by cooking purpose can be more intuitive than alphabetical order, particularly when you frequently prepare the same type of food.

  • Keep everyday essentials within reach

    Place frequently used products in the most accessible position. Less frequently used speciality spices can go on a separate shelf.

  • Review the collection twice a year

    A practical time to check spices is:

    • At the beginning of the year
    • Before summer grilling season
    • Before autumn and winter cooking
    • Before festive baking

    Smell each spice, clean the shelf and note which essentials should be replaced.

When Should Frequently Used Spices Be Replaced?

The printed date and general shelf-life table provide useful guidance, but frequency of use matters.

Replace a frequently used spice when it no longer delivers the expected result, even when it remains within its stated quality period.

For the best flavour, consider reviewing:

  • Open ground spices after approximately 12–18 months
  • Delicate dried herbs after approximately one year
  • BBQ rubs before each grilling season
  • Baking spices before autumn or festive baking
  • Curry blends when the aroma becomes noticeably flat
  • Whole spices after approximately three years

This does not mean that every product must automatically be discarded at these points. It means that they deserve a quick aroma, colour and taste check.

Five Spices Worth Replacing First

When you do not want to replace an entire spice collection at once, begin with the ingredients where freshness is most noticeable.

  • Paprika

    1. Paprika

    Paprika is often used for colour as well as flavour. An old paprika may look brown and add little beyond dry powder.

    Fresh paprika should have a noticeable pepper aroma and a vivid colour. Smoked paprika should also retain a clear smoky character.

  • Ground Black Pepper

    2. Ground Black Pepper

    Pre-ground black pepper loses its fragrant citrus, pine and floral notes faster than whole peppercorns.

    Replacing an old ground pepper—or switching to whole peppercorns and a mill—can improve almost every savoury meal.

  • Garlic Seasoning

    3. Garlic Seasoning

    Old garlic powder or granulated garlic can become flat, dusty or unpleasantly harsh.

    Fresh garlic seasoning should smell immediately savoury and work across vegetables, meat, pasta, sauces, soups and marinades.

  • Curry Blends

    4. Curry Blends

    Curry powders and blends often contain numerous aromatic ingredients, such as cumin, coriander, turmeric, ginger, cardamom, chilli and fenugreek.

    When their delicate notes fade, the blend can taste dominated by turmeric or bitterness rather than producing a balanced aroma.

    Browse Spice Blends when replacing versatile curry, Mediterranean and international seasoning mixes.

  • Dried Oregano

    5. Dried Oregano

    Oregano is inexpensive, frequently used and noticeably better when fresh.

    Old oregano often smells like dry leaves. Fresh dried oregano should have a strong Mediterranean fragrance when rubbed between your fingers.

  • Other Priorities: Cinnamon and BBQ Rubs

    Cinnamon deserves early replacement when it is used regularly for baking, porridge, hot drinks or desserts. Ground cinnamon should smell sweet and warm as soon as the jar is opened.

    BBQ rubs are also worth checking before grilling season. Their more complex flavour depends on numerous ground spices and herbs remaining balanced.

    For additional ideas on building a useful core collection, read Essential Spices Every Kitchen Needs.

Refresh Your Spice Rack

Has your collection lost its aroma? Begin with a small group of versatile spices that can be used across numerous meals.

Loose leaf tea

Sweet Paprika – Mild Spanish Paprika, 40 g

A mild, versatile paprika for stews, sauces, marinades, roasted vegetables, chicken, potatoes and rice dishes. Paprika is one of the easiest spices to judge by colour and aroma, making it a sensible first replacement.

Shop now

Loose leaf tea

Organic Granulated Garlic, 60 ml

A useful everyday seasoning for pasta, vegetables, soups, sauces, marinades and meat dishes. Granulated garlic is easy to distribute evenly and combines well with pepper, herbs, paprika and salt.

Shop now

Loose leaf tea

Organic Smoked Black Pepper Mill, 105 ml

Whole pepper in a mill retains its character better than pre-ground pepper. This smoked version adds peppery heat and an oak-smoked aroma to grilled food, vegetables, fish and everyday savoury dishes.

Shop now

Loose leaf tea

Organic Green Oregano, 27 g

A Mediterranean essential for tomato sauces, pizza, pasta, vegetables, soups, stews and marinades. Rub a pinch between your fingers before use to release its aroma.

Shop now

Loose leaf tea

Natural Curry Spice Blend, 45 g

A versatile salt-free blend containing warming curry spices. Use it with vegetables, rice, lentils, chicken, coconut-based sauces and homemade curries.

Shop now

Loose leaf tea

BBQ King SPG Rub – Salt, Pepper and Garlic, 70 g

A straightforward combination of three essential seasonings for meat, vegetables, grilling and roasting. It is particularly useful when you want a reliable base seasoning without a long ingredient list.

Shop now

Loose leaf tea

Chimichurri Seasoning Blend, 45 g

A herbaceous blend of garlic, parsley, oregano, pepper, thyme and other complementary ingredients. Use it with grilled meat, roasted vegetables, potatoes, marinades and sauces.

Shop now

Loose leaf tea

Beech Wood Smoked Mediterranean Salt, 60 ml

A finishing salt with a smoky character for grilled food, eggs, vegetables, sauces and dishes that need a subtle barbecue-style flavour.

Shop now

For less familiar flavours, browse Exotic Spices and discover peppers, chillies and aromatic blends inspired by cuisines from around the world.

Frequently Asked Questions

  • Can you use spices after their best-before date?

    Spices can often be used after their best-before date when they have been stored correctly and show no signs of moisture, mould, pests, contamination or unusual odours.

    The main question is whether they still provide enough flavour. Test the aroma, colour and taste before adding them to a recipe.

  • Can expired spices make you ill?

    A dry spice that has simply lost its potency is different from a contaminated spice.

    Discard any product showing mould, moisture, insects, damaged packaging or an abnormal smell. Always follow specific safety and storage instructions printed by the producer.

  • How can you tell if spices are too old?

    Rub a small pinch between your fingers and smell it. If the aroma is weak, dusty or almost absent, the spice is past its flavour peak.

    Also look for faded colour and test a very small amount when there are no signs of spoilage.

  • Do unopened spices expire?

    Unopened spices still lose flavour eventually, but intact packaging slows exposure to air and moisture.

    Check the best-before date, packaging condition and aroma after opening.

  • Do dried herbs expire?

    Dried herbs gradually lose their colour and fragrance. They generally provide their best quality for approximately one to three years, although delicate herbs may fade sooner.

  • Do whole peppercorns expire?

    Whole peppercorns can remain aromatic for several years when stored correctly. Crush one peppercorn to test it. A fresh peppercorn should release a strong peppery aroma.

  • Does cinnamon expire?

    Ground cinnamon gradually loses its sweet, woody fragrance. Cinnamon sticks generally retain their aroma longer because they remain whole.

    Replace cinnamon when it smells dusty, weak or only faintly sweet.

  • Does paprika expire?

    Paprika loses both colour and flavour with age. Old paprika often looks dull or brown and produces little aroma when rubbed.

  • Do BBQ rubs expire?

    BBQ rubs gradually become weaker and may lose their original balance. Salt can remain noticeable after paprika, garlic, herbs and other aromatic ingredients have faded.

    Check opened rubs before every grilling season.

  • Can you make old spices stronger by adding more?

    Adding more may increase basic intensity, but it cannot fully recreate the balanced aroma of a fresh spice.

    Using a large quantity of stale seasoning can also introduce unwanted bitterness or a dusty texture.

  • Is it better to buy spices whole or ground?

    Whole spices usually retain their flavour longer. Ground spices are more convenient and distribute easily through food.

    A practical approach is to buy frequently used spices in ground form and less frequently used aromatic spices whole.

  • How often should you clean out a spice rack?

    Review your spice collection approximately every six months. You do not need to discard everything, but you should check aroma, colour, packaging and opening dates.

Final Thoughts: Do Spices Expire?

So, do spices expire?

They do not usually change from fresh to unusable on one specific day. Instead, they gradually lose the aromatic oils, colour and flavour that make them valuable in cooking.

Whole spices generally stay fragrant longest. Ground spices fade faster, while dried herbs and complex seasoning blends may need more regular replacement.

Keep your spices:

  • Tightly sealed
  • Away from sunlight
  • Away from heat
  • Protected from moisture
  • Labelled with the opening date
  • Organised so older products are used first

Most importantly, trust your senses. A spice should smell, look and taste like the ingredient named on the jar.

If your spice rack no longer releases an inviting aroma when you open the cupboard, it may be time to replace the essentials.

Has your spice rack lost its aroma? Refresh the essentials with fragrant spices and ready-to-use blends from Leaf & Spice.

Continue reading

How to Brew Loose Leaf Tea

How to Brew Loose Leaf Tea: Temperature, Time and Ratios

How to Brew Loose Leaf Tea

How to Brew Loose Leaf Tea: Temperature, Steeping Time and Ratios

Learning how to brew loose leaf tea properly can completely change the way your tea tastes. The same leaves can produce a smooth, aromatic and balanced cup—or a bitter, weak or overly intense one—depending on how much tea you use, the water temperature and how long you allow it to steep.

The good news is that making loose leaf tea is not complicated. Once you understand a few basic brewing principles, you can prepare everything from delicate green tea to robust black tea, fruity infusions and naturally caffeine-free rooibos with confidence.

This loose leaf tea brewing guide explains:

  • How much loose leaf tea to use per cup
  • The ideal tea-to-water ratio
  • The correct tea brewing temperature
  • Recommended tea steeping times
  • How to prepare different types of tea
  • Which teapots, infusers and strainers work best
  • How to avoid the most common brewing mistakes

Loose Leaf Tea Brewing Guide at a Glance

Use the table below as a starting point whenever you prepare loose leaf tea.

Tea typeWater temperatureSteeping time
Black tea90–100°C

3–5 minutes

Green tea70–85°C2–3 minutes
White tea75–85°C3–5 minutes
Herbal tea95–100°C5–10 minutes
Fruit tea95–100°C5–10 minutes
Rooibos tea95–100°C5–8 minutes

These recommendations are a useful general guide. Always check the preparation instructions supplied with the individual tea, as leaf size, ingredients and the style of the blend can affect the ideal temperature, quantity and steeping time.

A light green tea, for example, usually benefits from cooler water and a shorter infusion. A robust black tea can handle hotter water and a slightly longer steep.

What You Need to Brew Loose Leaf Tea

You do not need expensive equipment to make good loose leaf tea. A few simple tools are enough.

Loose leaf tea

Loose leaf tea

Start with a tea that suits your taste and the time of day.

You can explore:

Loose leaf tea

Fresh water

Tea is mostly water, so water quality has a noticeable effect on the finished drink.

Use fresh, cold water whenever possible. Heavily chlorinated or strongly mineralised water can mask the more delicate aromas in tea.

Avoid repeatedly boiling the same water. Freshly drawn water generally produces a brighter and more enjoyable cup.

A temperature-controlled kettle

A kettle

A temperature-controlled kettle is convenient, especially if you regularly brew green or white tea. However, an ordinary kettle also works.

After boiling, allow the water to cool briefly before pouring it over delicate leaves.

As a rough guide:

  • Around one minute of cooling can bring the water closer to the black-tea range.
  • Several minutes of cooling may be needed for green or white tea.
  • Pouring the water into another vessel first can help it cool more quickly.

A tea infuser or strainer

A tea infuser or strainer

The leaves need enough space to expand and move through the water. A roomy basket infuser is therefore usually better than a very small tea ball.

Browse the tea infusers and strainers available from Leaf & Spice if you want a simple reusable option for mugs and teapots.

A cup or teapot

A cup or teapot

You can brew loose leaf tea directly in a mug or prepare several servings in a teapot.

A teapot is especially practical when:

  • Preparing tea for several people
  • Brewing larger quantities
  • Serving tea at the table
  • Re-steeping the same leaves
  • Creating a slower tea ritual

Explore the Leaf & Spice collection of teapots for loose leaf tea.

A timer

A timer

Tea can change quickly during the final minute of steeping. Using a timer helps you get consistent results and prevents delicate tea from becoming bitter.

Optional kitchen scale

Optional kitchen scale

A teaspoon is convenient, but tea leaves differ considerably in size and density.

One teaspoon of tightly rolled tea may weigh much more than one teaspoon of large white tea leaves. A small digital scale gives you a more accurate tea-to-water ratio, particularly when you are trying a tea for the first time.

How Much Loose Leaf Tea Should You Use Per Cup?

A good general starting point is:

2–3 grams of loose leaf tea per 250 ml of water.

This is approximately one level teaspoon for many black and green teas. However, the volume can vary considerably.

Large, light leaves take up more room, while finely cut or tightly rolled leaves are denser. Herbal and fruit teas may also contain larger pieces of fruit, flowers, bark, spices or roots, so they often require a more generous spoonful.

Loose leaf tea quantity by cup size

Water volumeGeneral starting amount
200 ml

2 g

250 ml

2–3 g

350 ml

3–4 g

500 ml4–6 g
1 litre8–12 g

For fruit infusions and blends with large ingredients, you may need approximately 12–20 grams per litre.

The instructions on the individual tea should always take priority over a general ratio.

The Ideal Tea-to-Water Ratio

The best tea-to-water ratio depends on the tea and your personal preferences, but the following formula works well for everyday brewing:

1 gram of tea for every 100 ml of water

This means:

  • 2.5 g for a 250 ml mug
  • 5 g for a 500 ml teapot
  • 10 g for a 1 litre teapot

You can then adjust the ratio after tasting the tea.

If your tea tastes too weak

Use slightly more tea leaves rather than dramatically increasing the steeping time.

Longer steeping can extract more tannins and stronger flavours without necessarily improving the tea’s aroma or balance.

If your tea tastes too strong

Reduce the quantity of leaves, shorten the steeping time or use slightly cooler water.

Change only one variable at a time. This makes it easier to understand what improves the result.

How to Make Loose Leaf Tea Step by Step

The following method works for most loose leaf teas.

  • Use fresh water

    1. Use fresh water

    Fill your kettle with the amount of fresh water you need. Avoid boiling considerably more water than necessary.

  • Heat the water to the correct temperature

    2. Heat the water to the correct temperature

    Use hotter water for black, herbal, fruit and rooibos teas. Use cooler water for green and white teas.

    Water temperature is one of the most important parts of learning how to make loose leaf tea properly.

  • 3. Warm the cup or teapot

    Pour a little hot water into your cup or teapot, swirl it around and discard it.

    Preheating is optional, but it helps maintain a stable brewing temperature—particularly when using a thick ceramic or cast-iron teapot.

  • Measure the tea

    4. Measure the tea

    Start with approximately 2–3 grams per 250 ml cup. Use more for bulky fruit or herbal blends if recommended.

  • Place the leaves in an infuser or teapot

    5. Place the leaves in an infuser or teapot

    Give the leaves enough room to open.

    Avoid packing large tea leaves into a tiny infuser. Restricted leaves cannot circulate through the water as freely, which may result in uneven extraction.

  • Pour the water over the tea

    6. Pour the water over the tea

    Pour the heated water directly over the leaves so they are fully immersed.

  • Start your timer

    7. Start your timer

    Use the recommended steeping time for the tea type. Taste the tea near the lower end of the suggested range when preparing a new blend.

  • Remove the leaves

    8. Remove the leaves

    Take out the infuser or pour the tea through a strainer.

    Do not leave the leaves sitting in the water unless you want the tea to continue becoming stronger.

  • Taste before adding anything

    9. Taste before adding anything

    Taste the tea plain first. This allows you to understand its natural flavour and decide whether it needs milk, lemon, honey or another addition.

Tea Brewing Temperature Chart

Using the correct temperature helps extract flavour and aroma without overwhelming the tea.

70–85°C: delicate teas

This range is generally suitable for:

  • Green tea
  • Delicate green tea blends
  • White tea
  • Some mixed green and white teas

Cooler water can help preserve fresh, floral and gently vegetal flavours.

90–100°C: stronger teas and infusions

This range generally works well for:

  • Black tea
  • Herbal tea
  • Fruit tea
  • Rooibos
  • Chai-style blends
  • Blends containing roots, bark or larger dried fruit pieces

These ingredients often need hotter water to release their full flavour.

Tea Steeping Time Chart

Tea typeStart tasting afterTypical maximum
Green tea2 minutes

3 minutes

Black tea3 minutes5 minutes
White tea3 minutes5 minutes
Rooibos tea5 minutes8 minutes
Herbal tea5 minutes10 minutes
Fruit tea5 minutes10–12 minutes

A longer steep does not always mean a better or stronger cup. For black and green tea, using more leaves usually produces a better strong tea than leaving the same leaves in the water for too long.

Herbal and fruit infusions are generally more forgiving and can often be steeped longer without becoming unpleasantly bitter.

How to Brew Black Tea

How to Brew Black Tea

Black tea is one of the easiest loose leaf teas to prepare. Its fully oxidised leaves can handle hotter water and usually produce a rich, aromatic cup.

Recommended method

  • Tea: 2–3 g per 250 ml
  • Water temperature: 90–100°C
  • Steeping time: 3–5 minutes

Begin with three minutes if you plan to drink the tea plain. Allow it to steep a little longer if you prefer a stronger cup or plan to add milk.

For a fruitier black tea, try Blackberry Tango Black Tea with Assam and Wild Berries.

How to prevent bitter black tea

Black tea may taste bitter when:

  • Too many leaves are used
  • The tea is steeped too long
  • Finely cut leaves are treated like large whole leaves
  • The brewed tea is left sitting on the leaves

Remove the leaves promptly and adjust the amount on your next brew.

How to Brew Green Tea

How to Brew Green Tea

Green tea requires a little more care than black tea, but it is easy to prepare once you stop pouring fully boiling water directly over the leaves.

Recommended method

  • Tea: 2–3 g per 250 ml
  • Water temperature: 70–85°C
  • Steeping time: 2–3 minutes

Start at approximately 75–80°C for a delicate green tea. Stronger or tightly rolled green teas may work well closer to 85°C.

Why green tea sometimes tastes bitter

The most common reason is water that is too hot. Excessive steeping time can also produce an overly sharp or astringent cup.

If your green tea tastes bitter:

  1. Reduce the water temperature.
  2. Shorten the steeping time.
  3. Use slightly fewer leaves.
  4. Do not squeeze or press the leaves after brewing.

Read our guide to the benefits of green tea to learn more about the different ways green tea can fit into your daily routine.

Is matcha brewed in the same way?

No. Matcha is a powdered green tea that is whisked into water rather than steeped and removed.

Our guide to what matcha tea is explains how matcha differs from ordinary loose leaf green tea and how to prepare it.

How to Brew White Tea

How to Brew White Tea

White tea has a delicate character and often consists of large, light leaves or buds.

Recommended method

  • Tea: 2–3 g per 250 ml
  • Water temperature: 75–85°C
  • Steeping time: 3–5 minutes

Because white tea leaves can be bulky, one teaspoon may not always be enough. Use a scale when possible or measure one to two loose teaspoons depending on leaf size.

A blend such as From Paris with Love Green and White Tea should be prepared gently because it combines two delicate tea styles.

Avoid using aggressively boiling water unless the individual product instructions specifically recommend it.

How to Brew Herbal Tea

How to Brew Herbal Tea

Herbal tea is technically an infusion rather than a traditional tea because it may be made from flowers, leaves, seeds, roots, bark or spices rather than leaves of the tea plant.

Recommended method

  • Tea: 2–4 g per 250 ml
  • Water temperature: 95–100°C
  • Steeping time: 5–10 minutes

Herbal ingredients generally need hot water and a longer steep to release their flavour.

For an evening infusion, Alveus Calm Down Organic Herbal Tea is an example of a loose herbal blend designed for a slower tea ritual.

You can find more caffeine-free ideas in our guide to the best tea for sleep and relaxation.

Should herbal tea be covered while steeping?

Covering the cup or teapot can help retain heat and aromatic steam. This is particularly useful for blends containing mint, lavender, citrus peel or other aromatic ingredients.

How to Brew Fruit Tea

How to Brew Fruit Tea

Fruit tea usually contains dried fruit, berries, flowers, spices or flavouring ingredients. These pieces are often larger than ordinary tea leaves, so fruit blends may require more tea per cup.

Recommended method

  • Tea: 3–5 g per 250 ml
  • Water temperature: 95–100°C
  • Steeping time: 5–10 minutes

Some dense fruit blends benefit from 10–12 minutes of steeping. Check the preparation instructions for the individual tea.

Candy Apple Fruit Tea with Apple, Caramel and Vanilla is an example of a substantial fruit blend that benefits from hot water and a generous infusion.

Fruit tea can also be chilled and served over ice. For cold-brewing methods, serving ratios and summer recipes, read our guide on how to make perfect iced tea at home.

How to Brew Rooibos Tea

How to Brew Rooibos Tea

Rooibos is a naturally caffeine-free infusion from South Africa with a smooth, gently sweet and sometimes slightly earthy flavour.

It is more tolerant of high temperatures and longer steeping times than green or white tea.

Recommended method

  • Tea: 2–3 g per 250 ml
  • Water temperature: 95–100°C
  • Steeping time: 5–8 minutes

Rooibos can usually be steeped a little longer if you prefer a stronger flavour. It is enjoyable plain but also works well with milk, honey, lemon or warming spices.

For a richer dessert-inspired option, try Organic Rooibos Cinnamon Roll.

How to Brew Premium Tea Blends

How to Brew Premium Tea Blends

Premium tea blends may combine:

  • Black and green tea
  • Green and white tea
  • Tea leaves and fruit
  • Tea and herbs
  • Rooibos and spices
  • Flowers, citrus peel or natural flavourings

When a blend contains several ingredients, the correct brewing temperature usually depends on its most delicate tea leaves.

For example, a blend containing green and white tea should normally be brewed more gently than a fruit infusion containing no traditional tea leaves.

The individual preparation instructions are especially important for mixed blends. Explore the premium tea blends collection to find combinations beyond traditional single-style teas.

Can Loose Leaf Tea Be Steeped More Than Once?

Many loose leaf teas can be steeped more than once.

Green, white and some high-quality black teas often continue releasing flavour during a second infusion. The second cup may taste softer, lighter or reveal different aromatic notes.

How to re-steep tea leaves

  1. Remove the leaves completely after the first infusion.
  2. Keep them in the infuser or teapot.
  3. Add fresh water at the appropriate temperature.
  4. Increase the next steep by approximately 30–60 seconds.
  5. Taste and adjust.

Some teas can produce two or three enjoyable infusions. Others lose most of their flavour after the first cup.

Herbal and fruit blends can be re-steeped, but the second infusion is often considerably lighter because many of their soluble flavours are released during the first long brew.

Do not leave wet tea leaves sitting at room temperature for an extended period. Re-steep them reasonably soon after the first infusion.

Common Loose Leaf Tea Brewing Mistakes

  • Using boiling water for every tea

    Boiling water works well for black, herbal, fruit and rooibos tea, but it can overwhelm delicate green or white tea.

    Match the temperature to the tea type.

  • Using too much tea

    More tea does not automatically produce a better drink. Excess leaves can make black or green tea overly intense and astringent.

    Begin with the standard ratio and adjust gradually.

  • Steeping for too long

    Over-steeping is one of the most common causes of bitter tea.

    Set a timer and remove the leaves completely once the recommended time has passed.

  • Using too little tea and steeping it longer

    This often produces a thin but bitter drink.

    For a fuller flavour, use a little more tea while keeping the steeping time within the recommended range.

  • Using an infuser that is too small

    Tea leaves need room to expand. A tightly packed tea ball may prevent the water from circulating evenly around larger leaves.

    Choose a basket infuser or teapot with a roomy removable filter.

  • Leaving the infuser in the cup

    If the leaves remain in the water, the tea continues to extract. This may be acceptable for some herbal infusions, but black and green tea can quickly become too strong.

  • Ignoring the product instructions

    General charts are helpful, but every blend is different.

    A fine black tea, large white tea, dense fruit infusion and herbal blend containing roots will not behave in exactly the same way.

  • Judging the tea after only one attempt

    Your first cup gives you a starting point. Adjust one variable during the next brew:

    • More or less tea
    • Hotter or cooler water
    • A shorter or longer steep

    After two or three attempts, you will usually find the ratio that suits your taste.

Teapot, Infuser or Tea Strainer: Which Is Best?

The best brewing tool depends on how much tea you prepare and how you like to drink it.

Basket infuser

A basket infuser is the most practical choice for everyday brewing.

It:

  • Fits inside a mug or teapot
  • Gives leaves room to expand
  • Is easy to remove at the correct time
  • Is simple to clean
  • Works with most tea types

Tea ball or tea egg

A tea ball is compact and convenient, but it works best with smaller tea leaves.

Avoid overfilling it. The leaves should have enough room to move as they absorb water.

Teapot with a removable infuser

This is ideal when preparing several cups.

Removing the infuser after brewing prevents the remaining tea from becoming stronger while you drink the first cup.

Glass teapots let you watch the leaves open, while ceramic and cast-iron teapots retain heat well.

Separate tea strainer

You can let the leaves move freely inside the teapot and pour the tea through a strainer into each cup.

This gives the leaves maximum room but requires you to pour all the brewed tea away from the leaves once the infusion is complete.

Disposable or reusable tea filter

Tea filters are useful when:

  • Brewing at work
  • Travelling
  • Preparing tea in a hotel
  • Using very fine leaves
  • Avoiding loose pieces in the cup

For most beginners, a roomy basket infuser is the simplest and most versatile choice.

Frequently Asked Questions

  • How many teaspoons of loose leaf tea should I use per cup?

    Start with approximately one teaspoon or 2–3 grams per 250 ml cup.

    Use one to two teaspoons for large white tea leaves and two to three teaspoons for bulky fruit blends. Always check the instructions supplied with the tea.

  • Can I make loose leaf tea without an infuser?

    Yes. Place the tea directly in a cup or teapot, add water and pour it through a kitchen strainer after steeping.

    You can also allow larger leaves to settle at the bottom, although the tea will continue becoming stronger while the leaves remain in the water.

  • Should I pour water over tea or add tea to the water?

    For consistent brewing, place the tea in your infuser or teapot first and pour the heated water over it. This helps immerse the leaves evenly.

  • Can you use boiling water for loose leaf tea?

    It depends on the type.

    Boiling or nearly boiling water is suitable for black, rooibos, fruit and most herbal teas. Green and white tea usually taste better when prepared with cooler water.

  • Why does my loose leaf tea taste bitter?

    The water may be too hot, the tea may contain too many leaves or it may have steeped for too long.

    Reduce one variable at a time until the flavour becomes smoother.

  • How do I make loose leaf tea stronger?

    Use slightly more tea leaves while keeping the recommended temperature and steeping time.

    Extending the steep too far can create bitterness rather than a fuller flavour.

  • Can I add milk to loose leaf tea?

    Yes. Milk works particularly well with robust black tea, chai-style blends and some rooibos teas.

    Brew the tea first and add milk afterwards. Delicate green and white teas are generally enjoyed without milk.

  • Can loose leaf tea be cold brewed?

    Yes. Add loose leaf tea to cold water and leave it in the refrigerator for several hours before straining.

    Cold brewing often produces a softer flavour with less bitterness. See our complete homemade iced tea guide for ratios, recipes and serving ideas.

  • Is loose leaf tea better than tea bags?

    Loose leaf tea often gives the leaves more space to expand and makes it easier to control the amount, temperature and steeping time.

    Quality still depends on the ingredients, freshness and preparation. A well-made tea bag can produce a better cup than poorly stored or incorrectly brewed loose leaf tea.

  • How should loose leaf tea be stored?

    Keep it in a sealed container away from:

    • Direct sunlight
    • Heat
    • Moisture
    • Strong food aromas
    • Spices with powerful scents

    A proper tea tin or airtight jar helps protect its flavour and aroma.

Brew Better Tea by Adjusting One Detail at a Time

Learning how to brew loose leaf tea is mainly about controlling three things:

  1. The amount of tea
  2. The water temperature
  3. The steeping time

Start with approximately 2–3 grams of tea per 250 ml cup. Use cooler water and shorter infusions for green and white tea. Use hotter water and longer infusions for black tea, rooibos, fruit and herbal blends.

Most importantly, follow the preparation instructions supplied with the individual tea and adjust the next cup according to your taste.

A small change in temperature, quantity or steeping time can turn an ordinary cup into a much more aromatic and enjoyable tea experience.

Ready to brew a better cup? Explore our loose leaf teas and find a blend for every part of your day.

Continue reading

How to Season Meat for BBQ

How to Season Meat for BBQ: The Best Spices and Rubs for Chicken, Beef, Pork, Fish and Vegetables

How to Season Meat for BBQ

How to Season Meat for BBQ: The Best Spices and Rubs for Chicken, Beef, Pork, Fish and Vegetables

Great barbecue is not only about buying good meat or mastering the temperature of your grill. The seasoning you choose can completely transform the final result.

The right BBQ spices bring out the natural flavour of meat, add an aromatic crust and help you create anything from a fresh Mediterranean chicken dish to a deeply smoky steak. However, different foods need different flavour profiles. A seasoning that works beautifully on beef may be too intense for fish, while a light citrus rub may not provide enough depth for slow-cooked pork.

In this guide, you will discover the best BBQ spices for chicken, beef, pork, fish and vegetables. You will also learn how much seasoning to use, when to apply it and whether a dry rub or marinade is the better choice.

Looking for a simple way to improve your next barbecue?

Explore our complete collection of BBQ and grill spices and discover seasonings for meat, seafood, vegetables and outdoor cooking.

What Are the Best BBQ Spices?

The best BBQ spices depend on what you are grilling and the flavour you want to create. However, several ingredients appear repeatedly in successful barbecue seasonings.

Popular BBQ spices include:

Salt enhances the natural flavour of the food, while pepper and chilli provide heat. Garlic and onion add savoury depth, paprika contributes colour and warmth, and Mediterranean herbs create freshness.

A good BBQ rub combines several of these elements in a balanced proportion. This means you do not need to measure every spice separately each time you light the grill.

What Is a BBQ Rub?

A BBQ rub is a mixture of salt, herbs, spices and other aromatic ingredients applied directly to the surface of meat, fish or vegetables.

It is called a rub because the mixture is usually rubbed or pressed gently onto the food before cooking. During grilling, the seasoning combines with the food’s natural moisture and fat to create a flavourful outer layer.

BBQ rubs can be:

  • Dry, containing only dry herbs, spices and salt
  • Wet, mixed with oil, mustard, honey, yoghurt or another liquid
  • Sweet, containing sugar or sweet spices
  • Spicy, with chilli, cayenne or pepper
  • Smoky, featuring smoked paprika, charcoal or roasted ingredients
  • Herbal, using rosemary, thyme, sage, oregano or fennel
  • Citrusy, with lemon, lime or orange peel

Ready-made rubs are especially practical because their flavours have already been balanced. You can season the food quickly and achieve more consistent results without opening several different spice jars.

Best All-Purpose BBQ Seasoning

When you need one seasoning that works on almost everything, choose a classic combination of salt, pepper and garlic.

The BBQ King SPG Rub combines these three essential barbecue flavours. It can be used on meat, vegetables and roasted dishes, making it a useful starting point for both beginners and experienced grill enthusiasts.

SPG stands for:

  • Salt
  • Pepper
  • Garlic

This simple combination works because it enhances the food instead of covering its natural taste.

Use an SPG rub for:

  • Beef steaks
  • Burgers
  • Pork chops
  • Chicken thighs
  • Grilled mushrooms
  • Potatoes
  • Courgettes
  • Corn on the cob

It is also an excellent base seasoning. You can use it on its own or add paprika, chilli, herbs or citrus depending on the dish.

Best BBQ Spices for Chicken

Chicken has a relatively mild flavour, which makes it suitable for many different seasonings. It works especially well with garlic, paprika, citrus, thyme, rosemary, sage, pepper and gentle chilli.

The best seasoning depends on the part of the chicken you are grilling.

Chicken Breast

Chicken breast is lean and can dry out quickly, so lighter, fresher seasonings usually work best.

Good flavours for grilled chicken breast include:

  • Lemon
  • Orange
  • Garlic
  • Black pepper
  • Thyme
  • Rosemary
  • Parsley
  • Mild chilli

The BBQ King Citrus Rub is particularly suitable for chicken breast. It combines orange and lemon peel with sea salt, herbs and black pepper, creating a fresh Mediterranean-style flavour.

Lightly coat the chicken with olive oil, apply the rub and leave it in the refrigerator for 30 to 60 minutes before grilling.

Serve citrus-seasoned chicken with:

  • Grilled courgettes
  • Tomato salad
  • Couscous
  • Roasted potatoes
  • Flatbread
  • Yoghurt sauce

Chicken Thighs

Chicken thighs contain more fat than chicken breast and can handle stronger seasonings.

Try combining:

  • Garlic
  • Smoked paprika
  • Mustard
  • Chilli
  • Black pepper
  • Thyme
  • Sage

For an aromatic herbal flavour, use the BBQ King Mammamia Rub. The blend contains Mediterranean ingredients including sea salt, fennel, sage, thyme, garlic, mustard and bay leaf.

This seasoning is a good choice when you want chicken that feels more like a complete Mediterranean dish rather than a traditional sweet and smoky barbecue.

Chicken Wings

Chicken wings work well with bold flavours because they have plenty of skin and surface area.

Good seasoning options include:

  • Chilli and garlic
  • Lemon pepper
  • Smoked paprika
  • Sweet and spicy BBQ seasoning
  • Pepper and mustard
  • Spicy butter

For bright flavour with a little warmth, try the BBQ King LPG Rub. LPG refers to lemon, pepper and garlic. The blend delivers citrus freshness, gentle heat and a deeper barbecue aroma.

You can also prepare a finishing butter using A Man A Grill Chili Butter Seasoning. Mix it with softened butter and brush it over the wings shortly before serving. The seasoning is designed for homemade chilli butter and can also be used with grilled meat, vegetables and potatoes.

Whole Grilled Chicken

A whole chicken needs a seasoning that can flavour the skin and complement the meat underneath.

Use a mixture containing:

  • Sea salt
  • Garlic
  • Pepper
  • Paprika
  • Sage
  • Thyme
  • Rosemary
  • Mustard

Apply the seasoning over the skin, underneath the skin where possible and inside the cavity. For more flavour, season the chicken several hours before cooking and keep it refrigerated.

Best BBQ Spices for Beef and Steak

Beef has a deep natural flavour and generally needs fewer ingredients than chicken or pork. A good steak can be seasoned simply with salt, pepper and garlic.

However, stronger rubs can add more complexity to burgers, brisket, ribs and larger cuts.

Classic Steak Seasoning

For a high-quality steak, begin with:

  • Coarse sea salt
  • Freshly ground black pepper
  • Garlic
  • Optional rosemary or mustard

The BBQ King SPG Rub provides the essential salt, pepper and garlic combination without introducing too many competing flavours.

Press the seasoning onto both sides of the steak. Avoid repeatedly moving or flipping the steak while it cooks, as a stable cooking surface helps create a better crust.

Smoky Seasoning for Beef

For burgers, brisket, beef ribs and thicker steaks, consider a darker and smokier seasoning.

The BBQ King Carbon Rub combines black garlic and charcoal in an entirely black seasoning blend. It is designed to add bold, smoky and gourmet character to barbecue dishes.

This style of rub is particularly effective when presentation matters. The dark seasoning creates a dramatic crust that contrasts with the inside of the meat.

Use it on:

  • Beef burgers
  • Ribeye steak
  • Sirloin
  • Beef ribs
  • Brisket
  • Roasted potatoes
  • Grilled mushrooms

Because the rub already has a distinctive flavour and appearance, pair it with simple side dishes such as grilled corn, potatoes, coleslaw or a green salad.

Easy Steak and Grill Seasoning

For casual weekend grilling, a prepared steak blend such as Happy Weekend Steak & Grill Seasoning offers a convenient way to season steaks, burgers and other grilled foods without measuring several individual spices.

This type of seasoning is particularly useful for:

  • Camping trips
  • Picnics
  • Holiday barbecues
  • Small outdoor kitchens
  • Motorhome travel
  • Quick weekday grilling

Best BBQ Spices for Burgers

Burgers benefit from straightforward, savoury seasoning.

For classic beef burgers, use:

  • Salt
  • Black pepper
  • Garlic
  • Onion
  • Mustard
  • Smoked paprika

Season the outside of the patties shortly before grilling. Avoid mixing excessive salt directly into the minced meat too early, as the final texture may become firmer than desired.

A classic SPG seasoning works well for traditional burgers, while a charcoal and black garlic rub creates a more distinctive gourmet burger.

For cheeseburgers, consider serving the meat with:

  • Mature cheddar
  • Smoked cheese
  • Caramelised onions
  • Pickles
  • Mustard
  • Chilli butter

Best BBQ Spices for Pork

Pork works especially well with sweet, smoky, spicy and herbal flavours.

Common pork seasonings include:

  • Paprika
  • Garlic
  • Black pepper
  • Mustard
  • Fennel
  • Sage
  • Thyme
  • Chilli
  • Cumin
  • Brown sugar

Pork Chops

Pork chops need enough seasoning to create a flavourful surface without overwhelming the meat.

Try:

  • SPG seasoning for a classic result
  • Citrus rub for a fresher summer dish
  • Mediterranean herbs for an aromatic flavour
  • Chilli butter for a richer finish

Brush the chops lightly with oil before applying a dry rub. After grilling, allow them to rest briefly before serving.

Pork Tenderloin

Pork tenderloin pairs particularly well with mustard, garlic, sage, thyme, fennel and citrus.

The Mediterranean ingredients in BBQ King Mammamia Rub make it a natural choice for pork tenderloin.

Season the tenderloin evenly and cook it over indirect heat after briefly searing the outside.

Pork Ribs

Pork ribs can handle a heavier coating of seasoning than smaller cuts.

A good rib rub typically contains:

  • Salt
  • Pepper
  • Garlic
  • Paprika
  • Mustard
  • Chilli
  • Cumin
  • A small amount of sugar

Sugar helps create a caramelised surface, but it can burn over very high direct heat. Sweet rubs are therefore better suited to slower cooking over indirect heat.

Pulled Pork

Pulled pork needs a strong seasoning because the flavour must penetrate and season a large piece of meat.

Apply the rub generously to the outside of the pork shoulder. Ideally, season it several hours before cooking.

For a balanced flavour, combine:

  • Two parts paprika
  • One part garlic
  • One part black pepper
  • One part mustard
  • Half a part chilli
  • A small amount of brown sugar

Alternatively, use a prepared BBQ rub and adjust the heat or sweetness according to your preference.

Best BBQ Spices for Fish and Seafood

Fish usually needs a lighter seasoning than beef or pork. Heavy smoky rubs can easily hide its delicate flavour.

The best spices for grilled fish include:

  • Lemon
  • Black pepper
  • Garlic
  • Dill
  • Parsley
  • Thyme
  • Mild chilli
  • Fennel
  • Mustard
  • Sea salt

The BBQ King Fish Rub is made for grilled fish, seafood, salmon, prawns, vegetables and light Mediterranean-style dishes.

Salmon

Salmon has enough natural fat to work with slightly stronger seasoning.

Try:

  • Fish rub
  • Lemon pepper garlic rub
  • Citrus rub
  • Mediterranean herbs
  • Chilli and lime
  • Mustard and dill

Apply the seasoning shortly before cooking and grill the salmon with the skin side facing down first.

White Fish

Cod, sea bass, sea bream and similar white fish work best with fresh and gentle seasonings.

Choose:

The BBQ King Citrus Rub adds lemon and orange notes without requiring a complicated marinade.

Prawns and Seafood Skewers

Prawns cook quickly, so they are ideal for strong but simple flavours.

Combine prawns with:

  • Lemon pepper garlic rub
  • Chilli butter
  • Fish rub
  • Garlic and parsley
  • Paprika and lime

Place the prawns on skewers and grill them briefly over direct heat. Brush with seasoned butter immediately after cooking.

Best Spices for Grilled Vegetables

BBQ seasonings are not only for meat. Vegetables often become sweeter and more aromatic when grilled, making them an excellent base for herbs, citrus, pepper and garlic.

Good vegetables for grilling include:

  • Courgettes
  • Aubergines
  • Peppers
  • Mushrooms
  • Corn
  • Onions
  • Asparagus
  • Potatoes
  • Sweet potatoes
  • Cauliflower

Mediterranean Grilled Vegetables

For courgettes, aubergines, peppers and onions, use an aromatic blend containing thyme, sage, fennel, garlic and bay leaf.

The BBQ King Mammamia Rub works particularly well for Mediterranean-style vegetable platters.

Cut the vegetables into similar-sized pieces, add olive oil and apply the seasoning evenly.

Citrus-Grilled Vegetables

Citrus seasoning works well with:

  • Asparagus
  • Courgettes
  • Fennel
  • Peppers
  • Cauliflower
  • Sweet potatoes

Use the BBQ King Citrus Rub when you want a lighter and fresher alternative to a traditional smoky BBQ blend.

Grilled Potatoes

Potatoes can handle stronger seasoning than most vegetables.

Try:

  • Salt, pepper and garlic
  • Chilli butter
  • Smoked paprika
  • Mediterranean herbs
  • Charcoal and black garlic seasoning

Parboil larger potatoes before grilling or cut them into thin wedges so they cook evenly.

After grilling, toss the potatoes with butter prepared using A Man A Grill Chili Butter Seasoning for a spicy and savoury finish.

Dry Rub vs Marinade: Which Is Better?

Both dry rubs and marinades can add flavour, but they produce different results.

FeatureDry rubMarinade
Main ingredientsSalt, herbs and dry spices

Oil, acid, herbs and spices

PreparationApplied directly to the surface

Food is soaked in liquid

Best forSteaks, ribs, burgers, chicken and vegetables

Chicken, pork, fish and tougher cuts

Surface textureHelps create a dry, seasoned crust

Produces a softer and moister surface

Preparation timeCan be used immediately

Usually needs more time

ConvenienceQuick and less messy

Requires a container and refrigeration

Risk over high heatSugar-heavy rubs may burn

Excess marinade may drip and flare

  • Choose a Dry Rub When:

    • You want a strong crust
    • You are grilling steak or burgers
    • You have limited preparation time
    • You want concentrated flavour on the surface
    • You are using a smoker or indirect cooking method
  • Choose a Marinade When:

    • You want to add oil and acidity
    • You are cooking lean chicken breast
    • You want a softer herbal or citrus flavour
    • You are preparing skewers
    • You want to season the food several hours in advance

Always marinate meat, poultry and seafood in the refrigerator rather than at room temperature. Do not reuse marinade that has touched raw meat unless it is boiled thoroughly first.

Can You Turn a Dry Rub into a Marinade?

Yes. A prepared BBQ rub can easily become a marinade.

For approximately 500 grams of food, mix:

  • One to two tablespoons of BBQ rub
  • Two tablespoons of olive oil
  • One tablespoon of lemon juice, vinegar or yoghurt
  • Optional teaspoon of honey or mustard

Mix everything in a bowl and coat the food evenly.

Use less acid for delicate fish and more oil for lean chicken breast. For pork and beef, mustard can help the seasoning adhere to the surface.

How Much BBQ Seasoning Should You Use?

As a general starting point, use approximately one tablespoon of seasoning for every 500 grams of meat or vegetables.

However, the correct amount depends on:

  • The salt content of the blend
  • The size and thickness of the food
  • Whether the seasoning contains sugar
  • How long the food will cook
  • Your preferred level of spice
  • Whether you will add sauce later

For a salty blend, begin with less. You can always add a finishing seasoning after cooking, but you cannot easily remove excess salt.

Approximate Guide

For 500 grams of food, try:

  • Fish: one to two teaspoons
  • Vegetables: two teaspoons
  • Chicken breast: two to three teaspoons
  • Chicken thighs: one tablespoon
  • Pork chops: one tablespoon
  • Steak: two teaspoons to one tablespoon
  • Ribs: one to two tablespoons
  • Large roasting cuts: enough to coat the entire surface evenly

The food should be covered with a visible, even layer, but the seasoning should not form a thick paste unless you are deliberately creating a heavy crust.

When Should You Season Meat Before Grilling?

Timing can affect both flavour and texture.

  • Immediately Before Grilling

    • Season immediately before cooking when:
    • Grilling delicate fish
    • Cooking prawns
    • Preparing thin vegetables
    • Using a salty blend on small cuts
    • You are short on time
  • 30 to 60 Minutes Before Grilling

    This is a useful approach for:

    • Chicken breast
    • Chicken thighs
    • Pork chops
    • Burgers
    • Vegetable skewers
    • Fish fillets

    It gives the seasoning time to adhere while keeping preparation simple.

  • Several Hours Before Grilling

    Season several hours in advance for:

    • Whole chicken
    • Pork tenderloin
    • Beef roasts
    • Large steaks
    • Thick pork chops
    • Ribs

    Keep the food covered in the refrigerator until you are ready to cook it.

  • Overnight

    Overnight seasoning works best for:

    • Pork shoulder
    • Brisket
    • Ribs
    • Whole poultry
    • Large roasting cuts

    Be careful with very salty rubs and acidic marinades, particularly on delicate foods.

How to Apply a BBQ Rub Correctly

Follow these simple steps for better and more consistent results.

  • 1. Dry the Surface

    Pat meat, fish or vegetables dry with a clean paper towel. Excess moisture can prevent the seasoning from adhering evenly.

  • 2. Add a Light Binder

    A binder is optional, but a small amount of oil, mustard or yoghurt can help the rub stick.

    Good binders include:

    • Olive oil
    • Sunflower oil
    • Mustard
    • Yoghurt
    • Softened butter
    • A thin layer of honey for indirect cooking

    Use only enough to lightly coat the surface.

  • 3. Apply the Seasoning Evenly

    Sprinkle the rub from slightly above the food to distribute it more evenly. Cover all sides, including the edges of thicker cuts.

  • 4. Press Rather Than Scrub

    Press the seasoning gently into the surface. Aggressive rubbing can cause the mixture to clump and fall off.

  • 5. Refrigerate When Necessary

    When seasoning food in advance, keep it covered and refrigerated.

  • 6. Allow the Surface to Lose Its Chill

    Before grilling larger cuts, remove them from the refrigerator while you prepare the grill. Do not leave perishable food at room temperature for extended periods.

Five Easy BBQ Flavour Combinations

You do not need dozens of ingredients to create an excellent barbecue. Start with one of these flavour combinations.

  • 1. Classic Salt, Pepper and Garlic

    Best for:

    • Steak
    • Burgers
    • Pork chops
    • Mushrooms
    • Potatoes

    Recommended seasoning:

    BBQ King SPG Rub

  • 2. Mediterranean Herbs and Garlic

    Best for:

    • Chicken
    • Pork tenderloin
    • Salmon
    • Courgettes
    • Aubergines
    • Potatoes

    Recommended seasoning:

    BBQ King Mammamia Rub

  • 3. Lemon, Pepper and Garlic

    Best for:

    • Chicken wings
    • Chicken breast
    • Fish
    • Prawns
    • Asparagus
    • Vegetable skewers

    Recommended seasoning:

    BBQ King LPG Rub

  • 4. Black Garlic and Smoky Charcoal

    Best for:

    • Burgers
    • Steaks
    • Beef ribs
    • Brisket
    • Mushrooms
    • Dark roasted vegetables

    Recommended seasoning:

    BBQ King Carbon Rub

  • 5. Spicy Chilli Butter

    Best for:

    • Corn
    • Potatoes
    • Chicken wings
    • Steak
    • Grilled bread
    • Prawns

    Recommended seasoning:

    A Man A Grill Chili Butter Seasoning

    Mix the seasoning with softened butter, refrigerate it until firm and add a small portion to freshly grilled food.

Common BBQ Seasoning Mistakes

  • Using Too Much Salt

    Some prepared blends already contain salt. Check the ingredients before adding extra salt separately.

  • Applying Sugar Over Very High Heat

    Sugar can burn quickly over direct flames. Use sweet rubs for indirect cooking or apply sweet sauces near the end.

  • Using the Same Rub for Everything

    A dark smoky rub may work beautifully on beef but overwhelm white fish. Match the strength of the seasoning to the food.

  • Seasoning Unevenly

    Large unseasoned areas will taste bland, while thick clumps may become overly salty. Apply a thin and consistent coating.

  • Adding Delicate Herbs Too Early

    Fresh parsley, basil and similar herbs may burn over direct heat. Add them after cooking or use them in a finishing sauce.

  • Forgetting the Side Dishes

    Season grilled vegetables, potatoes, bread and sauces as thoughtfully as the meat. A well-seasoned side dish can make the entire barbecue feel more complete.

BBQ Food Safety Tips

Seasoning improves flavour, but safe food preparation remains essential.

Keep raw meat separate from cooked food and vegetables. Use clean utensils and a food thermometer rather than judging doneness only by colour.

Recommended minimum internal temperatures include:

  • Chicken and other poultry: 74°C
  • Ground beef, pork and sausages: 71°C
  • Whole cuts of beef and pork: 63°C followed by a three-minute rest
  • Fish: 63°C or until the flesh is opaque and separates easily

These temperatures follow current US government food-safety guidance.

Frequently Asked Questions About BBQ Spices

  • What spices are best for barbecue meat?

    The most versatile BBQ spices are salt, black pepper, garlic, paprika, mustard, chilli and onion. Herbs such as thyme, rosemary, sage and fennel are particularly good for chicken, pork and vegetables.

  • What is the best all-purpose BBQ rub?

    A salt, pepper and garlic rub is the most versatile option. It works with beef, pork, poultry, potatoes, mushrooms and many grilled vegetables.

  • Should I oil meat before adding a dry rub?

    A small amount of oil can help the seasoning stick, particularly on chicken, fish and vegetables. Fatty cuts of meat may not require additional oil.

  • How long should a dry rub stay on meat?

    A dry rub can be applied immediately before grilling or several hours in advance. Large cuts such as ribs, pork shoulder and brisket can be seasoned overnight.

  • Can I use BBQ rub on vegetables?

    Yes. BBQ rubs work particularly well with potatoes, mushrooms, courgettes, aubergines, peppers, onions, cauliflower and corn.

  • What is the best BBQ seasoning for chicken?

    Chicken works well with citrus, garlic, paprika, thyme, sage, rosemary and mild chilli. Citrus and Mediterranean herb rubs are especially versatile.

  • What is the best BBQ seasoning for steak?

    Steak usually needs a simple combination of salt, black pepper and garlic. A smoky black garlic seasoning can be used when you want a darker and more intense crust.

  • What seasoning is best for grilled fish?

    Choose a lighter blend containing lemon, pepper, garlic, dill, parsley or Mediterranean herbs. Avoid very heavy, sweet or smoky rubs on delicate white fish.

  • Can I use BBQ seasoning without a grill?

    Yes. BBQ spices can also be used for:

    • Oven-roasted meat
    • Air-fryer recipes
    • Pan-fried steak
    • Roasted vegetables
    • Potatoes
    • Homemade sauces
    • Seasoned butter
    • Slow-cooked dishes

Find the Right Seasoning for Your Next BBQ

The best BBQ seasoning is the one that complements your ingredients rather than covering them.

Use salt, pepper and garlic for a classic steak. Choose citrus for chicken, fish and summer vegetables. Try Mediterranean herbs with pork and poultry, or create a darker gourmet crust with black garlic and charcoal seasoning.

A small selection of versatile rubs allows you to create many different meals without storing dozens of individual spice jars.

Shop BBQ & Grill Spices at Leaf & Spice and discover flavourful blends for meat, fish, vegetables, potatoes and your next summer barbecue.

Continue reading

A group of friends enjoying homemade iced tea with lemon, berries and mint at an outdoor summer garden table.

How to Make Perfect Iced Tea at Home

A group of friends enjoying homemade iced tea with lemon, berries and mint at an outdoor summer garden table.

How to Make Perfect Iced Tea: The Easy Guide for a Refreshing Homemade Drink

A perfect iced tea is cold, refreshing, balanced and full of flavour. It should taste clean and smooth, not watery, bitter or overly sweet. The secret is simple: use good-quality tea, brew it properly, chill it correctly and add just enough fruit, herbs or natural sweetness to make the flavour shine.

Homemade iced tea is one of the easiest drinks to prepare for summer afternoons, garden parties, family lunches, barbecues, picnics or simply for keeping in the fridge as a better everyday alternative to sugary soft drinks. Once you know the right tea-to-water ratio and brewing method, you can make iced tea that tastes fresh, elegant and naturally delicious every time.

In this guide, you will learn how to make perfect iced tea at home using two simple methods: cold brew iced tea and hot brew iced tea. You will also discover which teas work best, how long to steep them, how to avoid bitterness, how to sweeten iced tea properly and which Leaf & Spice iced tea blends are ideal for different tastes.

Quick Answer: The Best Way to Make Iced Tea

The easiest way to make smooth homemade iced tea is to use the cold brew method.

Add loose-leaf tea or an iced tea blend to cold water, place it in the fridge and let it steep for 6 to 12 hours. Then strain, serve over ice and add fresh fruit, citrus, herbs or a little syrup if desired.

For a faster version, use the hot brew method. Brew a stronger tea with hot water, strain it, cool it quickly and serve over plenty of ice. This method gives a more intense flavour and works well when you want iced tea quickly.

Basic iced tea ratio:
Use around 10–15 g loose-leaf tea per 1 litre of water, depending on how strong you like your iced tea.

Why Homemade Iced Tea Tastes Better

Store-bought iced tea is often very sweet, lightly flavoured and made to taste more like a soft drink than real tea. Homemade iced tea gives you more control. You can choose the tea base, adjust the strength, keep it unsweetened or lightly sweetened, add fresh fruit and make it exactly the way you like it.

The biggest benefits of homemade iced tea are:

  • You can use real tea blends with more natural flavour.
  • You control the sweetness.
  • You can make it caffeine-free, low-caffeine or energising.
  • It is easy to prepare in a large pitcher.
  • It works beautifully with fruit, herbs, citrus and spices.
  • It feels more premium than bottled iced tea.

A good iced tea should be refreshing first. The flavour should be clear, smooth and pleasant, with enough strength to hold up when poured over ice.

Shop iced tea

Cold Brew vs Hot Brew Iced Tea

There are two main ways to make iced tea: cold brewing and hot brewing. Both work well, but they create a different flavour.

Cold Brew Iced Tea

Cold Brew Iced Tea

Cold brew iced tea is made by steeping tea in cold water in the refrigerator. It takes longer, but the result is usually smoother, softer and less bitter.

This is the best method for delicate teas, fruity blends, green tea, white tea and rooibos iced tea. It is also perfect if you want to prepare iced tea in the evening and have it ready the next day.

Best for: smooth flavour, low bitterness, easy preparation, summer pitchers, fruit tea, green tea, white tea and rooibos blends.

Hot Brew Iced Tea

Hot brew iced tea is made by steeping tea in hot water first, then cooling it and serving it over ice. This method is faster and gives a stronger tea flavour.

It works especially well with black tea, spiced tea, stronger fruit blends and classic iced tea recipes with lemon.

Best for: quick iced tea, stronger flavour, black tea, classic lemon iced tea, sweet tea and party drinks.

Shop iced tea

What You Need to Make Perfect Iced Tea

You do not need complicated equipment. A good pitcher and quality tea are enough.

Cold Brew Iced Tea

Basic Equipment

  • Large glass pitcher or bottle
  • Tea infuser, filter bag or fine strainer
  • Measuring spoon or kitchen scale
  • Fresh cold water
  • Ice cubes
  • Glasses for serving
  • Fresh fruit, herbs or citrus slices, optional

Cold Brew Iced Tea

Best Ingredients

  • Loose-leaf tea or iced tea blend
  • Filtered water if your tap water has a strong taste
  • Lemon, lime, orange or grapefruit
  • Fresh mint, basil or rosemary
  • Fresh berries, peach, mango, apple or cucumber
  • Honey, agave syrup or simple syrup if you want sweetness

The quality of the water matters more than most people think. If your water tastes flat, heavily chlorinated or mineral-heavy, the iced tea will taste less clean. Fresh, neutral-tasting water gives the best result.

Shop iced tea

The Perfect Iced Tea Ratio

The most common mistake when making iced tea is using too little tea. Once tea is chilled and poured over ice, the flavour becomes lighter. That is why iced tea needs to be brewed slightly stronger than hot tea.

  • For Cold Brew Iced Tea

    Use:

    10–15 g loose-leaf tea per 1 litre of cold water

    Steep in the fridge for:

    6–12 hours

    For a lighter tea, use 10 g per litre.
    For a stronger, more flavourful pitcher, use 15 g per litre.

  • For Hot Brew Iced Tea

    Use:

    10–15 g loose-leaf tea per 500 ml hot water

    Then add:

    500 ml cold water or ice

    This creates a concentrated tea that becomes balanced when diluted with cold water or ice.

Method 1: How to Make Cold Brew Iced Tea

Cold brew iced tea is the easiest and most reliable method. It is smooth, refreshing and difficult to overbrew.

Ingredients

  • 1 litre cold water
  • 10–15 g loose-leaf tea or iced tea blend
  • Ice cubes
  • Fresh fruit, citrus or herbs, optional
  • Sweetener, optional

Instructions

  1. Add the tea to a clean pitcher or bottle.
  2. Pour in 1 litre of cold water.
  3. Cover and place in the refrigerator.
  4. Let it steep for 6 to 12 hours.
  5. Strain the tea.
  6. Taste and adjust with fruit, lemon, herbs or sweetener.
  7. Serve over ice.

Cold Brew Tip

If you are using herbal blends or fruit-heavy blends, you can start with a small splash of hot water for the first minute, then add cold water and refrigerate. This can help open up the ingredients and create a fuller flavour.

Method 2: How to Make Hot Brew Iced Tea

Hot brew iced tea is ideal when you want iced tea quickly. The key is to brew the tea stronger than normal, because the ice will dilute it.

Ingredients

  • 10–15 g tea
  • 500 ml hot water
  • 500 ml cold water or plenty of ice
  • Lemon, fruit or herbs, optional
  • Sweetener, optional

Instructions

  1. Heat the water to the right temperature for your tea.
  2. Add tea and steep for the recommended time.
  3. Strain the tea.
  4. Add cold water or pour over a large amount of ice.
  5. Let it cool fully.
  6. Serve with fresh fruit, citrus or herbs.

Hot Brew Tip

Do not leave tea leaves in hot water too long. Oversteeping is the main reason iced tea becomes bitter. If you want stronger iced tea, use more tea leaves instead of increasing the steeping time too much.

Shop iced tea

Best Water Temperatures for Iced Tea

Different tea types need different water temperatures. This is especially important for green tea and white tea, which can become bitter if the water is too hot.

  • Black Tea

    Use hot water around 90–95°C and steep for 3–5 minutes.
    Black tea gives a classic iced tea flavour and works well with lemon, peach, berries and mint.

  • Green Tea

    Use water around 75–85°C and steep for 2–3 minutes.
    Green tea is fresh, light and ideal with apple, lemon, ginger, cucumber and mint.

  • White Tea

    Use water around 75–85°C and steep for 2–4 minutes.
    White tea is delicate and elegant, perfect with grapefruit, cranberry, peach or berries.

  • Rooibos Tea

    Use hot water around 95°C and steep for 5–7 minutes.
    Rooibos is naturally caffeine-free and works beautifully with mango, papaya, orange, vanilla and summer fruits.

  • Fruit Tea and Herbal Tea

    Use hot water around 95°C and steep for 5–8 minutes.
    Fruit and herbal blends often need a longer steep to release their full flavour.

Shop all iced teas

Best Iced Tea Blends to Try

The easiest way to make great iced tea is to start with a blend designed to taste good cold. Leaf & Spice iced tea blends are made for refreshing summer drinks and are easy to prepare as cold brew or hot brew iced tea.

Black Ice Tea – Strawberry Lemon Black Tea Blend

Best for: classic iced tea lovers, lemon iced tea, berry iced tea, stronger flavour

Black Ice Tea is a great choice if you like a more traditional iced tea base. The black tea gives depth and structure, while strawberry and lemon create a bright, fruity summer flavour.

Try it with:

  • Fresh lemon slices
  • Strawberries
  • Mint
  • A little honey or simple syrup
  • Large ice cubes

This is the best option for people who enjoy classic iced tea but want something more interesting than plain black tea with lemon.

Shop now

Green Ice Tea – Green Tea with Apple, Ginger & Lemon

Best for: fresh, light and energising iced tea

Green Ice Tea is ideal for a crisp and refreshing drink. The green tea base feels clean and light, while apple, ginger and lemon add fruitiness, freshness and a gentle spicy note.

Try it with:

  • Apple slices
  • Lemon wheels
  • Fresh mint
  • Cucumber
  • Sparkling water

This is a great everyday iced tea for warm afternoons, after lunch or as a lighter alternative to sweet soft drinks.

Shop now

Red Ice Tea – Mango & Papaya Rooibos Blend

Best for: caffeine-free iced tea, tropical flavour, evening refreshment

Red Ice Tea is based on rooibos, which is naturally caffeine-free. Mango and papaya give it a sunny tropical flavour, making it perfect for summer evenings, children-friendly pitchers or anyone avoiding caffeine.

Try it with:

  • Mango cubes
  • Orange slices
  • Passion fruit
  • Pineapple
  • Fresh basil or mint

This is one of the best options for a naturally smooth iced tea that can be enjoyed at any time of day.

shop now

White Ice Tea – White & Green Tea with Grapefruit and Cranberry

Best for: elegant iced tea, citrus lovers, light fruity flavour

White Ice Tea combines white and green tea with grapefruit and cranberry. The result is delicate, fresh and slightly tangy. It is a lovely choice when you want iced tea that feels more refined and less sweet.

Try it with:

This blend works especially well as a cold brew because the lighter tea base stays smooth and refreshing.

shop now

Which Iced Tea Blend Should You Choose?

Choose your iced tea blend based on the flavour you want.

For a classic iced tea, choose Black Ice Tea.
For a fresh green tea flavour, choose Green Ice Tea.
For a caffeine-free tropical drink, choose Red Ice Tea.
For a light, elegant and citrusy iced tea, choose White Ice Tea.

If you are preparing iced tea for guests, make two pitchers: one caffeinated and one caffeine-free. A good combination is Green Ice Tea for a fresh daytime drink and Red Ice Tea for a caffeine-free tropical option.

Shop all iced teas

How to Sweeten Iced Tea Properly

Sugar does not dissolve well in cold tea. If you want sweet iced tea, it is better to use a liquid sweetener.

Best Sweeteners for Iced Tea

  • Simple syrup
  • Honey syrup
  • Agave syrup
  • Maple syrup
  • Fruit juice
  • Peach syrup
  • Elderflower syrup

How to Make Simple Syrup

Add equal parts sugar and water to a small pan. Warm gently and stir until dissolved. Let it cool, then store in the fridge.

Use a small amount at first. You can always add more, but you cannot remove sweetness once it is in the tea.

Natural Sweetening Ideas

For a lighter iced tea, skip sugar and use fruit instead. Peach, mango, orange, strawberries and apple can all add natural sweetness without making the drink heavy.

Shop iced tea

How to Make Iced Tea Taste Better

Small details make a big difference.

  • Use Enough Tea

    Weak iced tea usually happens because there is not enough tea in the water. Use a stronger ratio than you would for hot tea.

  • Do Not Oversteep

    Oversteeping can make tea bitter, especially black, green and white tea. If you want more flavour, add more tea leaves instead of adding more time.

  • Chill Before Serving

    Iced tea tastes best when it is properly chilled before it hits the glass. If you pour warm tea over ice, the ice melts quickly and waters it down.

  • Use Large Ice Cubes

    Large ice cubes melt more slowly and keep the drink colder for longer.

  • Add Fresh Ingredients Just Before Serving

    Fruit and herbs look best and taste freshest when added close to serving time.

  • Keep It Balanced

    The best iced tea has balance: tea flavour, freshness, acidity, sweetness and aroma. Lemon, lime or grapefruit can brighten the drink without needing much sugar.

Shop iced tea

Easy Iced Tea Recipes

Classic Strawberry Lemon Black Iced Tea

Best with: Black Ice Tea

Ingredients

  • 1 litre brewed Black Ice Tea
  • 1 lemon, sliced
  • 6 strawberries, sliced
  • Fresh mint
  • Ice cubes
  • Optional: simple syrup or honey syrup

Method

Prepare Black Ice Tea using the cold brew or hot brew method. Chill well. Add sliced strawberries, lemon and mint. Serve over ice.

This is a perfect summer garden drink with a classic iced tea feeling and a fruity twist.

Apple Ginger Green Iced Tea

Best with: Green Ice Tea

Ingredients

  • 1 litre brewed Green Ice Tea
  • 1 apple, thinly sliced
  • Fresh lemon
  • Fresh mint
  • Ice cubes
  • Optional: sparkling water

Method

Cold brew the Green Ice Tea in the fridge. Strain and pour into glasses with ice. Add apple slices, lemon and mint. For a lighter spritz, top each glass with sparkling water.

This iced tea is fresh, crisp and ideal for hot days when you want something clean and uplifting.

Tropical Mango Papaya Rooibos Iced Tea

Best with: Red Ice Tea

Ingredients

  • 1 litre brewed Red Ice Tea
  • Mango cubes
  • Orange slices
  • Fresh mint or basil
  • Ice cubes
  • Optional: pineapple juice

Method

Prepare Red Ice Tea as a cold brew or hot brew. Chill completely. Add mango, orange and herbs. Serve over ice.

This is a naturally caffeine-free iced tea with a tropical flavour, perfect for afternoon relaxation or evening drinks.

Grapefruit Cranberry White Iced Tea

Grapefruit Cranberry White Iced Tea

Best with: White Ice Tea

Ingredients

  • 1 litre brewed White Ice Tea
  • Grapefruit slices
  • A few cranberries or berries
  • Lime
  • Ice cubes
  • Optional: rosemary sprig

Method

Cold brew White Ice Tea for a smooth and delicate result. Strain and serve over ice with grapefruit, cranberry and lime.

This is a more elegant iced tea, ideal for brunch, summer dinners or a refreshing alcohol-free aperitif.

How to Make Sparkling Iced Tea

Sparkling iced tea is one of the easiest ways to make homemade iced tea feel more special.

Prepare a strong iced tea concentrate, then mix it with sparkling water just before serving.

Simple Sparkling Iced Tea Ratio

Use:

  • 2 parts chilled iced tea
  • 1 part sparkling water
  • Ice
  • Fruit or citrus

This works especially well with Green Ice Tea, White Ice Tea and Red Ice Tea.

Do not add sparkling water too early, because it will lose its bubbles. Add it directly in the glass or just before serving.

How to Make Iced Tea for a Party

Iced tea is perfect for parties because you can prepare it in advance.

  • For 4 People

    Use:

    • 1 litre water
    • 10–15 g tea
    • Ice
    • Fruit and herbs
  • For 8 People

    Use:

    • 2 litres water
    • 20–30 g tea
    • Plenty of ice
    • 2–3 lemons or oranges
    • Fresh mint
    • Optional sweetener
  • For 12 People

    Use:

    • 3 litres water
    • 30–45 g tea
    • Large serving dispenser
    • Ice served separately
    • Fresh fruit on the side

For parties, keep the tea chilled and add ice to glasses instead of adding all the ice directly to the pitcher. This prevents the tea from becoming watery.

Shop iced tea

How Long Does Homemade Iced Tea Last?

Homemade iced tea is best enjoyed fresh. Store it covered in the refrigerator and drink it within 24–48 hours for the best flavour.

Fruit and herbs can change the flavour over time, so if you plan to store iced tea for longer, keep the plain brewed tea in the fridge and add fruit just before serving.

Storage Tips

  • Use a clean glass bottle or pitcher.
  • Keep iced tea refrigerated.
  • Do not leave it sitting in the sun.
  • Add fresh fruit shortly before serving.
  • Discard iced tea if it smells or tastes unusual.

Common Iced Tea Mistakes

  • Mistake 1: Using Too Little Tea

    Iced tea needs more tea than hot tea because it is served cold and over ice. If it tastes weak, increase the amount of tea leaves.

  • Mistake 2: Oversteeping

    More time does not always mean better flavour. Oversteeped tea can become bitter or dry. Use the correct steeping time for the tea type.

  • Mistake 3: Pouring Hot Tea Over Too Little Ice

    If you pour hot tea over a small amount of ice, the ice melts and the drink becomes watery. Use more ice or cool the tea first.

  • Mistake 4: Adding Sugar Directly to Cold Tea

    Sugar crystals do not dissolve well in cold drinks. Use simple syrup or honey syrup instead.

  • Mistake 5: Adding Fruit Too Early

    Fruit can become soft and change the flavour if left in tea for too long. Add it shortly before serving for the freshest result.

Best Fruit and Herb Combinations for Iced Tea

  • Lemon + Mint

    Classic, fresh and works with almost every iced tea.

  • Strawberry + Lemon

    Perfect with black tea and fruit tea.

  • Apple + Ginger

    Fresh and lightly spicy, especially good with green tea.

  • Mango + Orange

    Tropical and naturally sweet, excellent with rooibos.

  • Grapefruit + Rosemary

    Elegant, slightly bitter and refreshing, perfect with white or green tea.

  • Peach + Basil

    Soft, aromatic and summery.

  • Cucumber + Lime

    Very refreshing and ideal for unsweetened green iced tea.

Best Tea Types for Iced Tea

  • Black Tea

    Strong, classic and full-bodied. Best with lemon, berries, peach and mint.

    Shop black tea

  • Green Tea

    Fresh, light and slightly grassy. Best with apple, lemon, ginger, cucumber and mint.

    Shop green tea

  • White Tea

    Delicate, smooth and elegant. Best with grapefruit, cranberry, peach and berries.

    Shop white tea

  • Rooibos

    Naturally caffeine-free, smooth and slightly sweet. Best with mango, papaya, orange and vanilla.

    shop rooibos tea

  • Fruit Tea

    Colourful, juicy and often naturally sweet. Best with berries, citrus and tropical fruit.

    shop fruit tea

  • Herbal Tea

    Caffeine-free and aromatic. Best with mint, lemon balm, hibiscus, lavender, fennel or ginger.

    shop herbal tea

Final Tips for Perfect Homemade Iced Tea

Perfect iced tea does not need to be complicated. Start with a good tea blend, use enough tea, brew it gently, chill it properly and add fresh ingredients that match the flavour of the tea.

For smooth and easy iced tea, choose the cold brew method.
For stronger and faster iced tea, choose the hot brew method.
For classic flavour, choose black tea.
For freshness, choose green tea.
For elegance, choose white tea.
For caffeine-free refreshment, choose rooibos.

Leaf & Spice iced tea blends make the process even easier because they are already created with cold, refreshing flavours in mind. Whether you prefer strawberry lemon black tea, apple ginger green tea, tropical mango rooibos or grapefruit cranberry white tea, you can prepare a beautiful homemade iced tea with just a pitcher, cold water and a little patience.

Shop Iced Tea Blends

Ready to make your own refreshing homemade iced tea? Explore the Leaf & Spice iced tea collection and choose your favourite blend for summer pitchers, garden parties, picnics and everyday refreshment.

Recommended blends:

  • Black Ice Tea – Strawberry Lemon Black Tea Blend
  • Green Ice Tea – Green Tea with Apple, Ginger & Lemon
  • Red Ice Tea – Mango & Papaya Rooibos Blend
  • White Ice Tea – White & Green Tea with Grapefruit and Cranberry

A good iced tea starts with good tea. Brew it cold, serve it fresh and enjoy every sip.

Shop Iced tea

Continue reading

0